How to Paint Bedroom Furniture: A Step-by-Step Guide
If you’re looking to refresh your bedroom and give it a new look without breaking the bank, painting your bedroom furniture can be a great solution. Whether you’re upcycling an old piece or simply wanting to change the color, painting can breathe new life into your furniture. In this step-by-step guide, we’ll walk you through how to paint your bedroom furniture like a pro!
How to Update Your Bedroom Furniture with a Fresh Coat of Paint
Painting bedroom furniture can breathe new life into old, tired pieces. Whether you want to refresh a dresser, bedside table, or even a bed frame, a simple coat of paint can make it look brand new. This step-by-step guide will show you how to achieve a professional-looking finish, even if you have never painted furniture before.
Why Paint Your Furniture?
Before diving into the process, let’s explore why painting your bedroom furniture is such a great idea.

1. Save Money
Buying new furniture can be expensive, especially when you want to replace several pieces. Painting your current furniture is an affordable way to update your bedroom without breaking the bank.
2. Personalize Your Space
You can choose any color or style you like, making your furniture match your bedroom’s theme. This gives you the freedom to create a unique look that reflects your personal style.
3. Quick Transformation
Painting furniture is a relatively quick project, especially when compared to buying and assembling new pieces. With the right tools, you can complete the transformation in a weekend.
Tools and Materials You’ll Need
To get started, gather the following supplies:
-
Paint (Furniture Paint) – Choose a color that suits your bedroom theme. Make sure to use paint made specifically for furniture, as it is more durable.
-
Primer – This helps the paint stick better and gives a smoother finish.
-
Sandpaper – For smoothing out the surface and helping the primer stick.
-
Paint Brushes – Choose a good-quality brush. A small brush for edges and a larger one for flat surfaces work best.
-
Paint Roller – For large flat areas, a roller can help speed up the process.
-
Drop Cloth or Old Towels – To protect the floor from paint splatters.
-
Screwdriver – To remove hardware like handles or knobs.
-
Clean Cloth – To wipe down the furniture before painting.
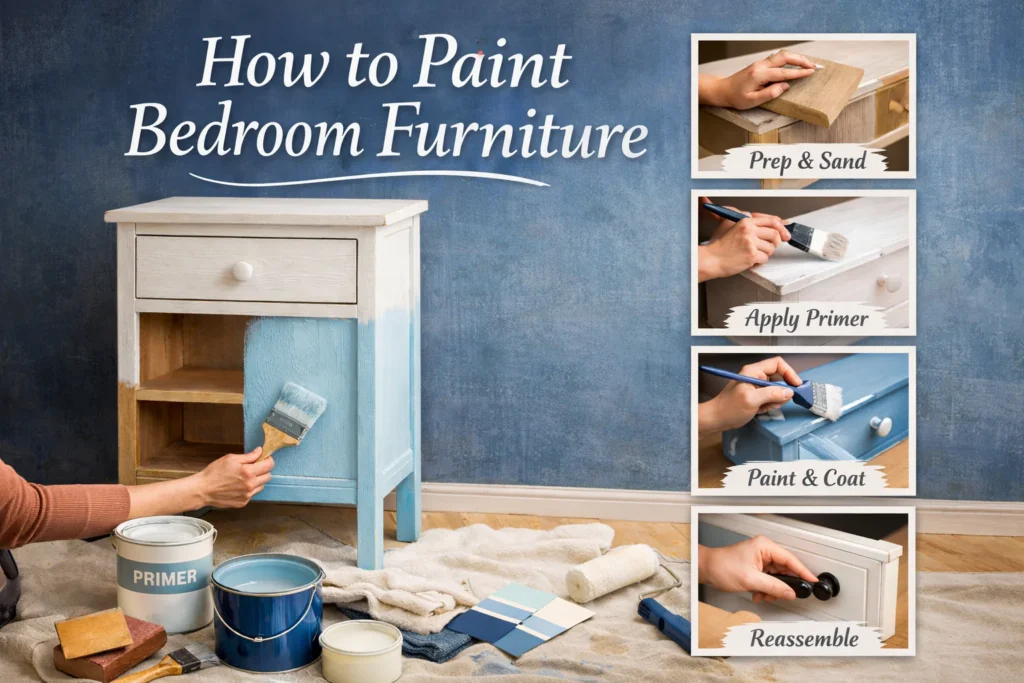
Step 1: Prepare Your Furniture
Before you begin painting, proper preparation is key.
1. Remove Hardware
Start by removing any hardware like knobs, handles, or hinges. This will ensure you don’t get paint on them and give you a cleaner finish.
2. Clean the Furniture
Dust and dirt can prevent paint from sticking properly. Use a clean cloth to wipe down your furniture thoroughly. If it’s very dirty, use mild soap and water, then let it dry completely.
3. Sand the Surface
Use sandpaper to lightly sand the surface of the furniture. This step helps to smooth out any imperfections and creates a better surface for the primer and paint to stick to. Be sure to sand along the wood grain for the best results. After sanding, wipe off the dust with a clean cloth.
Step 2: Apply Primer
Primer is essential for ensuring that the paint adheres well and provides an even finish.
1. Choose the Right Primer
There are different types of primers depending on your furniture material. For wood, a basic wood primer will work. If you’re painting metal or plastic, make sure to choose a primer suitable for that material.
2. Apply the Primer
Use a paintbrush or roller to apply a thin, even layer of primer. Start with the edges and then move to the flat surfaces. Be sure to follow the manufacturer’s instructions on drying times.
3. Sand After Priming
Once the primer has dried, lightly sand the surface again with fine-grit sandpaper. This will give you a smooth, flawless finish when you apply the paint.
Step 3: Choose the Right Paint
Choosing the right paint is critical for getting the best results.
1. Types of Paint
You’ll want to choose paint that is designed for furniture. Some popular types are:
-
Chalk Paint – Ideal for a vintage or distressed look. It doesn’t require much prep work, and it dries quickly.
-
Latex Paint – Great for a smooth finish. It’s easy to clean and works well on wood and metal surfaces.
-
Oil-Based Paint – Provides a durable finish, but it takes longer to dry and requires more ventilation.
2. Color Selection
Think about the mood you want to create in your bedroom. Lighter shades like white, cream, or pastel colors can make a small room feel bigger and brighter. Darker colors like navy blue, charcoal, or forest green can add a touch of elegance and make the room feel cozy.
Step 4: Painting the Furniture
Now comes the fun part—painting!
1. Apply the First Coat of Paint
Use your brush or roller to apply the first coat of paint. Start from the edges and move to the larger surfaces. Don’t worry about getting perfect coverage on the first coat—it’s normal for the paint to be uneven.
2. Let the Paint Dry
Allow the first coat to dry completely before applying the second coat. This usually takes a few hours, but check the paint can for the exact drying time.
3. Apply Additional Coats
Depending on the color and type of paint, you may need to apply 2-3 coats for full coverage. Make sure each layer is dry before applying the next one. For the best results, use thin layers of paint.
Step 5: Finish the Project
After the paint has dried, it’s time to add the finishing touches.
1. Sand Between Coats (Optional)
For an extra smooth finish, you can lightly sand the furniture between coats using fine-grit sandpaper. Be sure to clean off any dust before applying the next coat.
2. Reattach the Hardware
Once the final coat is dry, you can reattach the hardware you removed earlier. Make sure everything is tightened properly.
3. Add a Protective Topcoat (Optional)
If you want extra durability, especially for furniture that will be used frequently, consider applying a clear topcoat or furniture wax. This will protect the paint from scratches and spills.
Preparation is Key
Before you start painting, it’s important to prepare your furniture and the area around it.
-
Move your furniture to a well-ventilated area, preferably outdoors or in a garage, where you won’t worry about splattering paint on anything.
-
Lay down a drop cloth or old sheets to protect your floors from drips.
-
Remove all hardware, such as knobs, handles, and screws, from the furniture. This will make painting easier and prevent paint from covering hardware.
Common Mistakes to Avoid
While painting furniture is easy, there are a few common mistakes to watch out for:
1. Not Preparing the Surface Well
Skipping the sanding or cleaning step can result in uneven paint or peeling. Take your time to prepare the surface properly.
2. Using the Wrong Paint
Make sure to use furniture paint designed for the material of your furniture. Regular wall paint can be too soft for furniture and may chip easily.
3. Not Letting Each Coat Dry Completely
Impatience can ruin the finish. Be sure to wait until each coat of paint is completely dry before applying the next layer.
Tips for a Professional-Looking Finish
To achieve a professional-looking finish, here are some extra tips:
-
Use Quality Brushes: Good brushes will help you achieve a smoother finish with fewer brush marks.
-
Don’t Rush: Take your time with each coat to avoid uneven application or streaks.
-
Ventilate the Room: Make sure the room is well-ventilated, especially if you’re using oil-based paints.
Conclusion
Painting bedroom furniture is an affordable and creative way to update your space. With the right tools, preparation, and patience, you can transform even the oldest, most worn-out furniture into something beautiful and fresh. Whether you want to create a cozy, vintage vibe or give your bedroom a modern update, painting your furniture is a great way to achieve your dream bedroom look.


Pingback: Best White Paint for Bedroom Furniture 2026: Top Picks & Buying Guide