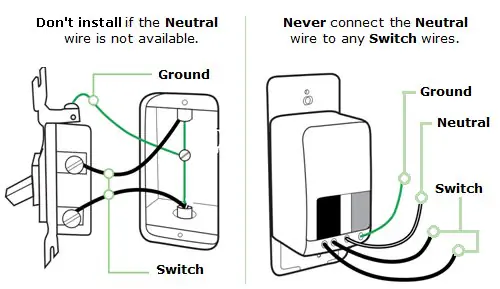
How to install smart light switch hardware requires replacing an existing wall switch with a Wi-Fi connected unit in about 30 to 45 minutes. The job costs between $15 and $45 for a single-pole switch, plus basic hand tools you likely own. It needs care because household alternating current carries genuine shock hazards. You must have a verified neutral wire bundle inside the wall box before purchasing most standard models.
What you need
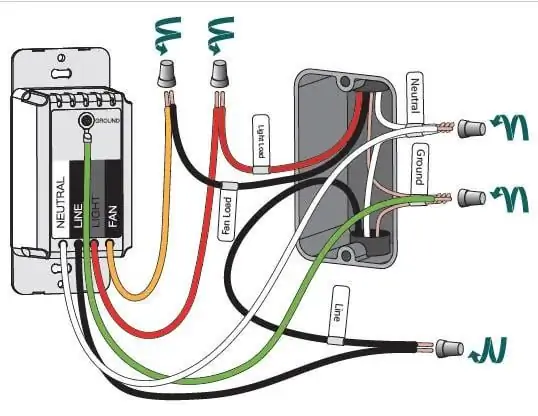 Photo: www.reddit.com on Google
| Item | How much | Why it’s needed | A substitute |
|---|---|---|---|
| Smart switch unit | 1 switch | Replaces standard mechanical toggle | None — don’t swap this |
| Non-contact voltage tester | 1 tool | Confirms power is dead | Multimeter set to AC |
| Wire strippers | 1 tool | Exposes bare copper lead | Utility knife with care |
| Wire nuts | 4 to 5 units | Secures wire junctions safely | Lever-style wire connectors |
| Magnetic screwdriver | 1 Phillips #2 | Drives faceplate and terminal screws | Standard manual Phillips driver |
| Electrical tape | 1 roll | Wraps around wire nuts | None — don’t swap this |
Before you start
- Turn off the correct circuit breaker in your main service panel and check that the room light turns off completely.
- Remove the wall plate screws and pull the old switch forward without touching any bare metal screws.
- Test every single wire inside the junction box with an approved sensor; the Electrical Safety Foundation International warns that contact with household voltage can cause severe cardiac arrest or death.
- Skipping the neutral wire check causes the most trouble; verify that two or more white wires are grouped together deep in the box before proceeding.
- If your home uses metal conduit without a neutral line, or contains knob-and-tube wiring, stop immediately and hire a licensed electrician.
Step by step
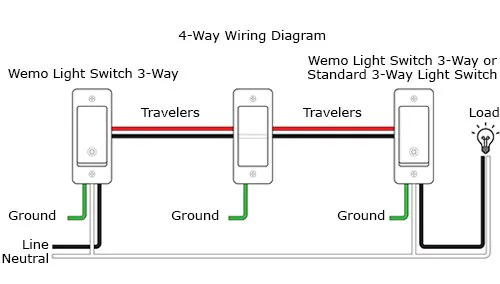 Photo: www.belkin.com on Google
- Switch off the circuit breaker feeding the room, then flip the wall switch back and forth twice to verify zero response.
- Unscrew the wall plate and the two mounting screws holding the existing switch to the metal or plastic wall box.
- Pull the old switch 3 inches out into the open room, keeping fingers away from the side terminal screws.
- Hold a non-contact voltage tester against every wire lead to prove that no voltage remains in the box.
- Take a clear smartphone photo of the existing wiring setup so you can reference original wire positions later.
- Loosen the terminal screws to detach the two line and load wires, plus the bare copper ground wire.
- Locate the white neutral wire bundle in the back of the box and remove its twist-on wire connector cap.
- Twist the smart switch’s white wire together with the house neutral bundle using an appropriately sized wire nut until tight.
- Connect the remaining smart switch leads: ground to bare copper, line to hot feed, and load to the fixture feed.
- Fold the wires gently into the back of the junction box and drive the two mounting screws into the frame.
How to know it worked
Turn the circuit breaker back on at the panel. A tiny LED indicator on the switch face should light up immediately, often blinking amber or green to show it has power and needs pairing. Press the physical button once; you’ll hear a distinct mechanical click, and the room fixture will turn on instantly. If the status light stays dark or blinks red continuously, cut the breaker again and recheck your line and neutral connections. The switch requires 2.4 GHz Wi-Fi pairing through its companion app—such as Tuya, Smart Life, or Monster Smart lighting software—which completes in roughly 60 seconds once connected.
If something goes wrong
| What happened | Why | What to do |
|---|---|---|
| Switch status light dark | Hot and neutral reversed | Swap line and neutral leads |
| Circuit breaker trips immediately | Ground touches hot terminal | Tape terminals and refold wires |
| Light stays on permanently | Line and load swapped | Switch the two black leads |
| App can’t find device | Phone on 5 GHz band | Switch phone to 2.4 GHz |
| Bulb flickers rapidly | Incompatible LED bulb load | Fit a bypass or dimmable bulb |
How often to do this
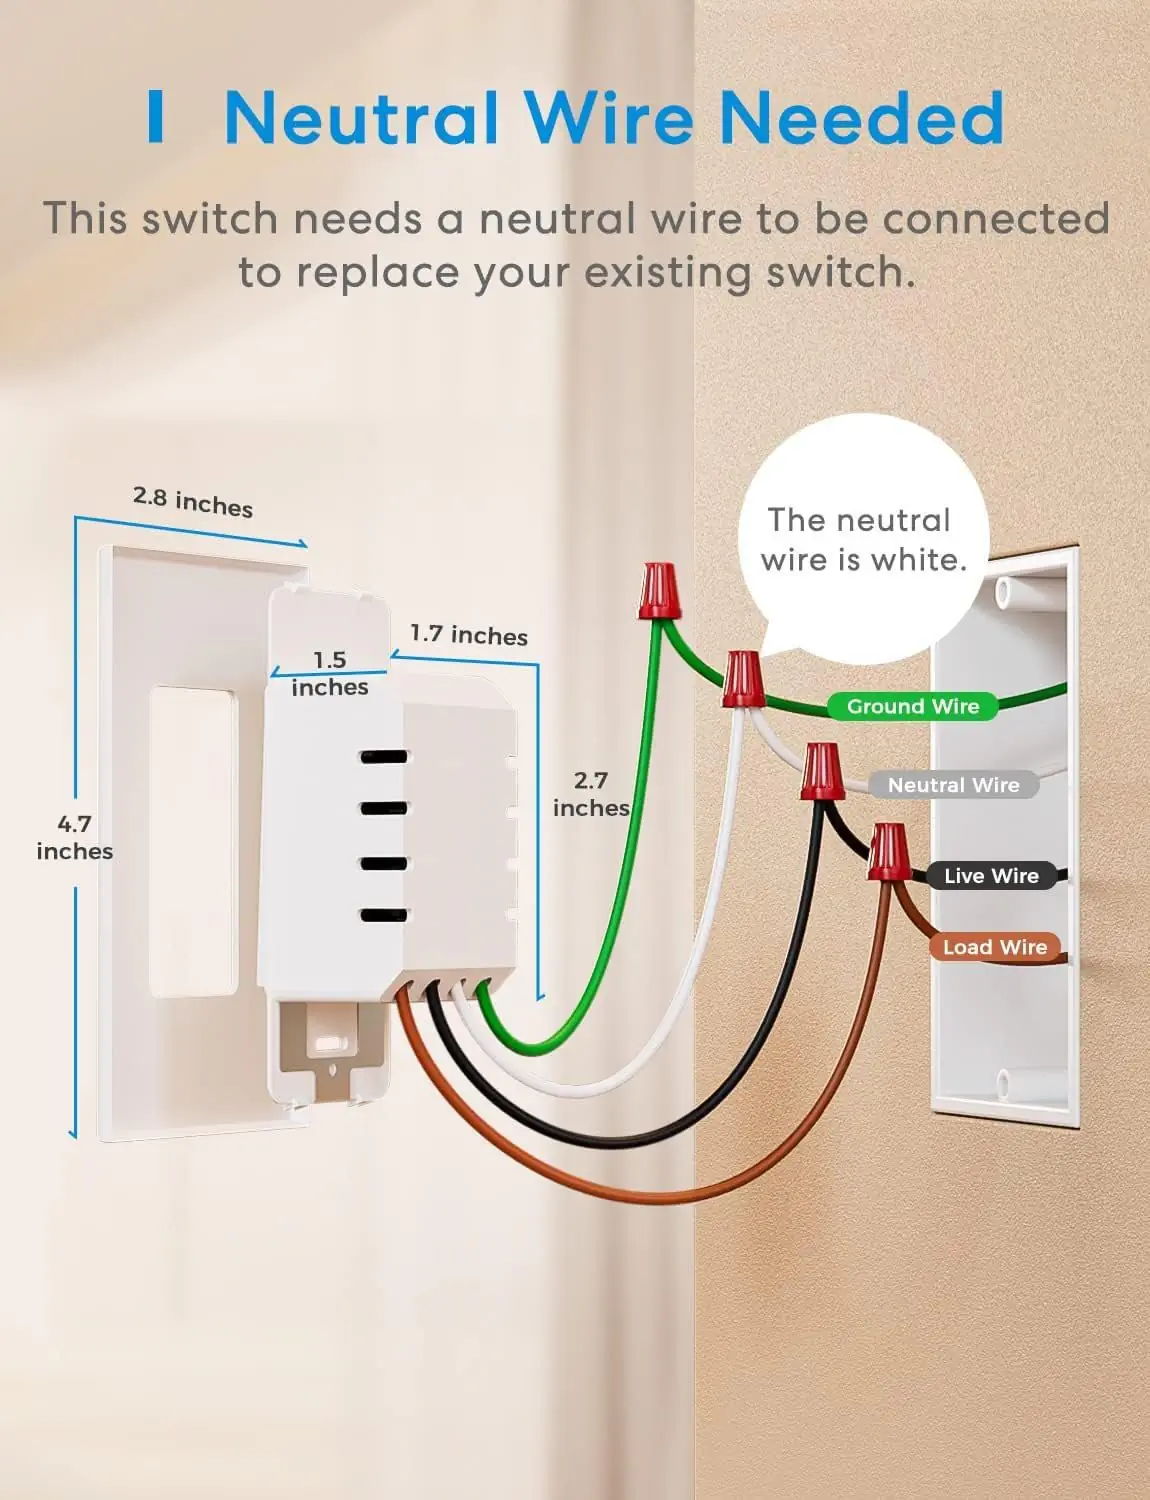 Photo: www.reddit.com on Google
A smart light switch installation is a one-time project per switch location. Most units remain in wall boxes as they age without requiring physical replacement. The two factors that change this timeframe are home renovations that alter interior circuits and wireless communication protocol shifts that render old radio modules obsolete. You’ll never need to pull the switch out for regular maintenance. Firmware updates happen over the air through your home network, so the physical hardware stays bolted in the wall undisturbed for its entire operating life.
Frequently asked questions
Can I install a smart switch without a neutral wire?
No, standard models require continuous neutral power to keep the internal Wi-Fi radio running. If your wall box lacks a neutral wire, purchase specialized no-neutral switches that use an external capacitor, or install smart bulbs instead.
Why does my smart switch keep disconnecting from Wi-Fi?
Your home Wi-Fi signal is split across dual bands or too weak at the wall box. Most wall units only speak 2.4 GHz; you must separate your router bands or move an access point within 25 feet of the switch.
How long does a smart switch installation take?
About 30 minutes for a standard single-gang box if you already have the correct tools. The job takes closer to an hour if your wall box contains crowded wiring that requires trimming and neat folding before the switch fits.
Is it safe to change a switch without turning off the main breaker?
No, you must never work on live branch circuits. Shutting off the single breaker that feeds that specific room is safe, provided you verify the circuit with an active voltage tester before touching bare metal.
What happens if I reverse the line and load wires?
The switch will fail to deliver power to the light fixture, or the internal logic board stays dead. Turn the circuit breaker off and swap those two specific black wires to restore normal operation.
Does a smart switch work with a regular ceiling light?
Yes, provided the total wattage of the fixture bulbs doesn’t exceed the maximum rating stamped on the switch frame. Check the back panel label, which usually caps standard LED lighting loads at 150 to 300 watts.
Related guides
- Best Smart Dimmer Switch for LED Lights 2026: Top Picks Reviewed
- How to Install a Ceiling Light Fixture: Step-by-Step Guide
- Best Smart Light Switch for Home Assistant in 2026: Inovelli Blue Series Review