
Fix Ceiling Fan Light Switch acting up? Maybe the light won’t turn on, or the switch feels loose and unreliable.
You’re not alone—and the good news is, fixing it might be easier than you think. Whether it’s a worn-out pull chain, a faulty switch, or a simple wiring issue, getting your ceiling fan light switch back in working order can save you money and hassle.
Stick with me, and I’ll guide you through clear, step-by-step solutions that anyone can follow. By the end of this article, you’ll know exactly how to diagnose the problem and fix your ceiling fan light switch confidently and safely. Let’s get started!
Common Ceiling Fan Light Issues
Ceiling fan lights can stop working due to several common problems. These issues often cause frustration but are usually easy to fix. Knowing the usual faults helps you identify and repair the problem quickly. This saves time and money on unnecessary service calls.
Below are some frequent causes of ceiling fan light failure. Understanding each one can help you troubleshoot effectively.
Burnt Out Bulbs
Burnt-out bulbs are the simplest cause of light failure. Over time, bulbs burn out and need replacement. Always check the bulb first before looking for other problems. Use the correct bulb type and wattage for your fan light.
Loose Wiring
Loose wiring inside the fan or light kit can stop the light from working. Vibrations from the fan can cause wires to disconnect or loosen. Inspect wires carefully for any loose connections. Tighten or reconnect wires to restore power.
Faulty Pull Chain Switch
The pull chain switch controls the light, turning it on and off. This switch can wear out or break after repeated use. A faulty switch may cause flickering or no response at all. Replacing the pull chain switch often solves this issue.
Power Supply Problems
Power supply issues include blown fuses, tripped breakers, or faulty wall switches. If the fan light has no power, check the circuit breaker first. Ensure the wall switch controlling the fan is on and working. A voltage tester can confirm if power reaches the fan.
Tools And Materials Needed
Fixing a ceiling fan light switch requires the right tools and materials. Having everything ready makes the job easier and faster. It ensures safety and helps avoid mistakes. Below are the essential items you need to gather before starting the repair process.
Basic Electrical Tools
- Screwdrivers (flathead and Phillips) for removing screws
- Wire strippers to prepare wires for connection
- Voltage tester to check if the power is off
- Needle-nose pliers for gripping and twisting wires
- Electrical tape for insulating wire connections
- A small flashlight to see inside the fan housing
Replacement Parts
- New ceiling fan light switch compatible with your fan model
- Spare pull chain or switch knob if damaged
- Replacement wires, if an,y are frayed or broken
- Light bulbs, in case the issue is related to burned-out bulbs
Safety Equipment
- Insulated gloves to protect against electric shock
- Safety goggles to shield your eyes from dust and debris
- Non-slip ladder or step stool for stable access to the fan
- Power shutoff at the circuit breaker to ensure no electricity flows
Safety Precautions
Working on a ceiling fan light switch requires careful attention to safety. Electrical parts can be dangerous if not handled properly. Taking the right safety steps protects you from shocks and accidents. Follow these simple but important precautions before starting any repair.
Turning Off Power
Always switch off the power at the circuit breaker. Do not rely on the wall switch alone. Confirm the correct breaker controls the fan’s power. This step stops the electricity flow to the fan and light. It lowers the risk of electric shock during the repair.
Using A Voltage Tester
Use a voltage tester to check if the power is off. Touch the tester to the wires or terminals. A no-power reading means it is safe to work. Never skip this test, even after turning off the breaker. This extra check ensures no electricity is present.
Handling Electrical Components
Wear rubber-soled shoes and avoid wet hands or floors. Handle wires and switches gently to avoid damage. Keep metal tools away from live wires or terminals. Use insulated tools designed for electrical work. Work in good light and stay focused on the task.
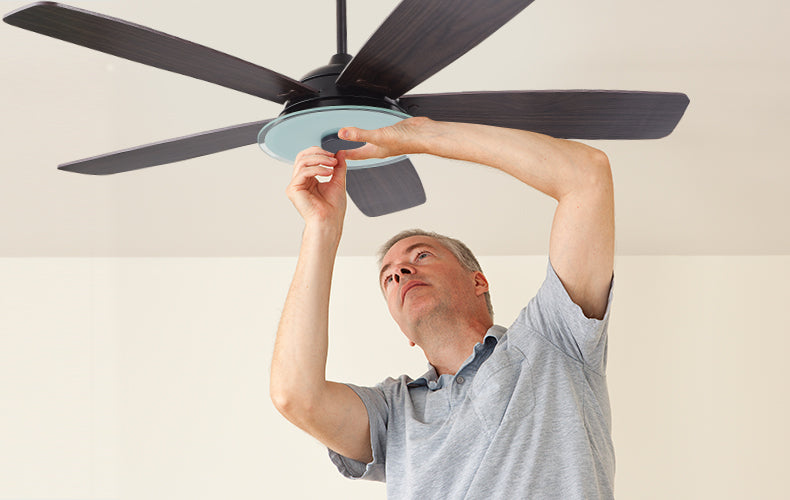
Inspecting The Light Switch
Inspecting the light switch is a key step in fixing a ceiling fan light. It helps find the exact problem causing the light to fail. Careful inspection saves time and money. This process involves checking the pull chain, wiring, and switch operation. Each part plays a role in the light’s function. Start with simple checks before moving to complex ones. This ensures safety and effective repair.
Checking The Pull Chain
The pull chain often causes light switch problems. Look for signs of wear or damage. Pull the chain gently to test its response. If it feels loose or stuck, it may need replacement. Check if the chain moves the switch inside. Sometimes, the chain can break or disconnect from the switch. Fixing or replacing the chain can restore light control quickly.
Examining Wiring Connections
Wiring issues are common in ceiling fan light switches. Turn off the power before touching any wires. Inspect wires for loose connections or damage. Look for frayed or disconnected wires near the switch. Tighten any loose screws holding wires in place. Secure connections ensure proper electricity flow. Faulty wiring can stop the light from working entirely.
Testing The Switch Functionality
Testing the switch confirms if it works correctly. Use a voltage tester or multimeter for safety. Check if power reaches the switch and passes through when on. Switch off the power before testing to avoid shock. Replace the switch if it shows no continuity when toggled. A faulty switch stops the light from turning on or off. Testing helps decide if repair or replacement is needed.
Quick Fixes For Light Switch Issues
Fixing a ceiling fan light switch can be simple. Many problems have quick solutions. These easy fixes save time and money. You do not need special skills. Basic tools and a bit of care are enough. Here are some quick fixes for light switch issues.
Prying The Metal Tab
The metal tab inside the light socket can get pressed down. This stops the bulb from making good contact. Use a small screwdriver to gently lift the tab. Be careful not to break it. This simple step often restores power to the bulb. Test the light after adjusting the tab.
Tightening Loose Connections
Loose wires cause flickering or no light at all. Turn off the power before touching any wires. Check connections at the switch and light kit. Tighten screws holding the wires in place. Secure wires firmly to ensure good contact. Loose wiring is a common cause of switch problems.
Replacing Light Bulbs
Burnt-out bulbs are an easy fix. Remove the old bulb by twisting it counterclockwise. Use a new bulb with the correct wattage and type. Screw the new bulb in clockwise until snug. Test the switch to see if the light works. Sometimes the problem is just a dead bulb.
Replacing The Ceiling Fan Light Switch
Replacing the ceiling fan light switch restores proper function to your fan’s lighting. The process involves careful steps to avoid damage or injury. You will handle electrical parts, so safety is important. This guide breaks down the replacement into clear, simple tasks.
Removing The Light Kit
Turn off the power to the fan at the circuit breaker. Remove the light bulbs first. Unscrew the light kit from the fan. Hold the kit steady as you detach it to prevent damage. Set the kit aside on a soft surface.
Disconnecting The Old Switch
Locate the light switch inside the fan housing. Note how the wires are connected for reference. Carefully disconnect the wires from the old switch. Use a voltage tester to confirm no power is present. Remove the switch from its mounting bracket.
Installing The New Switch
Place the new switch in the mounting bracket. Connect wires to the new switch following your notes. Ensure all wire connections are secure and tight. Avoid loose wires that can cause shorts or failure. Double-check connections before proceeding.
Reassembling The Fixture
Reattach the light kit to the fan carefully. Screw the light kit firmly, but do not overtighten. Insert the light bulbs back into the sockets. Turn the circuit breaker power back on. Test the light switch to confirm it works properly.
Replacing The Light Socket
Replacing the light socket in a ceiling fan is a simple fix that restores your light’s function. The socket holds the bulb and can wear out over time. This section guides you through the steps to replace it safely and correctly.
Identifying Replaceable Sockets
Check if the socket is a standard type. Most ceiling fans use common sockets like E26 or E12. Look for damage such as cracks or burn marks. If the socket is separate from the light kit, it can be replaced individually. Some models have sockets built into the light kit, requiring a full kit replacement.
Removing The Old Socket
Turn off the power at the circuit breaker. Remove the light bulb and glass cover. Locate the socket’s mounting screws or clips. Unscrew or unclip the socket carefully. Disconnect the wires by loosening the terminal screws. Note the wire positions to connect the new socket properly.
Installing A New Socket
Connect the wires to the new socket terminals. Tighten the screws firmly to hold wires in place. Secure the socket back with screws or clips. Replace the glass cover and bulb. Restore power and test the light to ensure it works well.

When To Replace The Entire Light Kit
Replacing the entire light kit on a ceiling fan becomes necessary in certain situations. Simple fixes may not work if the design or parts complicate repairs. Some light kits are built as one piece, making partial replacements impossible. Other times, replacement parts are hard to find or outdated. Upgrading the light kit also brings better performance and style. Knowing when to replace the whole kit saves time and effort.
Integrated Socket Designs
Many ceiling fan light kits have integrated socket designs. The light socket and wiring come as a single unit. This setup prevents replacing just the socket or switch. If the light socket fails, replacing the entire kit is required. Trying to fix parts inside may cause damage or safety risks. Integrated kits are common in newer fan models.
Hard-to-find Replacement Parts
Older or less common fan models may use unique parts. Finding exact replacement switches or sockets is often difficult. Some parts stop being made after years. Without the correct parts, repairs may fail or be unsafe. Replacing the whole light kit with a current model solves this problem. It also ensures better compatibility and ease of future fixes.
Upgrading For Better Performance
Replacing the entire light kit lets you upgrade features. New kits often use LED bulbs for energy savings. Some come with dimmers or remote controls. Fresh kits improve light brightness and reduce flicker. Upgrading refreshes the fan’s look and adds value. It can be a smart choice for both function and style.
Testing After Repair
Testing after repair is a crucial step to ensure your ceiling fan light switch works properly. This step confirms the fix is successful and safe. Follow simple actions to verify the repair before regular use.
Restoring Power
Turn the circuit breaker back on carefully. Avoid sudden power surges by switching it on slowly. Use a voltage tester to check if electricity flows to the fan. This step prevents shocks and damage to the fan.
Checking Light Function
Switch on the ceiling fan light to see if it operates. Test the pull chain or wall switch controlling the light. Look for steady, bright light without flickering. Replace bulbs if the light still does not work after repair.
Ensuring Safe Operation
Listen for any unusual sounds like buzzing or clicking. Make sure the fan and light switch feel firm and secure. Check that wires are not loose or exposed. A safe repair avoids fire risks and ensures long-lasting use.

Maintenance Tips For Ceiling Fan Lights
Maintaining your ceiling fan lights helps them work longer and stay safe. Simple care prevents common problems like flickering lights or faulty switches. Follow these easy maintenance tips to keep your ceiling fan lights in good shape.
Regular Cleaning
Dust and dirt can build up on fan blades and light fixtures. Clean the fan and lights regularly using a soft cloth. Avoid harsh chemicals that can damage the finish. A clean fan runs smoothly, and lights shine brighter.
Inspecting Wiring Periodically
Check the wiring connections inside the fan light switch and fixture. Loose or damaged wires cause flickering or no light. Turn off the power before inspecting to stay safe. Tighten any loose connections or replace damaged wires promptly.
Replacing Bulbs Promptly
Burnt-out bulbs lower the room brightness and can stress the fan switch. Replace bulbs as soon as they go out. Use the correct wattage and type recommended by the fan manufacturer. Proper bulbs keep your ceiling fan’s light working well and safely.
Frequently Asked Questions
How To Fix Ceiling Fan Control Switch?
Turn off the power at the breaker. Remove the light kit or switch cover. Check wiring and connections. Replace the faulty switch or pull chain. Reassemble and restore power. Test the fan and light functions.
Can I Fix A Light Switch Myself?
Yes, you can fix a light switch yourself if you have basic electrical knowledge. Always turn off the power before starting. Use a voltage tester to ensure safety. Replace faulty switches carefully, following instructions. Call a professional if unsure or if wiring seems complex.
Why Is My Ceiling Fan Switch Not Working?
Your ceiling fan switch may not work due to a burnt-out bulb, loose wiring, or a faulty pull chain switch. Check connections and test power with a voltage tester. Replace the switch if damaged.
Can A Ceiling Fan Light Socket Be Replaced?
Yes, you can replace a ceiling fan light socket if it is a standard type. Always turn off the power first. Some sockets are integrated, requiring a full light kit replacement. Check for visible screws or mounting brackets to confirm replaceability.
Conclusion
Fixing a ceiling fan light switch is simple with the right steps. Check wiring and switch condition carefully. Replace any faulty parts to restore function. Always turn off the power before starting repairs. Small fixes can save time and money. Keeping your fan light working improves comfort and safety.
Stay patient and follow instructions closely. Now, your ceiling fan light switch should work well again.


Pingback: What Are the Best Light Bulbs for Ceiling Fans? 2026 Guide