How to decorate a Bundt cake as amazing as they are? Decorating a cake might seem tricky, but with the right tips and simple steps, you can turn any plain cake into a stunning masterpiece.
Whether you’re prepping for a birthday, a special celebration, or just want to impress your friends, learning how to decorate a cake will boost your confidence and creativity. In this guide, you’ll discover easy techniques, must-have tools, and insider secrets that will help your cake stand out.
Ready to unlock your inner cake artist? Let’s get started!
Tools For Cake Decorating
Decorating a cake becomes fun and easier with the right tools. These tools help create smooth finishes, sharp details, and beautiful designs. Whether you are a beginner or want to improve, having basic tools is important. Start with simple items and add more as you grow your skills.
Essential Tools
Start with a turntable to spin your cake while decorating. It gives smooth and even coverage. Use a good offset spatula to spread icing or frosting evenly. Bench scrapers help smooth sides for a clean look. A mixing bowl and spatulas are needed for preparing frosting. Also, keep a sharp knife to level cake layers. These basics form the foundation of cake decorating.
Piping Tips
Piping tips create different shapes and patterns with frosting. Use a piping bag to hold the frosting and attach a tip. Round tips make dots and lines. Star tips create rosettes and shells. Leaf tips shape leaves and petals. Practice simple shapes before trying complex designs. Having a set of various tips allows more creativity. Clean tips after each use for best results.
Fondant Basics
Fondant is a smooth dough used to cover cakes or make decorations. Roll fondant with a rolling pin on a surface dusted with powdered sugar. Use smoothers to flatten and remove air bubbles after placing fondant on cake. Cut shapes with small cutters or knives for decoration. Keep fondant covered to prevent drying out. A little water or edible glue helps pieces stick together. Fondant tools let you add texture and details easily.
Preparing The Cake
Preparing the cake is the first key step before decorating. It ensures your cake layers are ready for frosting and toppings. Proper preparation helps achieve smooth, even surfaces for a beautiful finish. Follow these simple steps to get your cake layers perfect and fresh.
Cooling And Wrapping
Always let the cake cool completely on a wire rack. Cooling prevents the frosting from melting. Wrap the cooled cake layers tightly with plastic wrap. This keeps the cake moist and stops it from drying out. Avoid wrapping the cake while it is warm to prevent sogginess.
Leveling Layers
Leveling cake layers creates an even surface for stacking. Use a serrated knife or cake leveler to trim the domed tops. Cut slowly and carefully to avoid crumbs. Flat layers make decorating easier and give your cake a professional look. Check each layer’s height before stacking.
Storing Cake Layers
Store unfrosted layers wrapped in plastic in the fridge for up to one week. For longer storage, freeze the layers for up to one month. Thaw frozen cakes in the fridge overnight before decorating. Keep frosted cakes in the fridge to maintain freshness and firmness. Proper storage keeps your cake fresh and easy to decorate.
Frosting Techniques
Frosting techniques shape the look and feel of your cake. Proper frosting makes your cake smooth and neat. It also helps other decorations stick well. Simple steps create a polished finish.
Applying A Crumb Coat
Start with a thin layer of frosting called a crumb coat. This layer traps loose crumbs. Use a spatula to spread the frosting evenly. Cover all cake surfaces lightly. Chill the cake after this step to set the coat. This prevents crumbs from mixing into the final layer.
Smoothing The Frosting
After the crumb coat sets, apply a thicker frosting layer. Use a flat spatula or bench scraper. Hold it at a slight angle against the cake. Rotate the cake slowly to smooth the frosting. Work in small sections for a clean finish. Use gentle, steady strokes for best results.
Chilling Between Steps
Chilling the cake is important between frosting steps. It firms up the frosting and reduces smudging. Place the cake in the fridge for 15 to 30 minutes. This helps the frosting hold its shape. Cold frosting is easier to smooth and decorate. Repeat chilling as needed during decorating.

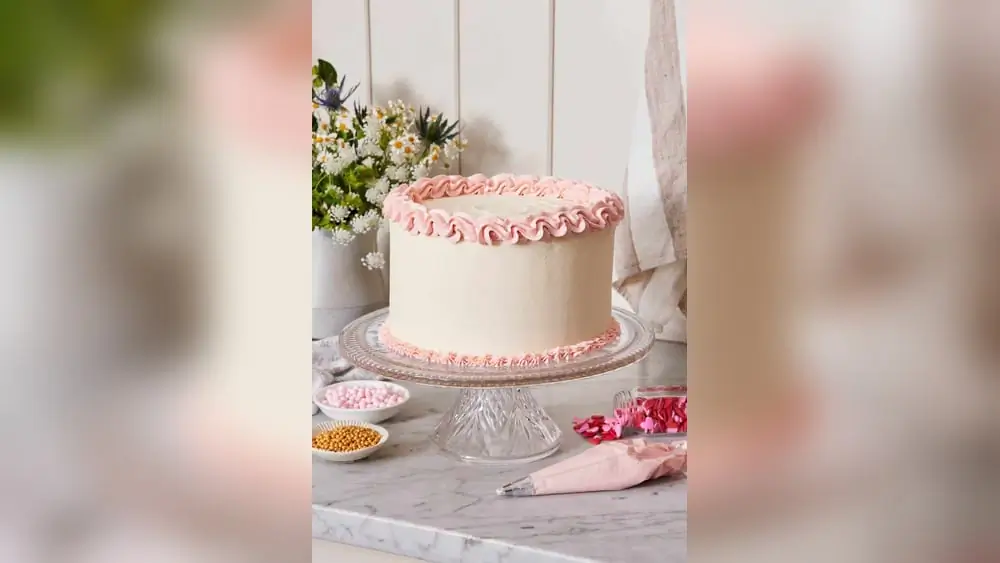
Creative Decorating Ideas
Creative decorating ideas bring life and personality to any cake. They turn simple desserts into stunning art pieces. Using different techniques, decorators can express unique styles and themes. These ideas fit all skill levels and occasions. Experimenting with textures, colors, and finishes makes cake decorating exciting.
Hand Painting
Hand painting on cakes uses edible colors and brushes. Artists create delicate designs directly on fondant or buttercream. Floral patterns and abstract art look amazing this way. This method allows for personal and intricate touches. It works well for custom cakes and special events.
Sugar Work
Sugar work adds elegance with shapes and decorations made from sugar. Techniques include pulled sugar, blown sugar, and sugar shards. These decorations add height and drama to cakes. Sugar work requires practice but creates stunning visual effects. It complements simple cakes with detailed craftsmanship.
Airbrushing Effects
Airbrushing sprays color evenly, creating smooth gradients or sharp details. It can cover large areas or add shadows and highlights. This technique gives cakes a polished, professional look. Colors blend seamlessly for a soft or bold finish. Airbrushing fits modern and classic cake designs.
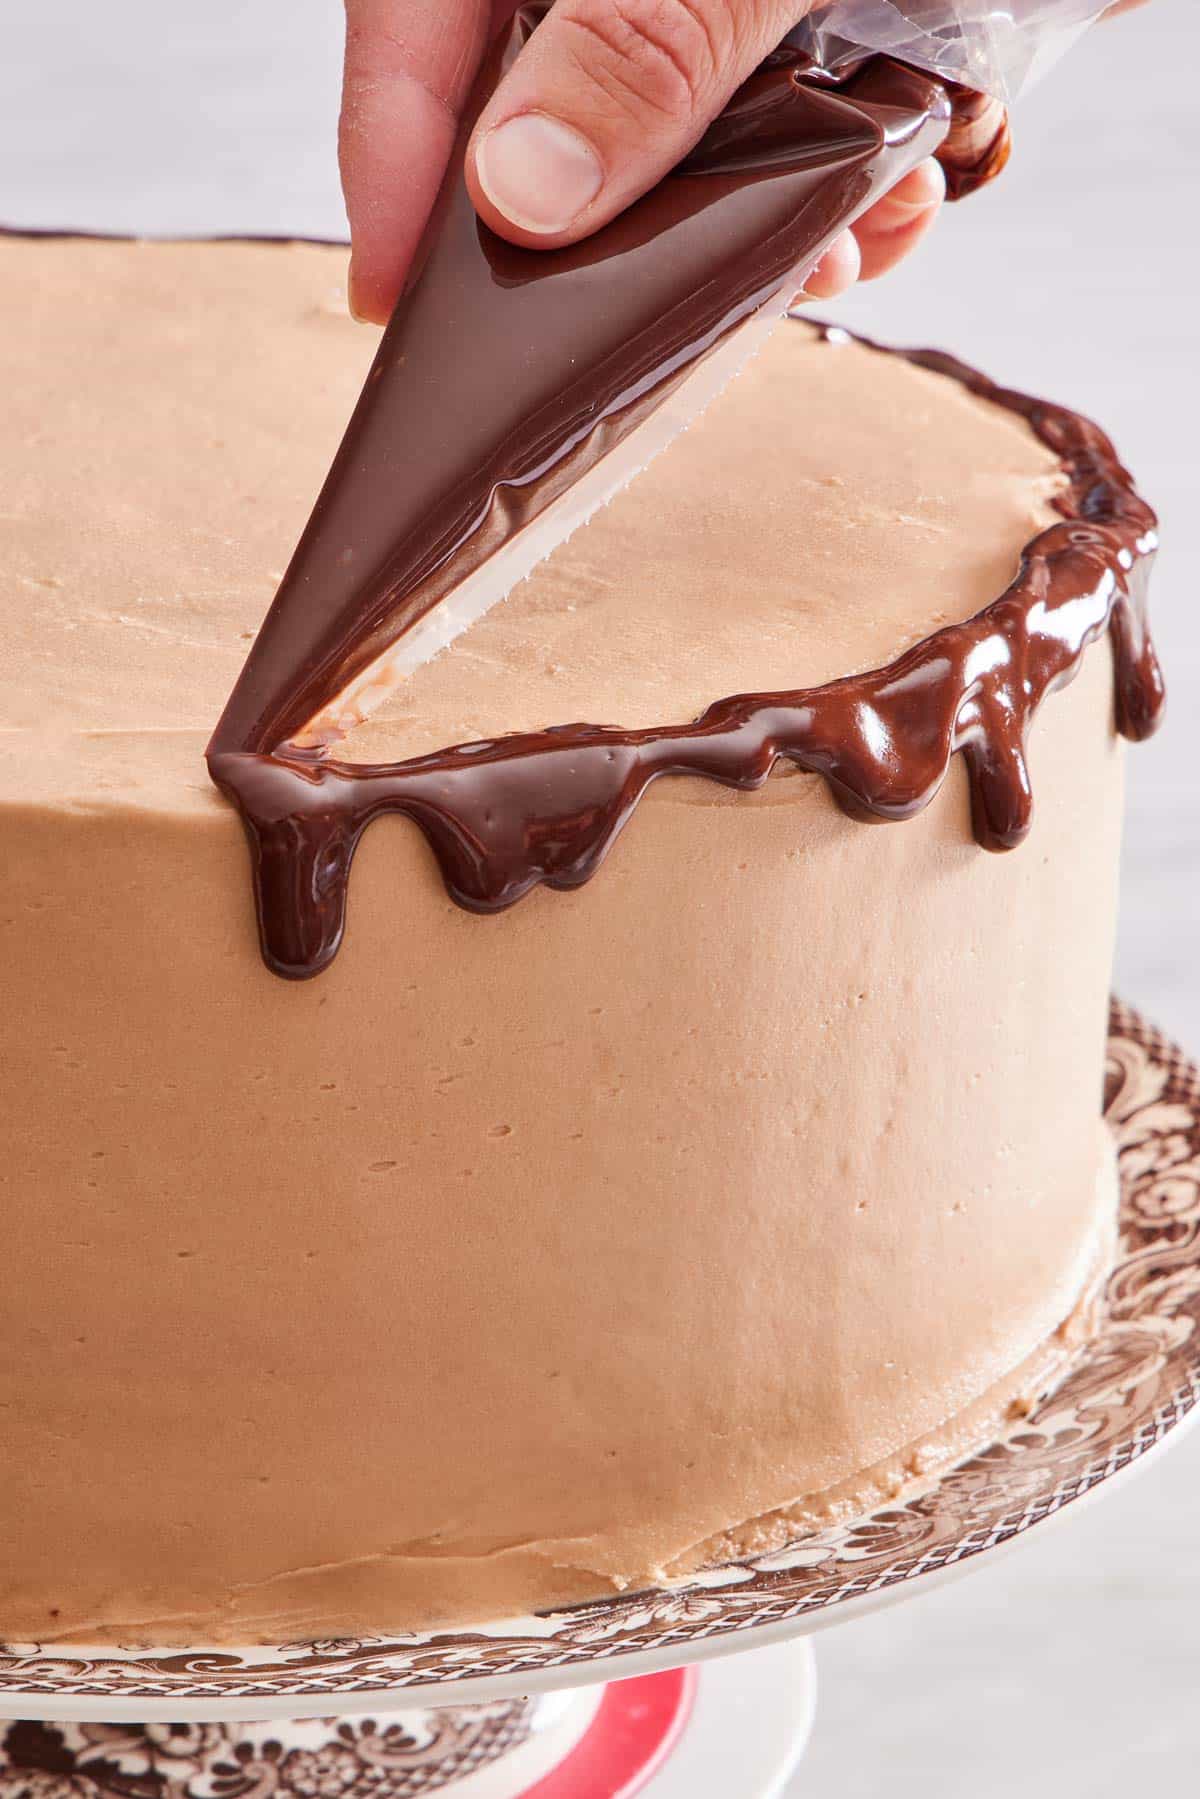
Mirror Glaze Finishes
Mirror glaze creates a shiny, reflective surface on cakes. It uses gelatin and colored glaze poured over chilled cakes. This finish looks like glass or liquid metal. Mirror glaze adds a sleek, eye-catching element. It works best on smooth, simple cake shapes to highlight the shine.
Using Fillings And Dams
Using fillings and dams in cake decorating creates layers with delicious textures and flavors. Fillings add moisture and taste between cake layers. Dams are barriers made from frosting that keep fillings inside. Proper use of fillings and dams makes the cake neat and beautiful.
Choosing Fillings
Select fillings that match your cake flavor well. Common options include fruit jams, chocolate ganache, or buttercream. Choose fillings that are not too runny. Thick fillings hold their shape better between layers. Avoid watery fillings that can soak the cake too much.
Building A Frosting Dam
A frosting dam is a thick ring of frosting around the cake edge. Use a piping bag or spatula to create it. The dam stops fillings from leaking out. Build the dam about half an inch high. Make sure the ring is smooth and even for a good seal.
Preventing Filling Oozing
Fill the center of the cake inside the dam with your chosen filling. Do not overfill. Too much filling pushes past the dam. Chill the cake after filling to firm the dam and filling. This keeps the layers stable and prevents mess during stacking.
Decorating Ahead Of Time
Decorating a cake ahead of time can save stress on the day of your event. It allows flavors to meld and designs to set perfectly. Planning your decorating schedule helps keep your cake fresh and beautiful.
Knowing how to store and handle your decorated cake is key. Proper chilling and serving tips will keep your cake looking its best and tasting delicious.
Storing Frosted Cakes
Store frosted cakes in a cool, dry place. Use a cake box or cover loosely with plastic wrap. Avoid sealing tightly to prevent moisture buildup. For buttercream cakes, refrigeration is usually safe for a few days.
Keep cakes away from strong odors in the fridge. If your cake has fresh fruit or cream cheese frosting, refrigeration is a must. Bring the cake out before serving to improve texture and flavor.
Chilling Tips
Chilling helps set frosting and decorations firmly. Place the cake on a flat surface in the fridge. Avoid stacking items on top of the cake. For best results, chill the cake for at least 30 minutes before transport.
Use a cake carrier if possible. This protects the cake while keeping it cool. If the cake has delicate decorations, chilling prevents them from melting or sliding.
Serving At Room Temperature
Buttercream and cream cheese cakes taste best at room temperature. Remove the cake from the fridge 30 to 60 minutes before serving. This softens the frosting and enhances the flavors.
Keep the cake covered while it warms to avoid drying out. Serve on a clean, dry plate with a sharp knife for clean slices. Enjoy your beautifully decorated cake at its best.
Pro Tips For Perfect Results
Decorating a cake can be fun and rewarding. Small details make a big difference. Follow these pro tips for perfect results. They help avoid common mistakes and improve the final look. Keep your cake neat, moist, and beautiful.
Preventing Crumbs
Crumbs ruin smooth frosting. To stop crumbs, chill your cake before frosting. Cold cake is firmer and less crumbly. Apply a thin crumb coat first. This seals crumbs in place. Chill again before the final layer of frosting. Use a clean, sharp knife to level the cake. Avoid scraping crumbs while spreading frosting.
Maintaining Moisture
Dry cakes are hard to decorate well. Keep cakes moist by wrapping them tightly in plastic wrap. Store wrapped cakes at room temperature or in the fridge. Add simple syrup or flavored syrup to layers before frosting. This adds moisture and flavor. Avoid overbaking to keep the cake soft. Moist cakes hold frosting better and taste fresh.
Handling Temperature
Temperature affects cake texture and frosting. Work in a cool room to prevent frosting from melting. Chill buttercream or fondant before use for easier handling. If the cake is too cold, frosting may crack. Bring chilled cake to room temperature before decorating. Warm hands can soften frosting too much; use tools instead. Proper temperature control ensures smooth, clean decoration.

Frequently Asked Questions
What Is The 4-Day Cake Rule?
The 4-day cake rule suggests baking cakes up to four days before serving. This ensures freshness and easier decorating. Proper storage in the fridge or freezer maintains quality and flavor. It helps prevent dryness and simplifies frosting application for better results.
How to Make a Cake Look More Professional?
Use smooth, even frosting and sharp edges. Add clean piping or fondant decorations. Chill between layers for stability. Employ quality tools like spatulas and piping bags. Keep designs simple and consistent for a polished, professional look.
What Are The 7 Different Cake Decorating Techniques?
The seven cake decorating techniques are spatula icing, piping, fondant work, hand painting, sugar work, airbrushing, and mirror glaze. Each method adds unique texture and style to cakes, enhancing their visual appeal and creativity.
How Long Can I Refrigerate a Cake Before Decorating?
Refrigerate unfrosted cake layers up to one week, wrapped tightly to retain moisture. For frosted cakes, chill after a crumb coat and finish decorating within 24 hours for best results. Always bring cakes to room temperature before serving for optimal flavor and texture.
Conclusion
Decorating a cake can be simple and fun with practice. Start with basic tools and simple designs. Take your time to spread frosting smoothly. Use fresh ingredients for the best taste. Experiment with colors and shapes to find your style.
Remember, each cake is a chance to improve. Enjoy the process and share your creations with others. Cake decorating brings joy and creativity to any celebration. Keep practicing, and soon your cakes will look amazing!