Changing a ceiling light can seem intimidating if you have never done it before. However, with the right guidance, this task becomes manageable and even satisfying. Many people call electricians for this simple job, but you can often do it yourself and save both time and money. Learning how to change ceiling light is a useful skill for any homeowner or renter. This guide will walk you through every step, explain safety tips, and help you avoid common mistakes. Whether you want to replace an old fixture, update your home’s style, or just fix a broken light, you will find clear instructions here.
Understanding Ceiling Lights
Ceiling lights come in many styles. Some are simple, like a flush-mount dome, while others are more complex, such as chandeliers or pendant lights. The process for changing most ceiling lights is similar, but some details may be different depending on the type.
Before you begin, it’s important to know what kind of light you have and what you want to install.
Types Of Ceiling Lights
- Flush-mount lights: These sit close against the ceiling. They are common in bedrooms, hallways, and living rooms.
- Semi-flush-mount lights: Hang a few inches below the ceiling. They offer a little more style.
- Pendant lights: Hang down by a cord, chain, or rod. Often used in kitchens or dining areas.
- Chandeliers: Decorative lights with multiple arms. Usually found in dining rooms or entryways.
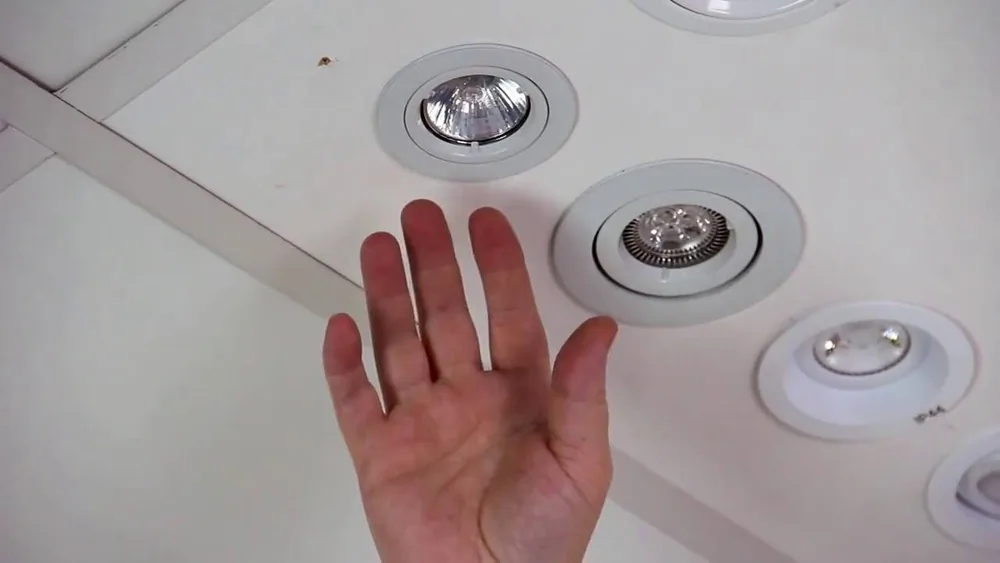
- Recessed lights: Set into the ceiling. Changing these requires different steps.
Knowing your fixture type helps you prepare the right tools and steps.
Safety First: Preparing For The Job
Before doing any electrical work, safety must come first. Working with electricity is risky if you do not follow proper steps. Most accidents happen because people skip precautions.
- Turn off the power: Go to your home’s electrical panel and switch off the circuit breaker for the room. Do not rely only on the wall switch.
- Test the wires: Use a non-contact voltage tester to make sure no electricity is flowing to the wires.
- Gather your tools: Having everything ready saves time and keeps you safe.
Here is a list of basic tools you will need:
- Screwdrivers (flathead and Phillips)
- Wire stripper/cutter
- Voltage tester
- Ladder (make sure it is stable and tall enough)
- Pliers
- Electrical tape
- Wire nuts
- New light fixture and included hardware
- Work gloves and safety glasses (optional, but recommended)
If your ceiling is high, make sure your ladder is secure. Never stand on furniture or unstable objects.

Removing The Old Ceiling Light
Taking down the old fixture is the first real step. Here is how you do it safely and efficiently.
- Remove the light bulbs and cover: Most ceiling lights have a glass cover or shade. Carefully remove it. Unscrew and set aside the light bulbs.
- Unscrew the fixture: Most fixtures are held by screws or a mounting plate. Support the fixture with one hand while you remove the screws.
- Lower the fixture: Gently pull the fixture away from the ceiling. You will see wires connecting it to the ceiling box.
- Test for power again: Before touching any wires, use your voltage tester once more to confirm the power is off.
- Disconnect the wires: Usually, there are three types of wires:
- Black or red (hot)
- White (neutral)
- Bare copper or green (ground)
Unscrew the wire nuts and separate the wires. Support the fixture so it doesn’t fall as you disconnect the last wire.
Non-obvious insight: Many people forget to check for a second set of wires (for example, if the light is controlled by two switches). Always look for extra wires and label them if needed.
Set the old fixture aside. Keep any screws or mounting hardware in case the new fixture doesn’t come with its own.
Inspecting The Electrical Box
After removing the old light, check the electrical box in the ceiling. This is a key step that many beginners skip.
- Is the box secure? It should not move or wiggle. If it does, tighten the screws or call a professional.
- Is the box rated for your new fixture? Heavy lights like chandeliers need a box rated for ceiling fans or heavy fixtures. Most boxes are labeled inside.
- Are the wires in good condition? Look for frayed, burned, or exposed copper. Damaged wires are a fire risk.
If you find problems, do not continue. Consult an electrician for repairs.
Preparing The New Light Fixture
Now, get your new fixture ready. Unpack it and read the instructions. Not all fixtures are the same, so check for any special steps.
- Assemble the fixture: Some lights need simple assembly, like attaching arms or screwing in the shade.
- Check the mounting bracket: Most fixtures use a metal bracket to attach to the ceiling box. If the new one is different from the old, replace it now.
- Thread the wires: Feed the wires from the fixture through the bracket or mounting plate as shown in the instructions.
Pro tip: If your new light is heavy, ask someone to help you hold it during installation.
Wiring The New Ceiling Light
This is the most important part. Always double-check your work to avoid electrical problems.
- Match the wires: Usually, you will have three wires:
- Black (hot) to black
- White (neutral) to white
- Green or bare (ground) to ground screw or wire
- Connect the wires: Hold the ends of the matching wires together and twist on a wire nut. Pull gently to make sure it is secure.
- Wrap with electrical tape: For extra safety, wrap the wire nut and exposed wire with electrical tape.
- Connect the ground wire: Attach the green or bare copper wire to the green screw on the bracket, or twist it to the ground wire from the ceiling.
Non-obvious insight: Sometimes, the ceiling box may only have two wires (no ground). In older homes, this is common. In this case, connect the ground wire from the fixture to the mounting bracket or box if it is metal.
- Tuck in the wires: Gently push the wires back into the electrical box.

Mounting The New Fixture
After the wiring is complete, you need to attach the fixture to the ceiling.
- Align the fixture: Line up the holes in the fixture’s base or mounting plate with the holes in the ceiling box.
- Screw it in: Use the screws provided with your new fixture.
- Attach the shade or cover: If your fixture has a glass shade, attach it according to the instructions.
- Install bulbs: Check the recommended wattage for your fixture. Using bulbs that are too strong can overheat the light.
Practical tip: Before you finish, make sure everything is tight and secure. A loose fixture can fall or break.
Turning The Power Back On And Testing
Now you are ready to test your work.
- Switch the circuit breaker back on: Return to your electrical panel and restore power to the room.
- Turn on the light switch: Check if the light works. If it does not, turn the power off again and check your connections.
- Check for flickering or buzzing: This can mean a loose connection or the wrong bulb type. Fix any issues before using the light regularly.
Comparing Ceiling Light Types
Choosing the right ceiling light is not just about style. Consider brightness, energy use, and cost. This can help you pick the best light for your space.
Here’s a quick comparison:
| Type | Brightness (lumens) | Energy Use (watts) | Best For | Average Lifespan |
|---|---|---|---|---|
| Flush-mount | 800-2,000 | 10-40 | Bedrooms, hallways | 5-10 years |
| Pendant | 300-1,000 | 6-25 | Kitchens, islands | 5-8 years |
| Chandelier | 1,200-5,000 | 15-60 | Dining rooms | 7-12 years |
| Recessed | 400-1,200 | 7-20 | Living rooms | 8-12 years |
Energy Efficiency: LED vs. Traditional Bulbs
Swapping your fixture is a great time to think about energy use. LED bulbs are more efficient and last longer than old incandescent or CFL bulbs.
Here’s a comparison of bulb types:
| Bulb Type | Energy Use | Average Lifespan | Light Quality | Cost |
|---|---|---|---|---|
| Incandescent | High | 1,000 hrs | Warm, yellow | Low |
| CFL | Medium | 8,000 hrs | Cooler white | Medium |
| LED | Low | 25,000+ hrs | Variable (warm to cool) | Medium to High |
Practical advice: LEDs cost more at first, but save money over time because they last longer and use less electricity.
Common Problems And Solutions
Changing a ceiling light is usually simple, but sometimes things go wrong. Here are some issues and how to solve them.
The Light Does Not Turn On
- Check the breaker: It may have tripped.
- Bulb is loose or burned out: Try another bulb.
- Wires not connected properly: Turn off the power and check your connections.
Flickering Or Buzzing
- Loose wire nut: Tighten the wire nuts and check the wires.
- Wrong bulb type: Use the recommended bulb.
- Dimmer switch issues: Some LED bulbs do not work well with old dimmer switches.
The Fixture Is Loose
- Mounting screws not tight: Remove the cover and tighten all screws.
- The electrical box is loose: This is a bigger problem. You may need to secure or replace the box.
Ground Wire Confusion
- Older homes: If you see no ground wire, attach the fixture’s ground wire to the metal box if possible.
- Plastic box: If the ceiling box is plastic and there is no ground wire, you may need to upgrade your wiring for safety.
Non-obvious insight: Sometimes, painted-over screws or fixture bases can make removal difficult. Use a utility knife to gently cut around the old fixture if it is stuck.
Essential Safety Tips
- Never work with live wires. Always double-check that the power is off.
- Do not touch metal parts while wiring. Even a small shock can cause a fall from the ladder.
- Use the right wattage bulbs. Too high can overheat the fixture.
- Keep children and pets away while you work.
- If unsure, call a professional. Some jobs are not safe for beginners.
Step-by-step Example: Replacing A Flush-mount Ceiling Light
To make things clearer, let’s walk through a real example. You want to replace an old flush-mount light in your hallway.
- Turn off the power at the breaker.
- Remove the glass cover and bulbs from the old light.
- Unscrew the fixture and gently pull it away from the ceiling.
- Test the wires with a voltage tester.
- Disconnect the wires and take down the old fixture.
- Inspect the ceiling box for security and damage.
- Attach the new mounting bracket from your new light.
- Connect the black, white, and ground wires together using wire nuts.
- Tuck the wires into the box and attach the new fixture.
- Install new bulbs and the glass cover.
- Restore power at the breaker and test your new light.
Most flush-mount lights take about 30–45 minutes to change if you have the right tools.
Advanced Scenarios: Special Ceiling Lights
Some ceiling lights need extra steps. Here are a few situations:
Chandeliers And Heavy Fixtures
- Check box rating: Use a ceiling box rated for heavy fixtures.
- Support weight: Have a helper hold the fixture while you wire it.
- Assemble before hanging: Put together as much as you can on the ground.
Ceiling Fan/lights
- Extra wiring: Fans often have separate wires for the fan and light.
- Follow the manual: Wiring can be more complex. Always read the instructions.
Recessed Lights
- Different mounting: These lights fit inside the ceiling. You may need to cut or patch drywall.
- Special tools: Sometimes require spring clips or housing cans.
If you are not sure, research your specific fixture or ask for help.
/convert-ceiling-light-to-recessed-light-p2-1821561-hero-1fd056c75f4c453b911a9ab5ea211d71.jpg)
Budget And Cost Considerations
Changing a ceiling light yourself is much cheaper than hiring an electrician. Here’s what you might expect:
- New fixture cost: $20–$500+, depending on style
- Basic tools: $30–$50 if you do not own them already
- Electrician fee: $100–$250 for a simple swap
DIY can save you around $100–$200 per light. However, safety comes first. If you face unknown wiring, old electrical systems, or very heavy fixtures, it is smart to pay a professional.
Environmental Impact
Switching to LED fixtures and bulbs is not just good for your wallet. It also reduces your environmental footprint. According to the US Department of Energy, LED lighting uses up to 75% less energy and lasts 25 times longer than incandescent lighting. Over time, this cuts down on waste and lowers your energy bill.
If you want to learn more about energy-saving lighting, visit the US Department of Energy.
Maintenance Tips For Your New Ceiling Light
Once your new light is up, keep it working well by following these tips:
- Clean regularly: Dust and dirt reduce brightness. Wipe covers and bulbs with a dry cloth.
- Check bulbs: Replace burned-out bulbs quickly to avoid uneven wear.
- Inspect wiring: If you notice flickering or strange smells, turn off the power and check connections.
- Upgrade bulbs: Use modern, energy-efficient bulbs when old ones burn out.
When To Call A Professional
Some situations are best left to experts:
- Old or damaged wiring
- No ground wire present
- Ceiling box is loose or damaged
- Complex fixtures with multiple switches
- High or hard-to-reach ceilings
Don’t risk your safety. If you feel unsure at any point, stop and call a licensed electrician.
Frequently Asked Questions
How Do I Know If My Ceiling Box Can Hold A Heavy Light?
The box should be labeled for ceiling fans or heavy fixtures inside. If it moves or feels weak, replace it with a metal box rated for heavy loads. Most home centers sell these boxes.
What If My New Light Has A Different Wire Color?
Check your fixture’s manual. Common colors are black (hot), white (neutral), and green or bare (ground). Sometimes, blue or red wires are used for other functions, like fans. Always match the wires as directed in the instructions.
Can I Change A Ceiling Light Without Turning Off The Power?
Never. Always turn off the circuit breaker before working on electrical fixtures. Relying on the wall switch is unsafe and can cause serious injury.
My Light Is Still Not Working After Installation. What Should I Check?
First, make sure the bulbs are goo,d and the breaker is on. Double-check all wire connections. If you still have trouble, the problem may be with the switch or the wiring in the ceiling box. Consider calling a professional.
Is It Safe To Use Led Bulbs In Any Ceiling Light?
In most cases, yes. Just make sure the LED bulb base and wattage match the fixture’s requirements. Some old dimmer switches may not work with all LED bulbs, so check compatibility.
Changing a ceiling light is a valuable DIY skill that can improve your home’s look and efficiency. With patience and the right steps, you can do it safely and confidently. Always keep safety first, follow your fixture’s instructions, and never be afraid to ask for expert help if you need it.