Wiring a ceiling light may seem tricky, but with the right steps, you can do it safely and confidently yourself. Whether you’re replacing an old fixture or installing a new one, understanding how Do You Wire a Ceiling Light is key to brightening up your space without any hazards.
In this guide, you’ll discover simple, clear instructions that make wiring your ceiling light straightforward—even if you’re not an expert. Ready to take control of your home lighting? Let’s dive in and make sure your next ceiling light installation is smooth, safe, and successful.

Safety First
Wiring a ceiling light involves working with electricity. Safety must be your top priority. Electrical shocks can cause serious injury or worse. Taking the right precautions keeps you safe and protects your home.
Follow these essential steps before you start wiring. They reduce risks and ensure a smooth installation process.
Turn Off Power
Switch off the power at your home’s circuit breaker. Do not rely only on the light switch. Confirm the breaker controls the correct circuit. This step stops the electricity flow to the fixture.
Use a lock or tape to keep the breaker off. This prevents someone from turning it on by mistake. Safety comes first before handling any wires.
Use Voltage Tester
Check wires with a voltage tester before touching them. This tool tells you if electricity is still flowing. Test all wires, not just the black or hot ones.
Touch the tester to each wire carefully. If the tester shows voltage, do not proceed. Only start wiring when all wires are confirmed dead.
When To Call A Professional
Some wiring jobs need expert knowledge. Call an electrician if you see damaged wires or old wiring. Complex wiring or unclear wiring colors also require a pro.
Do not risk your safety by guessing. A licensed electrician has the skills and tools. They ensure your ceiling light is wired safely and correctly.

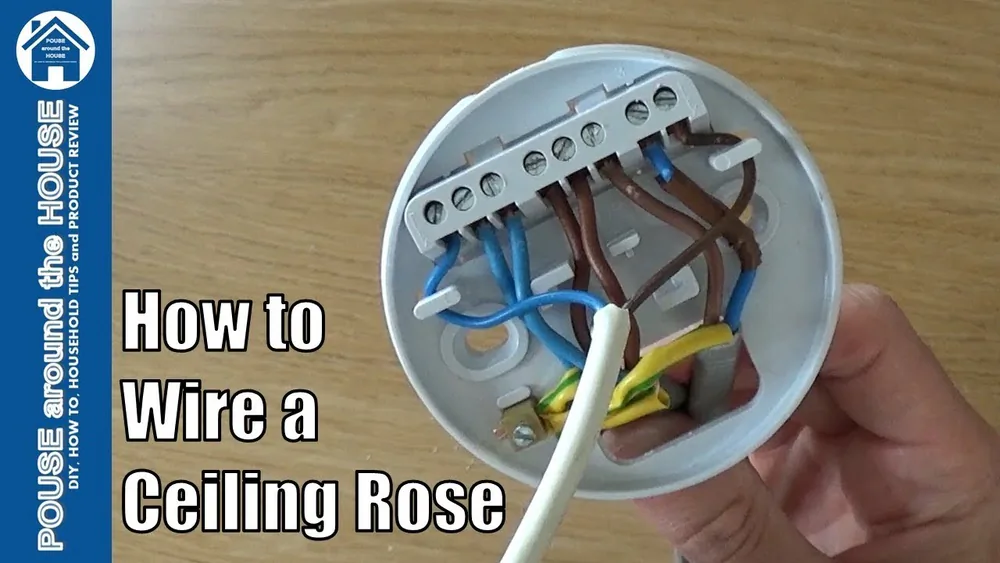
Identify Ceiling Wires
Before wiring a ceiling light, identifying the ceiling wires is crucial. These wires carry electricity and ensure the light works safely. Each wire has a specific color and function. Knowing which wire does what helps avoid mistakes. Here are the main ceiling wires you will find.
Black Wire (hot)
The black wire carries electricity from the power source. It is called the hot wire. Connect this wire to the black wire on your light fixture. Always turn off the power before handling the black wire. It can cause electric shock if touched live.
White Wire (neutral)
The white wire is the neutral wire. It completes the electrical circuit by carrying current back to the panel. Connect the white wire from the ceiling to the white wire on the fixture. This connection helps the light turn on and off properly.
Ground Wire (bare Or Green)
The ground wire is either bare copper or green. It protects you from electrical faults by redirecting current safely to the ground. Connect the ground wire from the ceiling to the green or bare ground wire on the fixture. This connection reduces the risk of electric shock.
Red Wire For Fan Lights
Some ceilings have a red wire for fan lights. This wire acts as a second hot wire. Connect the red wire to the light kit’s red wire if your fixture has a fan light. The black wire powers the fan, while the red wire powers the light separately.
Prepare The Fixture
Preparing the fixture is a key step before wiring a ceiling light. It ensures safety and proper installation. Taking time to prepare helps avoid issues later.
Follow these steps carefully to get the fixture ready for wiring.
Remove Old Fixture
First, turn off the power at the circuit breaker. Confirm power is off using a tester. Remove any bulbs and shades from the old fixture. Unscrew the fixture base from the ceiling. Gently lower the fixture to expose the wiring. Disconnect wires by unscrewing wire nuts. Set the old fixture aside safely.
Inspect Mounting Bracket
Check the mounting bracket attached to the ceiling box. Ensure it is secure and not bent or damaged. Tighten screws if loose. If the bracket is old or rusty, replace it with a new one. The bracket must hold the new fixture firmly. A stable bracket prevents wobbling or falling.
Check Fixture Wiring
Examine the wires on the new fixture. Look for any cuts or exposed copper. Make sure wire ends are clean and straight. Identify the black (hot), white (neutral), and green or bare (ground) wires. Confirm the wires match standard colors for easy connection. If the wires are too short, add wire extensions using wire nuts.
Connect The Wires
Connecting the wires is a crucial step in wiring a ceiling light. It ensures your light fixture works safely and correctly. Each wire has a specific role and must be connected to the right matching wire. Take your time and double-check each connection for safety and function.
Match Black To Black
The black wire is the hot wire that carries electricity. Connect the black wire from the ceiling to the black wire on the light fixture. Use a wire nut to secure the connection. This link powers the light when the switch is turned on.
Match White To White
The white wire is the neutral wire. It completes the electrical circuit. Connect the white wire from the ceiling to the white wire on the fixture. Twist the wires together and secure them with a wire nut. This connection balances the flow of electricity.
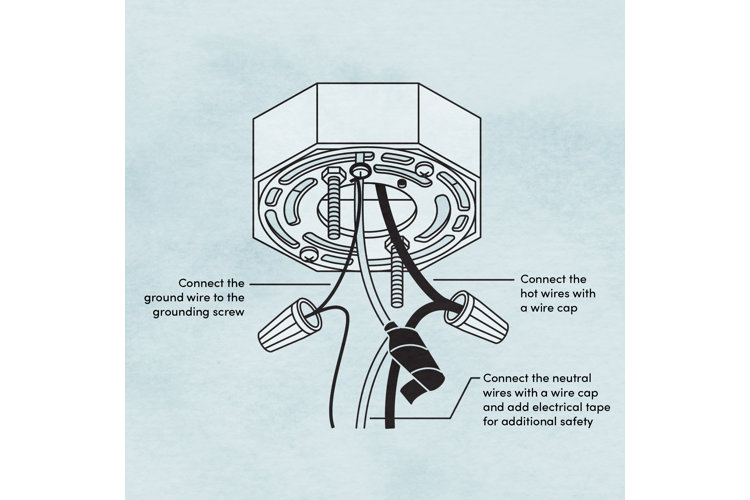
Connect Ground Wires
The ground wire keeps the fixture safe from electrical faults. It is usually bare copper or green. Connect the ground wire from the ceiling to the green or bare wire on the fixture. Attach it also to the grounding screw on the mounting bracket. This step prevents electric shocks.
Handle Red Wire For Fan Light
Some ceiling fans have a red wire. It controls the fan light separately. Connect the red wire from the ceiling to the red wire on the fan’s light kit. The black wire remains connected to the fan motor. This setup lets you control the fan and light independently.
Secure Wire Connections
Secure wire connections are crucial when wiring a ceiling light. They ensure safety and prevent electrical hazards. Loose or poor connections can cause flickering lights or even fire risks. Taking time to make strong connections gives a stable and lasting fixture.
Follow these simple steps to secure your wires correctly. Proper tools and careful handling make the job easier and safer. Always double-check each connection before finishing the installation.
Use Wire Nuts
Wire nuts hold wires together tightly. Twist the wires evenly before placing the wire nut. Turn the nut clockwise until it feels snug. This locks the wires inside and stops them from moving.
Choose the right size wire nut for your wires. Too small can cause loose connections. Too large may not hold wires firmly. Check the packaging for wire size guidelines.
Wrap With Electrical Tape
Wrap electrical tape around each wire nut. This adds an extra layer of security. It prevents the wire nut from loosening over time. Use tape designed for electrical work only.
Cover the entire nut and a bit of the wire. Make sure the tape is tight and smooth. This step helps stop moisture and dust from reaching wires.
Check For Loose Wires
After securing wires, gently tug each one. None should come free or move easily. If a wire slips, redo the connection with a new wire nut.
Inspect all wires visually. Look for any exposed copper or damage. Fix any issues before turning on the power. Safe connections protect your home and family.
Mount The Fixture
Mounting the ceiling light fixture is a key step in your installation process. It secures the light to the ceiling and ensures it is stable and safe. Follow these clear steps to attach the fixture properly. This makes your ceiling light both functional and neat.
Attach To Ceiling Box
Start by aligning the fixture’s base with the ceiling box. The box holds the wires and supports the fixture. Push the fixture’s wires gently through the box. Match the screw holes on the fixture with those on the box. Hold the fixture steady as you prepare to fasten it.
Tighten Mounting Screws
Use a screwdriver to tighten the screws that hold the fixture. Tighten each screw evenly to keep the fixture level. Avoid over-tightening to prevent damage. Check the fixture’s stability by gently shaking it. It should feel firm and secure without wobbling.
Install Light Bulbs
Choose bulbs that match the fixture’s specifications. Screw each bulb into its socket carefully. Do not force the bulb to avoid breaking it. Make sure the bulbs fit snugly and turn on easily. Proper bulb installation ensures good lighting and safety.
Final Checks
After wiring your ceiling light, performing final checks ensures safety and functionality. These steps confirm your installation works correctly and prevent hazards. Take time to restore power carefully, test the light, and address common issues.
Restore Power
Turn the circuit breaker back on to restore electricity. Avoid switching on the power before finishing all wiring. Use caution when handling the breaker panel. Ensure your hands are dry and tools are insulated. Restoring power is the first step to check your work.
Test The Light
Switch on the ceiling light to verify it works. Watch for any flickering or dimness. Confirm the fixture lights up steadily without buzzing sounds. Test the switch to see if it controls the light properly. Testing ensures your wiring connections are secure and correct.
Troubleshoot Common Issues
If the light does not turn on, check the breaker again. Inspect all wire connections for tightness and proper placement. Loose wires can cause failure or sparks. Use a voltage tester to confirm power reaches the fixture. Replace any faulty bulbs before deeper troubleshooting.
Frequently Asked Questions
What Wires Go Where On A Ceiling Light?
Connect black (hot) ceiling wire to fixture black wire, white (neutral) to white, and bare/green (ground) to fixture ground wire. Secure with wire nuts and always turn off the power before wiring.
Why Are There Three Wires For The Ceiling Light?
Three wires in a ceiling light include hot (black), neutral (white), and ground (green/bare) for power and safety connections.
What Color Wires Go Together For A Ceiling Fan With Light?
For a ceiling fan with light, connect black (fan hot) to black, red (light hot) to red, white (neutral) to white, and green/bare (ground) to green/bare wires. Always turn off the power before wiring and verify the wire functions with a tester.
Does It Matter Which Wire Goes Where On A Light Fixture?
Yes, connecting wires correctly ensures safety and proper function. Match black to black (hot), white to white (neutral), and green/bare to ground wires. Always turn off the power and verify with a tester before wiring. Incorrect connections can cause shocks or damage.
Conclusion
Wiring a ceiling light can be simple with clear steps. Always turn off the power before starting any work. Match wires by color: black to black, white to white, green or bare to ground. Use wire nuts to secure connections tightly.
Double-check all connections before restoring power. Taking your time helps avoid mistakes and ensures safety. With care, you can brighten your room easily and safely.


Pingback: 10 Best Ceiling Light for Home Office (2026 Guide)