How to Frame Canvas Print: The Ultimate DIY Guide to Amazing Wall Art
Canvas prints are now one of the most popular ways of displaying photographs, artwork and digital designs in homes and offices. Unlike traditional paper prints behind glass, canvas prints provide a textured, gallery-like finish that adds depth and warmth to any space. However, many people buy their canvas prints already stretched on bars but unframed, or they buy rolled canvases that require stretching and framing. Knowing how to frame canvas prints yourself can save you hundreds of dollars while giving you complete creative control over the final look.
This comprehensive guide will walk you through everything you need to know about framing canvas prints, including the basics and advanced DIY techniques. Whether you’re a beginner or experienced DIYer, by the end of this 2500+ word post, you will have the confidence to turn any canvas into professional-looking art. We’ll talk about materials, step-by-step directions, tips for different styles, troubleshooting common problems, and even when to go pro. Let’s dig in.
Why Should You Frame Your Canvas Prints?
It’s not just how something looks; it’s about protection, presentation and personalisation. A well-framed canvas print can turn a simple image into a statement piece. Without a frame, the edges of the canvas can fray or collect dust over time. A frame gives structure, protects the edges, and creates a finished border that draws the eye.
Framing is another way you can coordinate with your decor. Contemporary minimalist homes could opt for the floating frames for a sleek shadow effect, while traditional spaces find the ornate wooden mouldings more suitable. Economically, professional framing costs can range from $100 to $500+ per piece, but DIY methods often bring that down to under $50. And the satisfaction of doing the project yourself is invaluable.
Canvas prints are usually printed on cotton or polyester canvas with archival inks, so they are durable. Framing extends the life of your artwork by limiting its exposure to environmental elements such as humidity and UV light (when using protective varnishes).
Understanding Canvas Types: Rolled vs. Stretched
Decide on your type of canvas before framing:
- Pre-stretched canvases: These are already mounted on wooden stretcher bars, ready to frame or hang as is. Gallery wraps have the image wrapped around the sides for a seamless look.
- Rolled Canvases. Printed on flexible material, shipped flat. These have to be stretched on bars and then framed.
The vast majority of guides address the stretched versions, as they are the most common for printing. If yours gets rolled , then the first step is stretching .

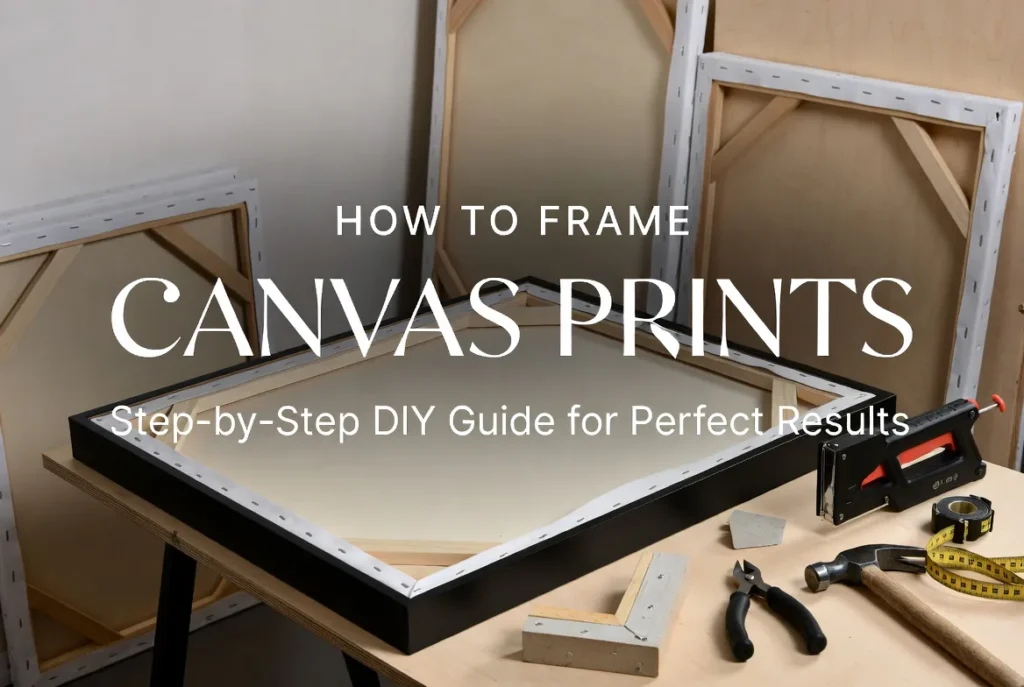
Tools and Materials You Will Need
“Getting the right supplies will make the process go smoothly.” Here is the complete list:
For Stretching (optional):
- Stretcher bars (wood, different lengths; ready-made kits or cut to order)
- Wire-cutters, canvas
- Heavy-duty stapler and staples (1/4” to 3/8”)
- Stapler remover
- Rubber hammer
- Utility knife or scissors
- Measuring tape and square.
For the sake of framing:
- Framing moulding or wood (poplar, pine, oak; 1×2 or 2×4 for simple frames)
- Mitre box or saw for 45 degree cuts
- Wood glue
- Brad nailer or pin nailer
- “Corner clamps”
- Emery paper
- (Optional) Paint / Stain / Varnish
- D-Rings, Wire, Sawtooth Hangers, etc.
- Level and pencil
Further information:
- Protective gauntlet
- Dust mask (N95 or better)
- Backing board or paper, dust cover
- Acid free tape
Budget tip: Use wood from hardware stores or recycle old frames. Amazon and other online suppliers have inexpensive stretcher bar kits.

Total starter cost: $20–$100, depending on size and tools you already have
How to Stretch a Rolled Canvas Print – Step by Step
If your canvas is rolled, stretching is a must for a tight, professional finish.
- Prepare your work area by clearing a large, flat table. Cover with clean paper or plastic to keep out dirt.
- Cut Stretcher Bar: If you are doing a gallery wrap, build a frame slightly smaller than your printed area. Use a square to make 90 degree corners. Fasten with corner braces or screws.
- Turn the canvas to the back. Centre the stretcher frame on top of it, allowing 2 to 3 inches of excess canvas on each side to wrap around.
- Staple one side Start in the middle of any long side. Pull the canvas taut using pliers and staple it. Staple every 2-3 inches working outward. Alternate sides to keep tension even.
- Fold Corners Tuck in crisp 45° hospital corners. Fold the excess canvas neatly and staple it down. Flush tap staples with the mallet.
- Tension Check: Canvas should be drum-tight without waves. If it is loose add more staples or restretch areas.
- Finish Edges: Trim off excess canvas or fold neatly. If you want UV-protection, varnish.
“Standard size will take 30–60 minutes, but the end result is a wrinkle-free surface.

Tips for DIY Canvas Print Framing
Once you stretch it, the options for framing are endless. Common methods include:
Method 1: Simple Float Frame
Floating frames create a modern edge around the canvas that appears to be “floating”.
- Take measurements of the stretched canvas.
- Cutting the outer frame’s moulding pieces at 45 degrees.
- Glue and nail frame together.
- Use offset clips or L-brackets to mount canvas inside so it is inset.
This style works for contemporary art and photography.
Method 2: Gallery Wrap with Frame Trim
Pre-stretched gallery wraps can have a thin trim added:
- Cut strips of 1×1 or 1×2 wood.
- Mitre the corners and glue to the sides of the stretcher bars.
- Paint or stain for contrast.
Method 3: 2×4 Full Wooden Frame
Rustic and budget-friendly:
- Cut 4 pieces of 2×4.
- Use butt or mitred joints.
- Sand it, paint it, then stick it around the canvas.
Method 4: Open-Back or Shadowbox Frame
Good for thicker canvases. The frame is backless, maintaining the canvas look but with borders.
How to Make a Simple Mitred Frame Step by Step – Detailed Guide
Let’s take a look at a pro-looking frame:
- Measure Twice: canvas size + desired overlap (usually 1/8-1/4 inch per side for a fit).
- Cut Moulding: Mitre saw set to 45 degrees. Cut two pairs of equal length. Fit test on canvas.
- Corners to Assemble: Apply glue to mitres. Use corner clamps. Back up with brad nails.
- Sand & Finish: Sand the edges. Use thin coats of stain or paint. Let it dry thoroughly (24 hours for best results).
- Attach to Canvas: Insert the canvas into the frame. Secure with framing points, clips or small screws into the stretcher bars . Do not mar the print.
- Add Hangs Hardware: D-rings to be installed 1/3 down from top Wire thread. Add wall bumpers for protection
- Dust Cover: Adhere some kraft paper or felt to the back for a finished look.
Time: 1-3 hours all up. Practise on scrap wood.
Advanced Tips & Variations
Colour & Finish Options: Black frames add drama; white or natural wood keeps the focus on the image. Metallic finishes bring a touch of luxury. Test samples in your lighting.
Large Canvases: Use cross braces on the stretcher bars to prevent warping. For oversized pieces (>40 inches) consider professional stretching.
Multi-Panel Sets (Triptychs) – Use the same framing on each panel or one continuous frame with dividers. Space evenly hang.
Eco-Friendly Choices: reclaimed wood or sustainable moulding. Avoid VOC laden paints.
Light: Position frames in areas that will receive natural light without fading. Led picture lights are amazing.
Maintenance: Clean with a soft cloth. Keep out of direct sunlight. If canvas sags over time, re-tighten staples (rare with quality materials).
What not to do:
- Ripples are caused by uneven tension.
- Gaps from bad corner joints.
- Canvas ripped by over-stapling.
- Skip measurements.
Debugging:
- Wrinkles? Re-stretch or lightly mist with water (for cotton canvas) and re-dry.
- Bent bars ? Replace or strengthen.
- Loose frame? Add fasteners.
When to Bring in a Pro
You save money doing it yourself. But if it is valuable art, heirlooms or complicated designs (museum mounts, conservation framing, etc.) professionals use acid free materials and precise equipment. Cost varies but will endure.
Design Ideas & Inspiration
Imagine a family picture in a warm oak frame above the mantelpiece. Or abstract digital art in a stylish black float frame in a modern office. Removable systems are easily interchangeable for seasonal prints.
Mix textures: Combine canvas with metal accents or layered mouldings for custom depth.
Final Thoughts: Change Your Space Today
DIY framing of canvas prints is a fun and easy combination of creative and practical work. With basic tools and patience, you can achieve gallery-quality results. Start small, try different styles and you will be framing like a pro in no time.
Remember, the goal is fun and a beautiful end result. Your walls will thank you with customised, attention-grabbing art that tells the story of you.