How to Remove Ceiling Light may seem like an easy task but it can be done safely if the right steps are followed and one is prepared. Knowing how to remove a ceiling light can be useful if you are a homeowner or renter and want to upgrade your lighting, fix a problem, or just clean an old fixture.
This guide will take you through the process, highlight important safety tips and explain common mistakes to avoid. By the end you’ll be confident enough to do this yourself.
Why Remove A Ceiling Light?
There are plenty of reasons to remove a ceiling light. Sometimes the fixture is old, broken or you want to put in a new one. Sometimes you need to paint the ceiling, repair water damage, or access the wiring for electrical upgrades.
You will also have to remove a ceiling light when vacating, as some landlords require original fixtures.
In fact, a 2022 survey by the National Association of Home Builders shows that lighting upgrades are one of the top 5 improvements homeowners make. People do it themselves a lot to save money but safety should always be the top priority.
Tools & Materials Needed
Have your tools ready before you begin. Making everything close at hand will make the process smoother and safer.
- Flat and Phillips screwdrivers
- A voltage tester or multimeter
- Sturdy step stool or ladder.
- Gloves (recommended but not required)
- Wire cutters Wire caps (if disconnecting wires)
- Flashlight (for dark rooms or attics)
If you plan to re-install the fixture at a later date, keep a small container for screws and parts.
Safety First: Electrical Safety
Be always cautious when working with electricity. There are about 30,000 non-fatal electrical shock accidents each year in the US (National Safety Council). Here are some steps to stay safe:
- Turn the power off at the circuit breaker—not just at the wall switch. Find the right circuit breaker and turn it off.
- Check for power with a voltage tester. Touch tester to wires. No light or beep, power off.
- Work during the day or with a torch. Never work in the dark.
- “Keep your hands dry and stand on a dry, stable surface.
Many beginners don’t bother testing the power, assuming the switch will do the trick. Always check the fixture. Sometimes the wires are live even with the switch off.
Ceiling Light Types and Fixture Variations
There are different styles of ceiling lights. The way to remove depends on the type of the object.
| Type | General features | Hard to Remove |
|---|---|---|
| Flush Mount | Flush with ceiling screws or clips | Simple |
| Semi Flush Mount | Gap small, stem or base showing | Medium |
| The chandelier | Hanging, many wires, chain / rod | Tough |
| Recessed Lighting | hidden housing clips or springs | Medium |
| Lighting Track | Multiple lights mounted on rail | Medium |
Flush or semi-flush mounts are common in most homes. Chandeliers and recessed lights need extra care because of weight and wiring.

Step-by-step Removal Guide
1. Make the area ready
Delicate objects and clear furniture under the light fixture. Place a drop cloth and catch any dust or screws. Position your ladder securely. Never stand on the top step.
2. Power Down
Head to your electrical panel. Switch off the breaker for the light circuit. Go back to the room and check the fixture with a voltage tester to see if it has power.
3. Take Off The Cover Or Bulbs
Most ceiling lights have a cover that is attached with screws, clips or a centre nut. Carefully loosen these; some covers just turn off, some need a screwdriver. Take out bulbs for easier handling.
Tip: If the cover is stuck, try wiggling it gently from side-to-side. Do not press too hard, or the glass may shatter.
4. Remove the screw. The Fixture
Check for screws on the bottom or side. Many flush mounts use screws hidden under the cover. For chandeliers, look for nuts at the canopy (where the fixture meets the ceiling) . Hold the fixture with one hand and unscrew it.
Non-obvious insight: Some fixtures have screws that are hidden under decorative caps. If you can’t find screws, look closely for caps that pop off.
5. Disconnect The Cables
When loose, lower the fixture carefully. There are wires connected with wire nuts or caps. Again confirm power is off before touching.
- Separate wires. Unscrew wire nuts.
- Use wire cutters if wires are stiff or tangled.
- If the fixture is heavy, have someone hold it while you unhook wires.
Tip: Photograph the wiring before you take it off. This helps with re-installation later.
6. Remove The Mounting Bracket (if necessary)
Some fixtures have a metal bracket that attaches to the ceiling box. Take it out with a screwdriver. If you are installing a new light, you can keep the bracket if it matches.
7. Check The Ceiling Box
Look for damage or loose wires and check the box. See burnt marks or frayed wires, call an electrician. The usual ceiling box is rated for 50 pounds; anything heavier needs additional support.
Special Cases: Removing Stubborn or Heavy Fixtures
Chandeliers of Crystal
Chandeliers can weigh more than 20 pounds. 2 people is a must . . . one to hold and one to disconnect wires . Lower gently so as not to hit walls or furniture.
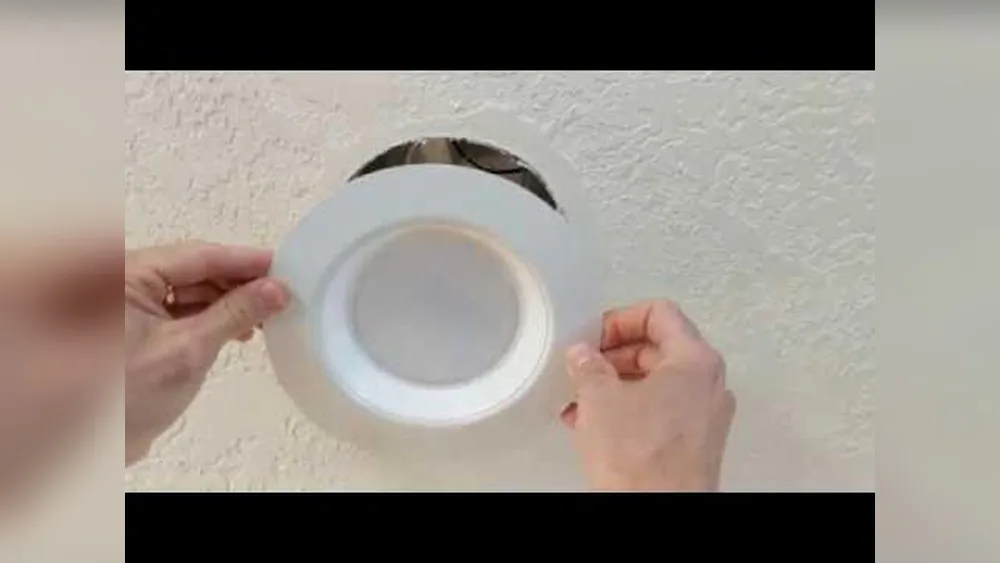
Recessed Lighting
These are often used with spring clips. Pull down gently and squeeze to open clips. Some models have a twist lock mechanism.
Lighting Track
Lower the rail from the ceiling and disconnect each light head. Note the wire connections – track systems can be multi-circuits.
Common Errors and How to Avoid Them
Lots of beginners get into trouble. Here are some errors to be aware of:
- Forget to turn off power – Always check with a tester.
- Lost screws or parts – Keep them in a container.
- ceiling paint damage – press gently and do not scrape
- Breaking glass covers – Take with both hands and move slowly.
- Do not label wires – Take pictures or tape for easy reinstallation.
There are people who rush, thinking it’s an easy job. No need to rush, most accidents happen when people are rushing or skipping steps.
What To Do After Extraction
When the lights go out you might want to:
- Replace with new fixture
- Fill holes or paint the ceiling
- Replacement of old wiring
If you’ve left the ceiling box exposed, use wire nuts and tape to cover the wires for safety. Never leave live wires dangling.
/convert-ceiling-light-to-recessed-light-p2-1821561-hero-1fd056c75f4c453b911a9ab5ea211d71.jpg)
Data: How long does it take to remove?
Here’s a quick comparison of the time taken for different fixtures:
| Type of fixture. | Time For Removal Estimates | Suggested Helper |
|---|---|---|
| Flush Mount | 10-20 minutes | Nah. |
| Semi Flush Mount | 15-25 minutes | Nah. |
| The chandelier | 45-25 minutes | Yes |
| Recessed Lighting | 15-30 minutes | Nah. |
| Lighting Track | 20-40 Minutes | Yes |
Most standard fixtures come off fast. Because of the weight and wiring, chandeliers and track systems take longer.
Practical Easy Removal Tips For
- Wear gloves to protect your hands from sharp edges and to avoid fingerprints on glass.
- Have a torch handy if your room goes dark when the power is off.
- To avoid screws falling out use a magnetic screwdriver.
- Spray a little WD-40 on stuck screws (but don’t spray on wires) if your fixture is old.
- Get help with heavy or awkward fixtures.
Non-obvious insight: For homes built prior to 1970, ceiling boxes might be smaller and not rated for heavy lights. Always verify weight ratings prior to installing new fixtures.
Environmental And Recycling Considerations
Many old light fixtures can be reused or recycled. Most recycling centres will accept glass and metal parts. If your fixture contains old bulbs (especially fluorescent), take them to a hazardous waste collection centre. According to the EPA, more than 600 million fluorescent bulbs end up in landfills each year in the U.S. But only a small fraction of them are recycled properly.
Don’t throw fixtures in regular trash. In many cities, electrical items have special collection days.
Troubleshooting: What to Do If Things Go Wrong
If you have problems:
- Stubborn screws: Apply penetrating oil or tap gently with a screwdriver.
- Painted-over fixtures: Cut around the base with a utility knife to loosen the paint.
- Broken wires: Stop and call a licenced electrician.
Never force parts or cut wires unless you know they are not live. “If you don’t know, ask for help.

DIY Removal Vs Professional Assistance Comparison
A lot of people wonder if they should do it themselves or get a pro to do it. Here’s a brief comparison:
| Methods | Average Cost. | Safety Risk | Skills Required |
|---|---|---|---|
| Do it yourself | $0-$40 (tools only) | Medium | Simple |
| Career | $75-$200 (per light) | Low: | No. |
DIY is cheaper but if you aren’t feeling confident or the fixture is heavy it’s safer to call a pro.
For more advanced electrical safety tips, you can visit Family Handyman.
Questions and Answers
How Can I Tell If My Ceiling Box Is Rated For A Heavy Fixture?
Look for a box made of metal or plastic screwed to a ceiling joist. If a box is suitable for heavy fixtures it will be labelled or stamped as such. When in doubt, consult an electrician.
What Should I Do If I Discover Old Or Frayed Wires?
Stop! Don’t touch the wires. Older wiring can be hazardous. Call a licenced electrician to inspect and repair all broken wires.
How to Remove a Ceiling Light Without Turning Off Power?
Never try to remove a ceiling light while the power is on. Even with the switch off, wires can still be ‘live’. Turn the breaker off every time . Test with a voltage tester .
Can You Reuse A Light Fixture Once Removed?
Yes most fixtures can be reused if not damaged. Wipe them off, and put them away safely. If you plan to sell or give it away, keep all the parts together and label the wiring.
How To Dispose Of Old Bulbs?
Incandescent bulbs can go in the regular trash. Fluorescent and LED bulbs must be recycled at a hazardous waste centre or special recycling facility. Review your city’s guidelines
Changing a ceiling light is an easy do-it-yourself project if you take the proper steps and safety precautions. With the right tools, preparation, and know what kind of fixture you have you can avoid common mistakes and get the job done. If you ever have any doubts or electrical problems, don’t hesitate to call in a professional.
You’ll have a safer, brighter home with careful work.