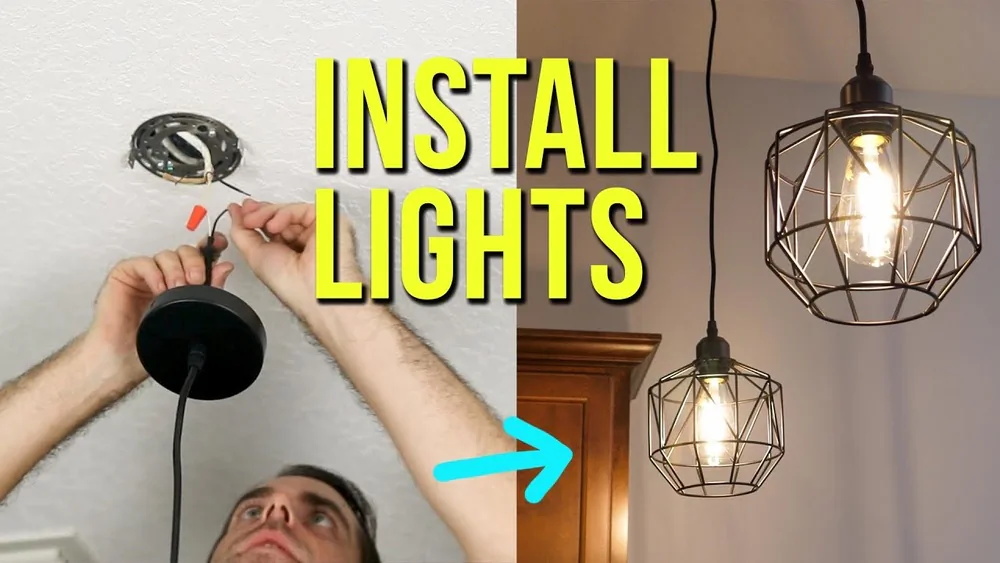
Thinking about how to fit ceiling light in your home? Whether you want to brighten up a room or replace an old fixture, knowing the right steps can save you time, money, and frustration.
You might wonder if this is a job you can tackle yourself or if you need professional help. This guide will walk you through the essential tips, safety advice, and clear instructions to help you fit a ceiling light confidently.
Keep reading, and you’ll learn how to transform your space with the perfect lighting—without risking shocks, damage, or costly mistakes. Your journey to a well-lit room starts here!
Tools And Materials
Fitting a ceiling light requires the right tools and materials to ensure a smooth and safe installation. Having everything prepared before you start saves time and avoids frustration. This section covers the basic tools, choosing the correct light fixture, and the necessary safety gear for your project.
Essential Tools
Gather tools like a screwdriver, wire stripper, voltage tester, and drill. A ladder helps reach the ceiling safely. Pliers and electrical tape come in handy for securing wires. Use a pencil to mark spots for drilling or fixing the fixture. These basic tools cover most ceiling light installations.
Choosing The Right Fixture
Select a fixture that fits your room size and style. Check the fixture’s weight to ensure the ceiling can support it. Consider the bulb type and brightness for your lighting needs. Fixtures designed for easy installation reduce complexity. Make sure the fixture matches your electrical box size and wiring.
Safety Gear
Wear safety glasses to protect your eyes from dust and debris. Use insulated gloves to avoid electric shocks. Turn off the power at the circuit breaker before starting any work. Use a voltage tester to confirm the power is off. Having a flashlight nearby helps when working in dim areas.
Preparing The Area
Preparing the area is the first step to fit a ceiling light safely and smoothly. This phase ensures you avoid accidents and have easy access to all parts. Taking time here saves effort later.
Turning Off Power
Always switch off the power at the main circuit breaker. Do not rely on the light switch alone. Use a voltage tester to confirm the power is off. This step prevents electric shocks and accidents.
Clearing The Workspace
Remove furniture and objects from below the light fixture. Cover the floor with a drop cloth to catch dust and debris. Clear space helps you move freely and keeps your area clean.
Checking Existing Wiring
Inspect the wires for damage or wear before installation. Look for frayed or exposed wires that may need repair. Confirm that the wiring matches the new light fixture’s requirements. Safe wiring is key to a secure installation.
Removing Old Fixtures
Removing old ceiling light fixtures is the first step in fitting a new light. This process prepares the space and ensures safety. Follow each step carefully to avoid damage or injury. Always switch off the power before starting.
Unscrewing The Fixture
Begin by locating the screws holding the fixture to the ceiling. Use a screwdriver that fits well to avoid stripping the screws. Turn the screws counterclockwise to remove them. Support the fixture with one hand while unscrewing to prevent it from falling. Once loose, gently pull the fixture away from the ceiling.
Disconnecting Wires
After removing the fixture, you will see the wires connecting it to the ceiling. Use a voltage tester to confirm the power is off. Carefully untwist wire connectors or remove screws holding the wires. Separate the fixture wires from the ceiling wires. Keep track of how the wires are connected for the new installation.
Inspecting The Ceiling Box
Look inside the ceiling box for any signs of damage or wear. Check for loose wires, cracks, or rust. Ensure the box is securely fastened to the ceiling joist. A stable box is essential to support the new fixture safely. Replace or repair the box if it shows damage before fitting the new light.
Wiring Basics
Understanding wiring basics is essential before fitting a ceiling light. It ensures a safe and secure installation. Wiring involves connecting the light fixture to your home’s electrical system. Each step needs careful attention to avoid hazards. Learning about wires, colors, and connections helps make the process smoother.
Identifying Wires
First, locate the wires in your ceiling box. Usually, you will find three types: live, neutral, and earth. The live wire carries electricity to the light. The neutral wire completes the circuit back to the power source. The earth wire protects against electrical shocks. Use a voltage tester to confirm the live wire. Always switch off the power at the breaker before touching wires.
Matching Wire Colors
Matching wire colors is crucial for correct wiring. In most homes, the live wire is brown or red. The neutral wire is blue or black. The earth wire is green or green-yellow striped. Connect wires of the same color together. This step ensures the light works properly and safely. Check local wiring codes as colors can vary by country.
Securing Wire Connections
Secure wire connections tightly to avoid loose contacts. Use wire connectors or terminal blocks to join wires. Twist wires together before capping with connectors. Make sure no bare wire is exposed. Tuck wires neatly into the ceiling box. Loose wires can cause sparks or short circuits. Double-check all connections before restoring power.
Installing The New Light
Installing a new ceiling light is a straightforward task if done carefully. This process involves securing the fixture, connecting electrical wires, and attaching the light to the ceiling. Follow each step to ensure a safe and stable installation.
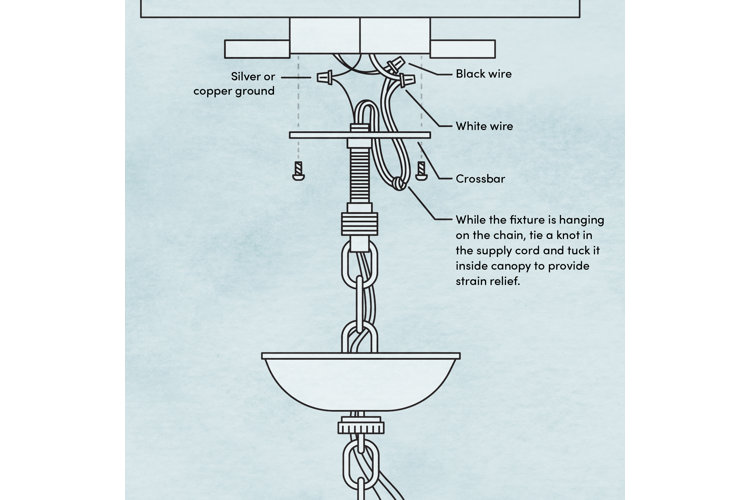
Mounting The Bracket
Start by fixing the mounting bracket to the ceiling box. Use screws that fit the box holes tightly. Ensure the bracket is level and secure to support the light fixture’s weight. Tighten the screws firmly but avoid over-tightening to prevent damage.
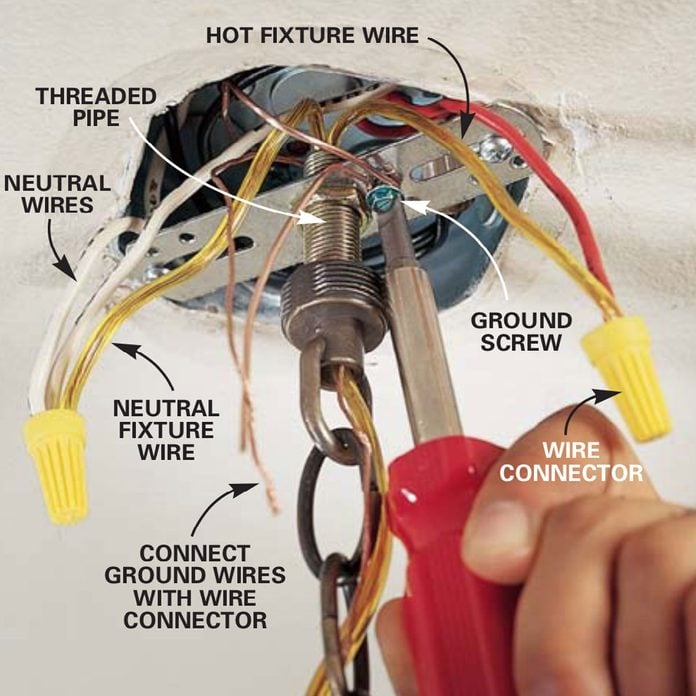
Connecting The Wires
Turn off the power at the circuit breaker before handling wires. Match the fixture wires to the ceiling wires by color: black to black (live), white to white (neutral), and green or bare copper to ground. Use wire nuts to twist wires together securely. Wrap electrical tape around the nuts for extra safety.
Attaching The Fixture
Align the light fixture with the mounted bracket. Insert screws or hooks through the fixture base into the bracket. Tighten all screws to keep the fixture stable. Check that the light does not wobble or feel loose before restoring power.
Testing And Finishing
Testing and finishing your ceiling light installation is the final step. It ensures the light works correctly and is safely secured. This stage helps catch any problems early. Proper testing protects your home and gives you peace of mind.
Restoring Power
Turn the main power back on at the breaker box. Make sure no tools or wires touch before switching the power. Restore power slowly to avoid any sparks or shocks. Safety is the top priority during this step.
Checking The Light Operation
Flip the light switch to test the fixture. The light should turn on without flickering or buzzing. Check all bulbs to confirm they light up properly. If the light does not work, turn off power and recheck wiring connections.
Adjusting And Securing
Once the light works, adjust its position if needed. Tighten screws and fasteners to secure the fixture firmly. Ensure the light is level and stable to prevent future issues. Proper finishing keeps your ceiling light safe and looking great.
When To Hire An Electrician
Knowing when to hire an electrician is key to safe and effective ceiling light installation. Electrical work can be risky without the right skills and tools. Some jobs require professional knowledge to prevent hazards like shocks or fires. Trusting an expert saves time and avoids costly mistakes.
New Wiring Needs
Installing a ceiling light in a place without existing wiring calls for an electrician. Running new wires means working inside walls or ceilings. This work demands technical skills and proper tools. Mistakes can cause electrical faults or fire risks. Professionals ensure wiring meets safety standards and local codes.
Heavy Or Complex Fixtures
Heavy ceiling lights need strong support and careful wiring. Complex fixtures often have special connections or multiple bulbs. Improper installation can damage the fixture or ceiling. An electrician knows how to secure these lights safely. They also handle unusual wiring setups correctly.
Permits And Safety Concerns
Certain electrical jobs require permits from local authorities. Hiring an electrician ensures all permits are in place. They understand building codes and safety regulations. Professionals reduce risks of accidents and legal problems. Licensed electricians provide work that passes inspections easily.

Common Mistakes To Avoid
Installing a ceiling light can brighten any room, but mistakes can cause problems. Avoiding common errors saves time, money, and frustration. Safety is the top priority during installation. Pay attention to details and follow instructions carefully. Here are the most frequent mistakes to avoid when fitting a ceiling light.
Ignoring Power Off
Never start without turning off the power at the circuit breaker. Live wires are dangerous and can cause electric shock. Always test with a voltage tester to confirm the power is off. Skipping this step risks injury and damage to the fixture.
Poor Wire Connections
Loose or incorrect wiring causes flickering lights or short circuits. Connect wires firmly using wire nuts or connectors. Match wire colors correctly: usually, black or red for live, white for neutral, and green or bare for ground. Double-check all connections before covering them.
Overloading Fixtures
Using bulbs with wattage higher than the fixture’s limit can cause overheating and fire hazards. Check the maximum wattage rating on your ceiling light. Use bulbs within the recommended range to ensure safety and prolong fixture life.
Safety Tips
Safety is the top priority when fitting a ceiling light. Taking simple precautions prevents accidents and injuries. Follow these key safety tips before and during the installation. A careful approach ensures a smooth and secure process.
Using Insulated Tools
Use insulated tools designed for electrical work. They protect you from electric shocks. Never use regular tools when handling wiring. Insulated screwdrivers and pliers reduce the risk of accidents. Check tools for damage before starting your work.
Double-Checking Power
Always turn off the power at the breaker box. Verify the power is off using a voltage tester. Test the wires to make sure no electricity flows. This step avoids dangerous shocks during installation. Never skip this check, even if you think the power is off.
Working With A Partner
Have a partner assist you during the fitting. They can hold the light fixture while you work. Another set of eyes helps spot potential hazards. A partner can also call for help if needed. Working together makes the job safer and easier.
Frequently Asked Questions
Can You Fit A Ceiling Light Yourself?
You can fit a ceiling light yourself if replacing a similar fixture with existing wiring. Always turn off power first. For new wiring, heavy fixtures, or safety doubts, hire a licensed electrician to avoid risks and ensure compliance.
Do I Need An Electrician To Install A Ceiling Light?
You need an electrician to install new wiring or heavy fixtures. DIY is possible for simple replacements if you understand wiring and safety. Hiring a pro ensures safety, permits, and prevents costly mistakes or insurance issues.
What Are Common Mistakes When Installing A Light?
Common mistakes include ignoring power shutoff, incorrect wiring connections, using wrong fixtures, poor mounting support, and skipping safety checks.
How Do You Attach A Light Fixture To The Ceiling?
Turn off the power at the breaker. Secure the mounting bracket to the ceiling box. Connect wires by matching colors. Attach the fixture to the bracket. Restore power and test the light.
Conclusion
Fitting a ceiling light can improve any room’s look and feel. Always turn off the power before starting any electrical work. Use the right tools and follow safety steps carefully. Simple swaps are doable for those with basic skills. Call an electrician for new wiring or heavy fixtures.
Safety should always come first to avoid accidents. Taking your time ensures a neat and secure installation. Brighten your space with confidence by following these tips.


Pingback: Best Lights for Kitchen Ceilings 2026: Top Picks for Every Style - Home Decor