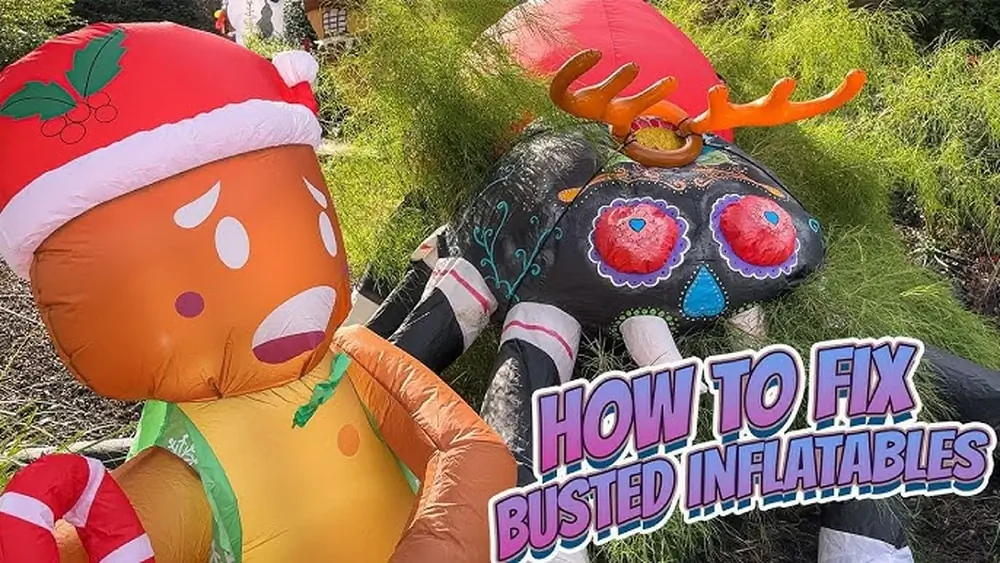
How to Fix Inflatable Decorations losing their charm because of leaks, tears, or blower problems? You don’t have to toss them out or buy new ones just yet.
Whether it’s a small puncture or a stubborn fan that won’t start, you can fix your inflatables quickly and easily with the right tips. Imagine having your favorite holiday or party decorations looking brand new again, saving you money and stress.
In this guide, you’ll learn simple, step-by-step solutions to spot the problem, patch up leaks, and get your inflatable decorations puffed up and ready to impress. Keep reading, and you’ll be the go-to expert for fixing inflatables in no time!
Common Inflatable Issues
Inflatable decorations add fun and charm to any event or holiday. They are lightweight and easy to use. Yet, they can face common problems that stop them from working well. Knowing these issues helps fix them quickly. This keeps your decorations looking great and working longer.
Leaks And Holes
Leaks and holes are the most frequent problems. Sharp objects or rough surfaces cause small punctures. These let air escape, making the inflatable lose shape. To find leaks, listen for hissing sounds or use soapy water. Bubbles will form at the leak spot. Patch kits with adhesive and vinyl patches work well. Clean the area, apply the patch, and press firmly. Let it dry before inflating again.
Fan And Motor Problems
The fan and motor inflate the decoration. Dirt, dust, or moisture can block the fan blades. This stops the inflatable from filling with air. Check the fan for debris and clean it carefully. If the motor does not run, test the power source and connections. Sometimes, the motor may need replacement if it is burned out. Always unplug before inspecting the fan and motor.
Electrical Fuse Failures
Many inflatables use electrical fuses to protect the motor. A blown fuse means no power to the fan. Locate the fuse box near the plug or cord. Open the fuse cover carefully. Replace the blown fuse with one of the same type and rating. Using the wrong fuse can cause damage or fire risk. Test the inflatable after replacing the fuse to ensure it works.
Seam Splits And Tears
Seams can split or tear from stress or rough handling. Air escapes through these openings, deflating the decoration. Use heavy-duty repair tape or a vinyl patch kit for seams. Align the torn edges and apply the patch on the inside if possible. Press firmly and allow time to dry. Avoid inflating the decoration too tightly to protect seams.
Finding Leaks
Finding leaks in inflatable decorations is the first step to fixing them. Air escapes through tiny holes or tears, causing the decoration to deflate. Detecting the exact spot of the leak can save time and effort during repair. Below are simple and effective methods to find leaks quickly and accurately.
Soapy Water Bubble Test
Mix water with a few drops of dish soap in a spray bottle. Spray the solution on the inflatable surface. Look closely for bubbles forming on the material. Bubbles indicate air escaping through a hole. Mark the spot with a waterproof marker. This test works well on dry and inflated decorations.
Listening For Air Hissing
Inflate the decoration fully and stay in a quiet area. Bring your ear close to the inflatable surface. Listen carefully for a faint hissing sound. The hissing noise shows where air leaks out. Moving slowly helps pinpoint the exact leak location. Use a flashlight to check hidden or shaded parts.
Water Dunk Test
Partially inflate the decoration and submerge small sections in water. Watch for air bubbles rising from the surface. Bubbles reveal the leak’s position underwater. This test works best for small or medium-sized inflatables. Dry the inflatable completely after the test before fixing the leak.
Preparing For Repair
Preparing for repair is the first step to fix your inflatable decorations. It helps ensure the patch sticks well and lasts longer. Take your time to get the surface ready before applying any glue or patches. This section shows how to clean, dry, and gather tools for a smooth repair job.
Cleaning The Damaged Area
Start by removing dirt and dust from the tear or hole. Use a soft cloth or sponge with mild soap and water. Gently wipe the area to avoid making the damage worse. Avoid harsh chemicals that can weaken the material. Clean surfaces help the glue bond tightly.
Drying And Surface Prep
Dry the cleaned area completely using a towel or let it air dry. Moisture can stop the patch from sticking properly. Check that the surface feels smooth and free of wrinkles. If the material is crinkled, flatten it carefully. A dry, smooth surface gives the best repair results.
Tools And Materials Needed
Gather all tools before you start fixing your inflatable. You will need patch material, adhesive glue, scissors, and a clean cloth. Some repairs may require a heat source like a hair dryer for better bonding. Having everything ready saves time and avoids frustration during repair.

Credit: www.youtube.com
Patch Repairs
Patch repairs are the most common way to fix holes or tears in inflatable decorations. These repairs help restore the shape and keep the air inside. A proper patch can make your decoration last longer. The process is simple and affordable.
Choosing the right patch is key. The patch must match the material of the inflatable. It should be durable and flexible. Vinyl or PVC patches often work best for most decorations. Avoid patches that are too thin or too thick. The patch must cover the damage completely.
Choosing The Right Patch
Select a patch made of vinyl or PVC for strong repair. Check the size to cover the hole with some extra space. Use a patch kit designed for inflatables if possible. Some stores sell repair kits with adhesive and patches. Make sure the patch fits the shape of your decoration.
Cutting And Shaping Patches
Cut the patch into a shape that fits the tear. Rounded edges prevent peeling and lifting over time. Use scissors to make smooth, clean cuts. Avoid sharp corners that can catch and rip again. The patch should be slightly larger than the damage. Trim any excess after applying if needed.
Applying And Securing Patches
Clean the area around the tear with soap and water. Let it dry completely before patching. Apply adhesive evenly on the patch or on the inflatable surface. Press the patch firmly onto the damaged area. Use a roller or your hand to smooth out bubbles. Let the repair dry for several hours before inflating. This ensures a strong, air-tight seal.
Using Glue And Sealants
Using glue and sealants is a practical way to fix inflatable decorations. They stop air leaks and restore the shape quickly. Choosing the right product depends on the size and type of damage. Small holes need different solutions than larger tears. Proper application ensures a strong, lasting repair. Below are some of the best options for sealing your inflatables.
Silicone For Small Holes
Silicone works well on tiny punctures in the inflatable. It creates a flexible, airtight seal that lasts through use. Apply a thin layer over the hole, smoothing it out carefully. Let it dry completely before inflating the decoration. Silicone is waterproof and resists weather damage, perfect for outdoor use. Avoid using too much, as it can add weight and stiffness.
Specialized Inflatable Glues
Specialized glues are designed specifically for inflatable materials. These adhesives bond quickly and remain flexible after drying. Clean the area around the tear before applying the glue. Press the edges together and hold until it sets. These glues are ideal for medium-sized rips and can handle repeated inflation. Follow the manufacturer’s instructions for best results and safety.
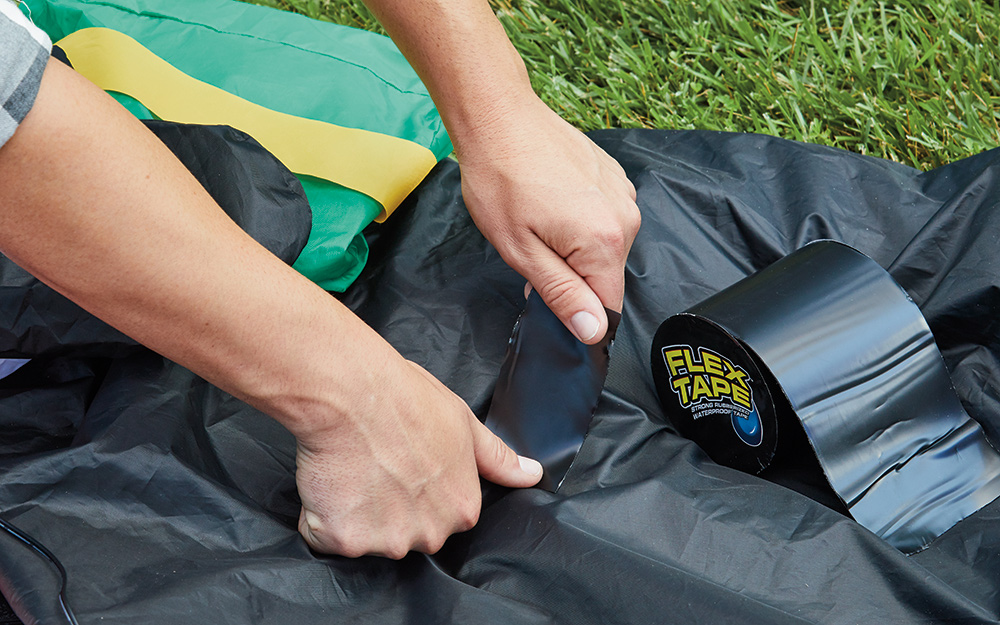
Waterproof Tape Options
Waterproof tape offers a quick fix for various inflatable damage. Choose a tape made for outdoor use with strong adhesive. Cut a patch larger than the hole or tear. Apply it smoothly, avoiding air bubbles under the tape. This method works well for temporary repairs or when glue is not available. Some tapes are transparent, keeping the decoration looking neat.
Fixing Seams And Tears
Fixing seams and tears is essential for keeping inflatable decorations in good shape. Small holes or ripped seams can cause air leaks. These leaks stop the inflatable from staying firm and looking great. Quick repairs extend the life of your decorations and save money.
Sewing Techniques
Sewing is a reliable way to fix torn seams on inflatables. Use a strong needle designed for heavy fabrics. Choose nylon or polyester thread for durability. Stitch carefully along the torn edge, making small, tight stitches. Avoid big gaps to prevent air from escaping. Double stitching adds extra strength to the repair.
Using Heavy-duty Adhesives
Heavy-duty adhesives work well on small tears or holes. Look for glue made for vinyl or plastic materials. Clean the area around the tear before applying glue. Press the torn edges together firmly. Hold until the glue sets, usually a few minutes. This method is quick and prevents air leaks effectively.
Reinforcing Weak Spots
Weak spots often appear near seams or folds. Reinforce these areas to stop future tears. Use patch kits designed for inflatables or vinyl materials. Cut a patch slightly larger than the weak spot. Apply adhesive to both the patch and decoration. Press the patch firmly and let it dry completely. Reinforcing weak spots helps keep decorations inflated longer.
Fan And Electrical Repairs
Fan and electrical issues often stop inflatable decorations from working. Fixing these problems can bring your decoration back to life quickly. Most inflatables use a small fan powered by electricity. This fan keeps the decoration inflated and looking great.
Simple electrical faults like blown fuses or broken cords often cause failure. Understanding how to check and fix these parts saves time and money. Here are the key steps to repair fan and electrical problems in your inflatable decorations.
Checking And Replacing Fuses
Locate the fuse near the plug or where the cord meets the inflatable. Open the fuse holder carefully to access the fuse inside. Look for a thin wire inside the fuse; if it is broken, the fuse is blown. Replace it with a fuse of the same size and rating. Avoid using a fuse with a higher rating, as it can cause damage. Test the inflatable after replacing the fuse to see if it works.
Fan Motor Troubleshooting
Check if the fan blades spin freely by hand. If the fan is stuck, clear any debris or dirt blocking it. Listen for unusual sounds when the fan runs. A noisy or silent fan may indicate a motor problem. Replace the fan motor if it does not start or runs weakly. Use a compatible motor designed for your inflatable model.
Cord And Plug Inspection
Examine the power cord for cuts, frays, or exposed wires. Damaged cords can cause shorts or no power to the fan. Inspect the plug for bent or broken prongs. Clean any dirt or corrosion on the plug contacts. Replace the entire cord or plug if damage is visible. Always unplug the inflatable before inspecting or repairing cords.

Credit: www.reddit.com
When To Seek Professionals
Knowing when to call a professional can save your inflatable decoration. Some damages need expert care to ensure safety and durability. Handling big or complex problems alone may cause more harm. Professionals have the right tools and skills for tough repairs.
Large Tears And Complex Damage
Big tears are hard to fix at home. The damage may go deep into the material. Professionals can patch these tears securely. They use strong adhesives and special techniques. This keeps your decoration looking good and lasting longer.
Specialized Material Repairs
Some inflatables use unique materials or coatings. These require specific repair methods. Professionals understand these materials well. They can fix leaks without damaging the surface. This keeps the decoration safe and functional.
Commercial Inflatable Safety
Commercial inflatables must follow strict safety rules. Faulty repairs can be dangerous in public spaces. Experts ensure repairs meet all safety standards. This protects users and avoids legal issues. Professional repair is best for business inflatables.
Maintenance Tips
Maintaining inflatable decorations keeps them looking great and lasting longer. Simple care steps prevent tears and malfunctions. Follow these tips to protect your inflatables from damage and keep them ready for each season.
Proper Storage Practices
Store inflatables in a dry, cool place. Avoid areas with sharp objects or heavy items. Fold them gently to prevent creases and stress points. Use a large bag or box to keep dust and moisture away. Proper storage stops mold and material breakdown.
Regular Cleaning
Clean inflatables after every use. Use a soft cloth with mild soap and water. Avoid harsh chemicals that can weaken the fabric. Rinse thoroughly and let dry completely before storing. Clean surfaces reduce dirt buildup and stop mold growth.
Preventing Future Damage
Check inflatables for small holes or weak spots before each use. Patch tiny tears early to avoid bigger rips. Secure inflatables firmly to the ground to prevent wind damage. Keep them away from sharp edges and pets. Proper care extends the life of your decorations.
Credit: www.homedepot.com
Frequently Asked Questions
Why Is My Inflatable Decoration Not Working?
Check the power source and fuse near the cord plug. Inspect for fan motor issues or punctures causing air leaks. Clean and repair small tears with patches or glue. Ensure the inflatable is fully unfolded and free of obstructions for proper inflation.
Can Inflatables Be Repaired?
Yes, inflatables can be repaired using patch kits, specialized glue, or professional services for larger damage. Clean the area, find leaks, and apply patches or sealants to fix holes and tears effectively.
Can You Use Gorilla Tape To Repair An Inflatable?
Yes, you can use Gorilla Tape for temporary inflatable repairs. It seals small punctures but may not hold long-term. For best results, use patches or repair kits designed for inflatables.
What Glue To Use On Inflatables?
Use vinyl adhesive or specialized inflatable repair glue for strong, waterproof seals on inflatables. Avoid superglue or regular craft glue.
Conclusion
Fixing inflatable decorations is easier than many think. Small tears need simple patches or glue. Check the electrical parts if the inflatable won’t inflate. Regular care extends the life of your decorations. Quick repairs save money and keep your decor looking great.
Keep tools handy for fast fixes during the season. Enjoy your festive decorations without worry or stress. A little effort goes a long way in repair. Stay prepared, and your inflatables will bring joy year after year.


Pingback: How to Graduation Cap Decoration- Creative 10 Ideas and Easy Tips
Pingback: How to Decorate Lounge Room- Best 10 Ideas for a Cozy