
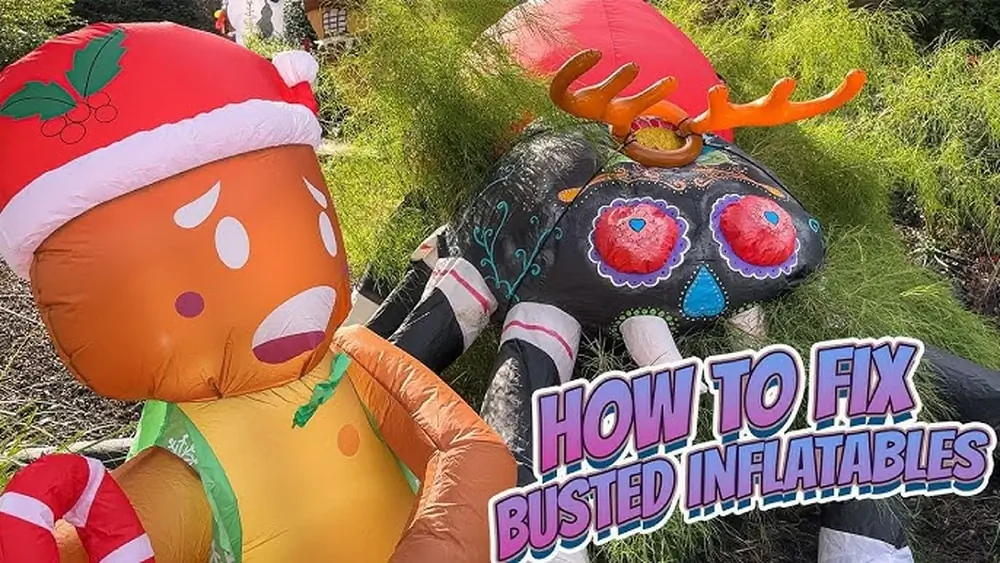
How to Fix Blow-Up Decorations: add fun and charm to any celebration, but what happens when they lose air or get a tear? You might feel frustrated seeing your favorite inflatable droop or deflate.
Don’t worry—fixing blow-up decorations is easier than you think. Whether it’s a small hole or a seam split, you can restore your inflatable’s shape and keep your party looking great. In this guide, you’ll discover simple, step-by-step tips to repair your blow-up decorations quickly and effectively.
Keep reading to save your inflatables and enjoy your celebrations without a hitch!
Common Blow Up Damage
Inflatable decorations add fun and charm to any event. They face wear and tear from weather and use. Knowing common damage types helps you fix them quickly. This saves money and extends their life. Below are typical problems and how to spot them.
Punctures And Holes
Punctures and holes are the most frequent issues. They cause air to leak out and deflate the decoration. Sharp objects or rough surfaces usually cause these tears. Small holes may not be easy to see but cause slow leaks. Fixing them requires cleaning the area and applying a patch. Use a repair kit with adhesive patches for best results.
Seam Splits
Seam splits happen when the stitching or bonding fails. Stress or excessive pressure weakens seams over time. Look for gaps or openings along the decoration’s joints. Seam splits cause large air loss and affect stability. Repair by gluing the split or sewing it carefully. Use a strong adhesive or thread made for inflatables. Reinforcing with a patch may prevent further damage.
Fan And Blower Issues
Fans and blowers keep inflatables full of air. They can stop working due to dirt, blockage, or motor failure. A broken fan causes the decoration to sag or collapse. Check for unusual noises or no airflow. Clean the fan blades and remove any debris. If the blower is faulty, replace it with a compatible model. Proper care keeps blow-ups inflated longer and safer.
Tools And Materials
Fixing blow-up decorations requires the right tools and materials. Using proper supplies makes repairs easier and more durable. Gathering these items before starting saves time and effort. Below are key tools and materials for fixing inflatables.
Inflatable Repair Kits
Inflatable repair kits come with essential items for quick fixes. They usually include patches and adhesive designed for inflatables. These kits work well for small to medium holes or tears. Most kits have easy-to-follow instructions for use. Using a repair kit ensures a strong and lasting seal.
Adhesives And Patches
Adhesives help bond patches to damaged areas securely. Choose adhesives made for vinyl or plastic materials. Some adhesives require drying time, while others are instant. Patches come in various shapes and sizes to cover different holes. Cutting patches slightly larger than the damage improves sealing.
Cleaning Supplies
Cleaning supplies prepare the damaged area for repair. Use rubbing alcohol to remove dirt and oils from the surface. A clean, dry surface helps adhesives stick better. Soft cloths or paper towels work well for cleaning and drying. Avoid using harsh chemicals that can damage the inflatable.
Preparing The Surface
Preparing the surface is the first step to fix blow-up decorations properly. A clean and well-prepared area helps the patch stick firmly. This makes the repair last longer and work better. Follow simple steps to get the surface ready before applying any patch or adhesive.
Cleaning The Area
Start by removing dirt, dust, and grease from the damaged spot. Use a soft cloth and mild soap with water. Wipe the area gently to avoid making the hole bigger. For stubborn grease, use isopropyl alcohol on a cotton ball. This removes oils that stop glue from sticking well.
Drying And Sanitizing
After cleaning, dry the area completely. Use a dry cloth or let it air dry. Make sure no moisture stays on the surface. Moisture can weaken the patch’s hold. You can also use a small amount of rubbing alcohol to sanitize. This kills germs and helps the glue bond better.
Surface Roughening
Lightly roughen the surface around the hole with fine sandpaper. This step is optional but highly recommended. Roughening creates tiny grooves that help the adhesive grip better. Be gentle to avoid making the damage worse. After sanding, wipe off any dust with a clean cloth.
Applying Patches
Applying patches is a simple and effective way to fix blown-up decorations. Small holes or tears can be sealed quickly with the right materials. Patching helps restore your decoration’s shape and function. This section explains how to choose and apply patches properly for a long-lasting repair.
Choosing The Right Patch
Choose a patch made of vinyl or a similar material. It should be strong and flexible. The patch must cover the hole with some extra space around it. Avoid patches that are too thin or fragile. A good patch sticks well and resists air leaks.
Applying Adhesive
Use a strong adhesive designed for vinyl repairs. Apply a thin, even layer on both the patch and the damaged area. Let the adhesive become tacky before joining them. This step ensures a firm bond between surfaces. Avoid using glue not made for inflatables.
Using Self-adhesive Patches
Self-adhesive patches save time and effort. Peel off the backing carefully. Place the patch over the hole, covering it completely. Press firmly to remove air bubbles. These patches work well for small to medium tears. Check the patch edges to ensure full contact.
Pressing And Smoothing
After placing the patch, press down firmly. Use a flat tool or your palm to smooth out bubbles. Start from the center and move outward. This helps create a tight seal. Let the adhesive cure for several hours before inflating. Proper pressing prevents leaks and extends patch life.
Curing And Testing
Curing and testing are vital steps in fixing blow-up decorations. These steps ensure the repair holds well and the decoration works properly. Take time to let adhesives dry fully. Test inflation carefully to find any leaks. Reapply patches if the first fix is not perfect. This process helps keep your inflatable decoration looking great and lasting longer.
Allowing Proper Drying Time
After applying the patch and adhesive, wait for the recommended drying time. This allows the glue to set completely. Avoid inflating the decoration too soon. Drying times vary by product, but usually range from several hours to a full day. Proper drying ensures a strong bond and prevents the patch from peeling off.
Inflation Check
Slowly inflate the decoration to check for leaks. Listen for hissing sounds or feel for escaping air. Inspect the patched area carefully. Use a small amount of soapy water on the patch to spot bubbles. Bubbles show where air is escaping. If the inflation holds steady, the repair is successful. Deflating the decoration before moving on.
Reapplying If Needed
If you find leaks during the inflation check, deflate the decoration again. Clean the area around the patch thoroughly. Apply a new layer of adhesive and press another patch firmly. Allow this patch to dry completely as well. Repeat the inflation check to confirm the fix. Sometimes, two or more applications are needed for a perfect seal.
Repairing Seams
Repairing seams is a key step in fixing blow-up decorations. Seams are the joints where different parts of the inflatable meet. These areas often face the most stress and wear, leading to tears or splits. Repairing seams carefully can extend the life of your decoration and keep it looking great.
Identifying Seam Damage
Start by inspecting all the seams closely. Look for small cracks, splits, or weak spots. Gently press the seams to check for air leaks. Sometimes, damage is hidden under folds or wrinkles. Use a flashlight to see the seams better. Mark damaged areas with a pencil or tape for easy spotting.
Using Seam Repair Kits
Seam repair kits are available at most craft or hardware stores. These kits include adhesive and special patches made for inflatable materials. Clean the damaged seam with rubbing alcohol to remove dirt and oils. Cut the patch slightly larger than the tear. Apply adhesive as instructed, then press the patch firmly on the seam. Hold in place until the glue sets.
Reinforcing Weak Areas
After repairing visible damage, reinforce nearby weak spots. Apply extra patches along the seam to prevent future tears. Use flexible tape designed for inflatables for added strength. Avoid stretching the material too much during repair. Reinforced seams help the decoration hold air better and last longer.
Fixing Fan And Blower Problems
Fixing the fan and blower in blow-up decorations ensures they stay fully inflated and look great. Problems with these parts cause slow inflation or no inflation at all. This section guides you through simple steps to diagnose and fix common fan and blower issues. Follow each step carefully to bring your decoration back to life.
Checking Power Supply
Start by checking if the fan or blower is receiving power. Ensure the plug is firmly connected to the outlet. Test the outlet with another device to confirm it works. Look for any damaged cords or plugs that may block electricity flow. Replace or repair any faulty cables to restore power.
Cleaning Fan Blades
Dirt and debris on fan blades reduce airflow and slow inflation. Unplug the decoration before cleaning. Use a soft brush or cloth to remove dust and dirt from the blades. Clear any stuck leaves or small objects. Clean blades spin smoothly and help the blower work better.
Replacing Faulty Parts
Faulty fans or blowers need replacement parts to function again. Identify broken or worn-out components like the motor or fan blades. Order exact replacements from the manufacturer or a trusted supplier. Carefully remove the damaged part and install the new one. Test the decoration to ensure it inflates properly.
When To Get Professional Help
Knowing when to get professional help for your blow-up decorations saves time and ensures safety. Small tears and simple holes can be fixed at home. Larger or complicated damage needs expert care. Professionals have the right tools and skills to restore your decorations properly.
Large Tears
Large tears are hard to fix with basic repair kits. They require special patching techniques and materials. Poor repairs can cause air leaks and ruin the decoration. Professionals can mend big tears to restore full function and appearance.
Complex Repairs
Some damages involve multiple holes or broken seams. Complex repairs need careful assessment and precise work. DIY fixes may fail or worsen the problem. Experts can handle tricky repairs to make your decoration strong again.
Durability Concerns
Repeated damage or old decorations may lose durability. Fixing weak areas is critical to prevent new tears. Professionals know how to reinforce these spots for long-lasting use. Their work helps your decoration last through many seasons.
Maintenance Tips
Proper care extends the life of blow-up decorations. Regular maintenance keeps them looking good and working well. Simple steps can prevent damage and costly repairs. Follow these maintenance tips to enjoy your decorations longer.
Proper Storage
Store blow-up decorations in a cool, dry place. Avoid areas with sharp objects that could puncture them. Fold decorations carefully to prevent creases. Use a storage bag or box to keep them clean. Proper storage stops mold and damage during the off-season.
Regular Cleaning
Clean decorations after each use to remove dirt and debris. Use a soft cloth and mild soap with water. Avoid harsh chemicals that can weaken the material. Make sure decorations are completely dry before storing. Regular cleaning helps prevent mold and keeps colors bright.
Pre-season Inspections
Check decorations before each season for holes or tears. Inflate them fully to spot any leaks. Inspect seams and valves carefully. Repair small damages early to avoid bigger problems. Pre-season checks ensure your decorations are ready to shine.

Credit: www.christmascentral.com

Credit: www.youtube.com
Frequently Asked Questions
Can Inflatables Be Repaired?
Yes, most inflatables can be repaired using patch kits with adhesive for small to medium tears. Large damage may need professional repair.
How To Patch A Blow-Up Decoration?
Clean and dry the damaged area thoroughly. Apply adhesive and press a patch firmly over the hole. Let it cure before inflating.
Can You Replace Light Bulbs In Inflatables?
Yes, you can replace light bulbs in inflatables by carefully removing the old bulb and installing a compatible new one. Ensure the inflatable is unplugged before replacement. Use bulbs recommended by the manufacturer to avoid damage and maintain safety.
Why Is My Inflatable Decoration Not Working?
Your inflatable decoration may not work due to power issues, a clogged fan, or leaks. Check the power source, clear debris, and inspect for holes. Repair small tears with a patch kit. Ensure the fan runs properly to keep the decoration inflated.
Conclusion
Fixing blow-up decorations is easier than it seems. Small holes and tears respond well to simple patch kits. Clean and dry the damaged area first for best results. Press the patch firmly and wait before inflating again. For bigger tears, consider professional repair to avoid further damage.
Regular care can extend your decoration’s life. Enjoy your festive inflatables looking great year after year. Simple steps make a big difference in keeping them fun and functional.

Pingback: How to Graduation Cap Decoration- Creative 10 Ideas and Easy Tips
Pingback: Best Material for Garden Furniture: Top Picks for 2025
Pingback: Best Stores for Halloween Decorations 2025 | Shop Frightful Finds
Pingback: How to Fix Blinking Green Light Xfinity Best Modem/Router-2025