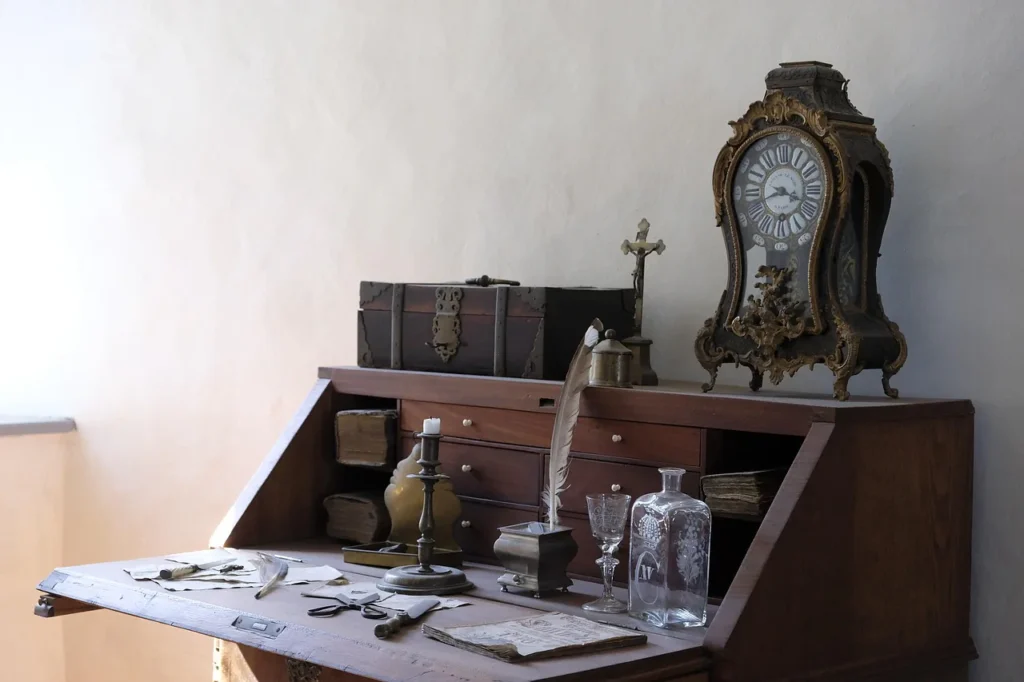
How to Fix a Grandfather Clock not ticking like it used to? Maybe the pendulum has stopped swinging, or the chimes are silent.
You don’t have to let this beautiful timepiece sit idle any longer. Fixing your grandfather clock might seem complicated, but with the right guidance, you can bring it back to life. You’ll discover simple, clear steps to diagnose common issues and restore your clock’s charm and function.
Whether it’s a cherished family heirloom or a stunning piece of décor, you’ll learn how to make your grandfather clock tick again—and keep it running smoothly for years to come. Keep reading to unlock the secrets to fixing your grandfather clock with confidence.
Common Problems
Grandfather clocks are beautiful and classic timepieces. They need care to work well. Many common problems can stop these clocks from running correctly. Understanding these issues helps in fixing the clock and keeping it in good shape.
Pendulum Issues
The pendulum controls the clock’s timing. If it swings unevenly, the clock stops. Dust or dirt on the pendulum can cause problems. Sometimes the pendulum is not hanging straight. Check for any bends or damage to the pendulum rod. Small adjustments can make the clock run smoothly again.
Weight And Cable Problems
Weights drive the clock’s movement. If the cables are tangled or broken, the clock will not work. Weights may slip or hang unevenly. Make sure the cables are wound correctly and not frayed. Weights must be in their right place and attached firmly. Fixing cable and weight issues often restores the clock’s function.
Movement Malfunctions
The clock’s movement is its engine. Dust and old oil cause it to slow down or stop. Sometimes gears get stuck or worn out. Cleaning and lubricating the movement helps a lot. Watch for broken parts or loose screws inside. Proper care of the movement is key to a working grandfather clock.
Chime And Strike Errors
The chime and strike mark the hours and quarters. If they sound wrong or stop, the mechanism may be out of sync. Check if the hammers hit the chime rods properly. Sometimes the chime selector is set incorrectly. Adjusting the chime and strike parts carefully fixes most errors. This keeps the clock’s melody clear and timely.
Tools And Materials
Fixing a grandfather clock requires the right tools and materials. Having proper equipment makes repairs easier and safer. This section covers the essential items needed for common fixes. Each group of tools and materials serves a specific purpose in the repair process.
Basic Repair Tools
Start with simple hand tools. A set of screwdrivers with flat and Phillips heads is vital. Small pliers help in gripping and bending parts gently. Tweezers assist in handling tiny components inside the clock. A soft brush clears dust without causing damage. A magnifying glass improves visibility of small, delicate parts.
Cleaning Supplies
Cleaning is key to clock maintenance. Use a lint-free cloth to wipe surfaces carefully. Mild soap mixed with water works well for cleaning wooden parts. Avoid harsh chemicals that can harm finishes. Cotton swabs help reach tight spaces. Compressed air can blow away dust from hard-to-reach areas.
Replacement Parts
Some parts wear out and need replacing. Common replacements include pendulum bobs, weights, and suspension springs. Check for worn or broken gears and bushings. Use parts designed specifically for grandfather clocks. Keep original parts if possible, as they maintain the clock’s value and function.
Lubricants And Oils
Proper lubrication keeps the clock running smoothly. Use clock oil made for fine mechanical movements. Avoid general-purpose oils that attract dust and cause buildup. Apply sparingly to pivots and gear teeth. Regular oiling prevents wear and extends the clock’s life. Clean off old oil before applying new lubricant.
Preparing The Clock
Preparing the grandfather clock before any repair is essential. It ensures safety and protects delicate parts. Taking proper steps prevents damage during the fixing process.
Follow these simple actions to get your clock ready for repair. Each step helps you handle the clock with care.
Stopping The Pendulum
Gently stop the pendulum by holding it in the center. Avoid sudden movements to prevent damage. Keep the pendulum steady to stop the clock mechanism.
Removing Weights And Pendulum
Carefully take down the weights one by one. Note their positions to avoid confusion later. Remove the pendulum by lifting it straight up. Handle all parts with clean hands to avoid dirt.
Accessing The Movement
Open the clock case door slowly. Locate the screws or latches that hold the movement in place. Use a screwdriver to remove them carefully. Pull the movement out gently for inspection or repair.
Fixing The Movement
The movement is the heart of a grandfather clock. Fixing it requires care and patience. Understanding the movement helps in identifying issues accurately. The main tasks involve cleaning, adjusting, and replacing parts. These steps restore smooth operation and time accuracy.
Cleaning The Mechanism
Dust and dirt cause the clock to run poorly. Use a soft brush to remove loose debris. Clean metal parts with a gentle clock cleaner or alcohol. Avoid water, which can cause rust. Let the parts dry completely before reassembly. Regular cleaning prevents wear and prolongs life.
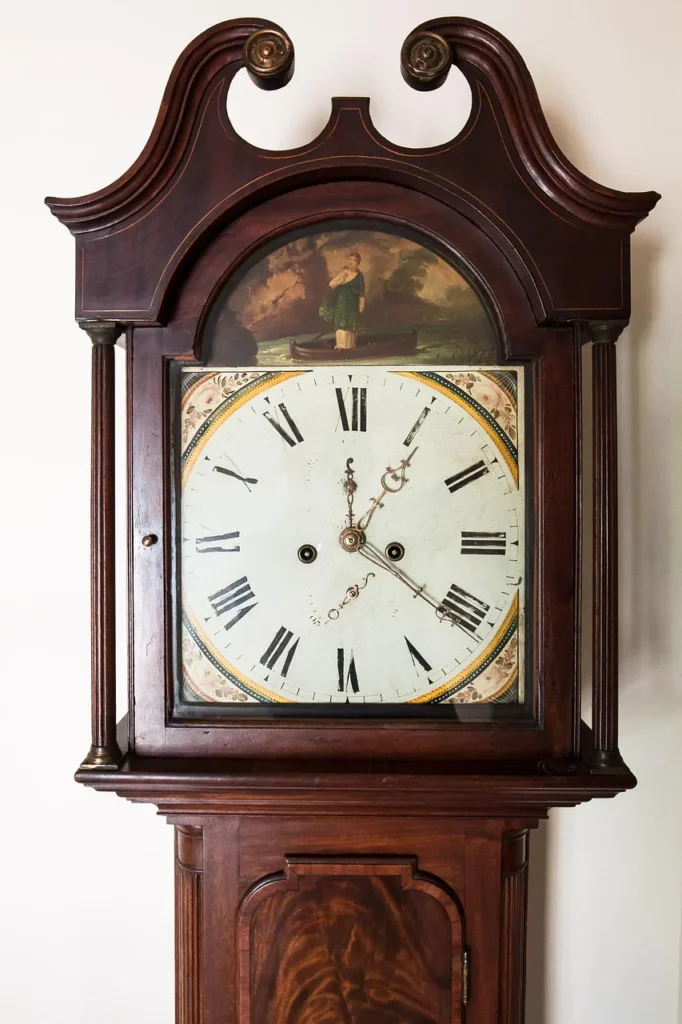
Adjusting The Beat
The beat controls the ticking rhythm of the clock. A clock is in beat if the ticks sound even and steady. Check the pendulum swing; it should be equal on both sides. Adjust the crutch or the pendulum leader slightly to correct the beat. Proper adjustment stops the clock from stopping unexpectedly.
Replacing Worn Parts
Parts like bushings, gears, and springs wear out over time. Inspect the movement for worn or broken pieces. Order exact replacements from clock part suppliers. Carefully remove old parts and install new ones. Test the clock after replacement to ensure smooth running.
Pendulum And Weight Repairs
The pendulum and weights are vital parts of a grandfather clock. They control the clock’s timing and movement. Fixing issues with these parts restores the clock’s accuracy and function. This section covers how to realign the pendulum, repair or replace cables, and balance weights correctly.
Realigning The Pendulum
A misaligned pendulum can stop the clock or cause it to lose time. Check if the pendulum swings evenly from side to side. Gently adjust the pendulum bob until the ticking sound is steady. Make small movements and listen carefully. The goal is a smooth and balanced swing.
Repairing Or Replacing Cables
Cables hold the weights and help power the clock. Over time, cables can wear out or break. Inspect cables for fraying or damage. Replace damaged cables with new ones made for your clock model. Thread the new cable carefully to avoid tangles. Secure the cable firmly to the weight and drum.
Balancing Weights Correctly
Weights must hang evenly for the clock to run well. Uneven weights cause the clock to stop or run fast or slow. Check that weights are in their correct positions. Use a level to ensure the clock is standing straight. Adjust the weights until the pendulum swings freely and the clock keeps time.
Chime And Strike Adjustments
Chime and strike adjustments are key to keeping your grandfather clock sounding right. These parts control the clock’s melody and the timing of its strikes. Proper tuning ensures the clock chimes beautifully and strikes on time. Problems like silent chimes or off-beat strikes often need simple fixes. Understanding these adjustments helps maintain your clock’s charm and function.
Fixing Silent Chimes
Silent chimes usually mean the chime mechanism is stuck or off position. Check the chime lever and ensure it is not set to “silent” mode. Gently move the lever to the chime setting and listen for any sound. Dust or dirt can block the chime rods, so clean them carefully. Test the clock after cleaning to see if the chimes work again.
Adjusting Strike Timing
Strike timing controls when the clock counts the hour with a strike. If the strikes are early or late, adjust the strike lever slightly. Locate the strike adjustment screw near the movement. Turn it a small amount and wait for the next hour to check the timing. Repeat until the strike matches the correct hour. Small tweaks prevent damage and keep the strike reliable.
Replacing Chime Rods
Chime rods can wear out or break, causing dull or missing sounds. To replace them, carefully remove the clock’s back panel. Note how the rods are attached to the hammer assembly. Unscrew the damaged rod and replace it with a matching rod. Secure the new rod firmly but avoid overtightening. Test the chime after replacement for clear, full tones.
Lubrication And Maintenance
Proper lubrication and maintenance keep your grandfather clock running smoothly. These tasks reduce wear and prevent damage. Regular care helps avoid costly repairs and extends the clock’s life.
Follow simple steps to maintain your clock’s movement. Use the right oils and clean the parts carefully. This section explains how to apply oils, the best cleaning schedule, and ways to prevent future problems.
Applying Proper Oils
Use clock-specific oil for lubrication. Avoid household oils; they can gum up the movement. Apply oil sparingly to pivots and gears. Too much oil attracts dust and dirt. Focus on the points where metal parts move against each other. Use an oiler with a fine tip for precision. Do not oil the pendulum or weights. These parts do not need lubrication.
Cleaning Frequency
Clean your grandfather clock every three to five years. Dust and old oil build up inside the movement. Remove the movement carefully for cleaning. Use a soft brush or cloth to clear dust. Avoid harsh chemicals that can damage the clock. For deeper cleaning, seek a professional clockmaker. Regular cleaning prevents sticky parts and keeps the time accurate.
Preventing Future Issues
Keep your clock in a stable environment. Avoid places with high humidity or direct sunlight. Wind the clock gently and regularly. Check for signs of wear or dirt during winding. Keep the clock level to ensure a smooth pendulum swing. Handle the clock gently to avoid bending parts. Regular checks catch problems early, saving you money and effort.
When To Seek Professional Help
Knowing when to seek professional help is important for fixing a grandfather clock. Some repairs need special skills and tools. Trying to fix complex issues without experience can cause more damage. Understanding the limits of DIY repair keeps your clock safe and working well.
Complex Movement Repairs
The clock’s movement is delicate and detailed. Complex problems like broken gears or springs need expert attention. Professionals have the knowledge to handle these parts carefully. They can clean, repair, or replace components without harming the clock.
Antique And Valuable Clocks
Antique or valuable clocks require extra care. Mistakes during repair can lower their value. Experts understand how to preserve original parts and finish. They protect the clock’s history and appearance while fixing it.
Cost Vs. Repair Benefits
Consider repair costs before starting. Sometimes, fixing a clock costs more than buying a new one. A professional can advise if repair is worth it. They help balance the clock’s value against repair expenses.
Preserving Clock Appearance
Preserving the appearance of a grandfather clock is key to keeping its charm alive. The clock’s woodwork, finish, and decorative parts show its history and character. Careful maintenance protects these elements and enhances the clock’s value.
Small repairs and gentle cleaning keep the clock looking its best. Attention to detail helps avoid damage. Here are simple ways to maintain your grandfather clock’s beauty.
Woodwork Repair Tips
Start by cleaning dust and dirt with a soft cloth. Avoid water or harsh chemicals that harm wood. For scratches, use a wax stick or wood filler matching the color. Sand lightly with fine-grit sandpaper to smooth rough spots.
Loose joints need wood glue and clamps to hold parts firmly. Replace missing veneer carefully, matching the grain and color. Work slowly to keep the wood’s original look intact.
Polishing And Finishing
Use a high-quality furniture polish made for wood. Apply polish sparingly with a soft cloth. Buff gently to bring out shine without creating buildup. Avoid silicone-based products, which can dull the finish over time.
For faded finishes, consider light sanding followed by a new coat of varnish or shellac. Test products on a hidden area first. Proper finishing protects the wood from moisture and dust.
Protecting Decorative Elements
Handle carved or painted parts with care. Use a soft brush to clean hard-to-reach areas. Avoid strong cleaners that can strip paint or damage wood. Check for loose pieces and secure them with appropriate adhesives.
Glass panels need gentle cleaning with a glass cleaner and soft cloth. Keep metal elements free of rust by wiping with a dry cloth. Regular care preserves intricate details and prevents wear.
Evaluating Repair Options
Deciding how to fix a grandfather clock starts with evaluating repair options. Understanding the clock’s condition and what repairs are possible helps you make the best choice. Some problems are simple to fix, while others may need more work or parts. This section guides you through key points to consider before starting any repair.
Repair Vs. Replace Movement
The movement is the clock’s heart. Repairing it keeps the original parts intact. This is important for antique or valuable clocks. Sometimes, the movement is too damaged or worn out. Replacing it with a new movement can be cheaper and more reliable. Think about the clock’s age and style. If the clock is modern, replacement might be the best choice. For older clocks, repair preserves its history and value.
Estimating Repair Costs
Getting a clear idea of repair costs avoids surprises. Ask for quotes from clock repair experts. Costs depend on the problem, parts needed, and labor time. Small fixes may cost less than $100. Complex repairs or parts replacement can reach hundreds or more. Compare repair costs to the clock’s worth. This helps decide if fixing is sensible or if replacing is smarter.
Considering Sentimental Value
Sentimental value often outweighs cost. A clock passed down through generations holds memories. Repairing keeps this treasure alive. You might accept higher costs to preserve family history. Sentimental clocks often deserve careful repair. Even if repair costs are high, emotional ties make it worthwhile. Balance feelings with practical repair options for the best outcome.
Frequently Asked Questions
What Causes A Grandfather Clock To Stop Working?
A grandfather clock stops working mainly due to being out of beat, worn parts, or lack of proper maintenance. Dust, misaligned pendulum, or dead batteries (in quartz models) also cause stoppage. Regular cleaning, correct setup, and timely repairs keep it running smoothly.
Is It Worth Repairing A Grandfather Clock?
Repairing a grandfather clock is worth it for sentimental or decorative value. Compare repair costs to the clock’s worth. Sometimes, replacing the movement offers better reliability and value. Get a professional assessment before deciding.
Can I Fix My Own Grandfather Clock?
You can fix minor issues on your grandfather clock with care and proper tools. Complex repairs need professional help to avoid damage. Regular maintenance keeps it running well. Assess the problem first, and decide if DIY repair suits your skill level.
How To Fix Stuck Weights In A Grandfather Clock?
Gently lift and reposition stuck weights to ensure they hang freely. Check for obstructions or tangled cables. Clean the pulleys and lubricate moving parts. Adjust the weights evenly to balance the clock. Seek professional help if the problem persists or parts seem damaged.
Conclusion
Fixing a grandfather clock takes patience and careful steps. Start with simple checks like the pendulum’s beat and weight positions. Regular cleaning and oiling help keep it running smoothly. Small repairs often solve common problems without needing experts. Remember, gentle handling prevents damage to delicate parts.
Enjoy the charm and steady tick of your restored clock. With time and care, your grandfather clock will work well again and brighten your home. Keep learning and practicing to maintain its beauty and function.