How to Apply Wall Art Stickers to Decorate Your Wall
Decorating a wall can completely change the look of a room. One of the easiest and most affordable ways to do this is by using wall stickers. They are easy to apply, come in many styles, and can be used in any room. Whether you want to add a little color to a bedroom or make your living room more fun, wall stickers can help. In this guide, we will show you how to use them to decorate your space and make it look stylish and fresh.
Why Choose Wall Stickers?
Wall stickers are a popular choice for decoration for many reasons. They are:
-
Easy to Apply: No special skills are required. Even beginners can do it.
-
Affordable: Compared to paint or wallpaper, stickers are budget-friendly.
-
Removable: You can easily change or remove them when you want a new look.
-
Variety of Designs: Wall stickers come in many designs, sizes, and colors. You can find something that fits your style.
-
No Mess: Unlike painting, there is no need for brushes, paint, or cleaning up afterward.
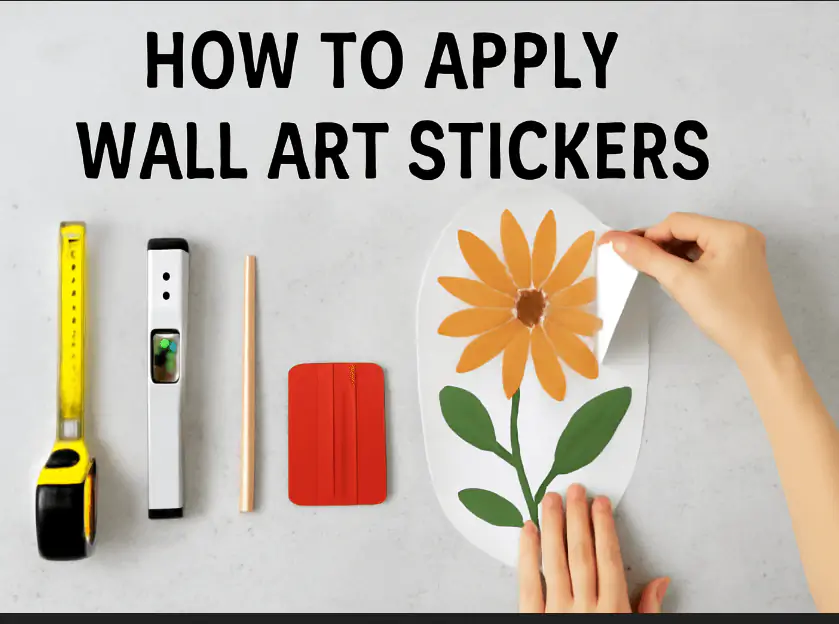
Tools You Will Need for Applying Wall Stickers
Before you begin, make sure you have everything you need. The good news is that you won’t need many tools! Here’s a list of what you’ll need:
-
Wall Stickers
Choose the design that fits your room. Wall stickers come in sheets, sets, or even large decals. -
Measuring Tape
A tape measure helps to place your stickers correctly, ensuring they are straight and centered. -
Spirit Level
A spirit level helps ensure your stickers are placed straight on the wall. -
Pencil
Use a pencil to mark where you will place the stickers. This ensures perfect alignment. -
Squeegee or Credit Card
A small, flat tool like a squeegee helps smooth the sticker onto the wall and avoid air bubbles. -
Cloth or Sponge
You may need a cloth to clean the wall before applying the stickers. -
Scissors
If your stickers need trimming, a pair of scissors will help you cut them neatly.
Step-by-Step Guide to Applying Wall Stickers
1. Prepare the Wall
Before applying your stickers, it’s important to prepare the wall. Clean the surface to remove dust, dirt, and oils. Use a cloth or a sponge and warm, soapy water. Dry the wall completely before applying the stickers. This helps them stick better and last longer.
2. Measure and Mark
Once your wall is clean and dry, decide where you want to place the stickers. Use the measuring tape to find the center of the wall. If you’re working with multiple stickers, arrange them on the floor first to see how they will look. This way, you can decide the best position.
Use a pencil to lightly mark the points where you want the stickers to go. If you’re creating a pattern, you can measure equal spaces between them.
3. Peel the Sticker from the Backing
Most wall stickers come with a paper backing that needs to be peeled off. Start by peeling the backing slowly from one corner. Be careful not to tear the sticker. If it’s large, you may want to start at the top and work your way down.
4. Position the Sticker on the Wall
Place the sticker on the wall gently, starting from the top or one corner. Hold it in place lightly at first. If you’re applying a larger sticker, it’s best to have someone help you hold it while you work.
Once the sticker is in the right spot, make sure it’s aligned with your marks and looks straight.
5. Smooth Out Air Bubbles
Now, use your squeegee or a credit card to smooth out the sticker. Start from the center and move outward. This helps to push out any air bubbles and stick the sticker flat against the wall.
If you notice any bubbles, you can gently lift the sticker and press it back down. Be careful not to tear it.
6. Trim Excess Edges (if needed)
If your sticker is too large, you may need to trim the edges to fit the wall. Use a pair of scissors to carefully cut around the edges. Take your time to make clean cuts to avoid damaging the sticker.
7. Press Down Firmly
After smoothing the sticker out, press firmly along the edges and the center. This helps the sticker to adhere well to the wall and stay in place for a long time.
8. Step Back and Check
After applying the sticker, step back and check how it looks from a distance. Adjust it if necessary before the adhesive fully sets.
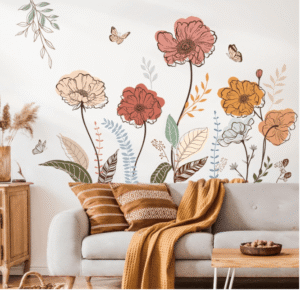
Wonder Boho Flower Wall Stickers Wildflower Floral Grass Peel and Stick Wall Art Decals for Living Room Bedroom TV Wall
Reliable Material: Wonderwall decals are made of high-quality self-adhesive PVC material, safe and non-toxic, easy to peel and stick, durable, and waterproof.
Easy to Use: Just peel them off, then paste them to the place you want, with no residue left behind. It can be applied to most smooth, flat, dry, and clean surfaces, which are very easy to paste or remove.
Widely Application: wonder wall stickers are perfect for home decoration or room decoration, such as living room, baby nursery, kids’ game room, and anywhere else. Brighten your room without troubling paints, and it’s also a unique gift idea.
[su_button url=”https://amzn.to/4ayfPZx” target=”blank” style=”3d” background=”#bd2610″ color=”#ffffff” size=”20″ center=”yes” radius=”round” icon_color=”#ffffff” text_shadow=”0px 0px 0px #000000″]Buy On Amazon[/su_button]
How to Create Patterns and Designs with Wall Stickers
Wall stickers are perfect for creating patterns and designs. Whether you want to make a feature wall or add a fun design to a room, the possibilities are endless. Here’s how you can create a pattern:
1. Geometric Shapes
Geometric patterns are trendy and modern. You can use different shapes like squares, triangles, or circles to create a stylish design. Arrange them in rows, columns, or any other formation that fits your style.
2. Nature-Inspired Designs
Flowers, trees, and leaves are popular designs for walls. You can create a beautiful, natural theme by arranging flower stickers in a pattern or making a garden-like scene with trees and birds.
3. Quotes and Words
Wall stickers are often available with inspirational quotes, motivational words, or funny phrases. You can arrange these stickers in a neat row or stack them for a more casual, creative look.
4. Borders and Frames
Use stickers as a border to frame a picture or mirror, or as a frame around the top or bottom of the wall. This is a simple way to create a polished look in any room.
Tips for Removing and Replacing Wall Stickers
One of the best things about wall stickers is that they are easy to remove and replace. If you want to change your design, follow these steps:
-
Peel the Sticker Gently
Start from one corner of the sticker. Slowly peel it off, making sure not to damage the wall or sticker.
-
Use Heat for Stubborn Stickers
If the sticker is difficult to remove, you can use a hairdryer on a low setting to warm up the adhesive. This will make it easier to peel off.
-
Clean the Wall After Removal
Once the sticker is off, there may be some residue left. Clean the wall using a soft cloth and warm water to remove any leftover adhesive.
-
Reapply New Stickers
If you want to change your design, simply clean the wall again and repeat the process with your new stickers.
Where to Use Wall Stickers
Wall stickers are very versatile and can be used in different parts of your home. Here are some ideas on where you can use them:
1. Living Room
Add a personal touch to your living room by using large wall decals or quote stickers. You can create a feature wall with nature-inspired designs or geometric patterns.
2. Bedroom
Wall stickers can transform your bedroom into a peaceful sanctuary. Stickers with calming patterns or gentle colors work well in bedrooms. You can place them above your bed or on a feature wall.
3. Kitchen
Brighten up your kitchen with fun stickers. Food-themed stickers, such as fruits or utensils, can create a playful vibe. Use small stickers on the cabinets or around windows.
4. Bathroom
Wall stickers are great for bathrooms as they are easy to apply and remove. Choose waterproof stickers with fun patterns or quotes for a more relaxed look.
5. Children’s Rooms
Kids love colorful stickers! You can decorate their rooms with stickers of animals, stars, or their favorite characters. This makes the room feel more inviting and fun.
Common Mistakes to Avoid
Even though applying wall stickers is easy, there are a few common mistakes that can make the process harder. Here’s what to avoid:
-
Not Cleaning the Wall
It’s important to clean the wall before applying stickers. Dirt or oil can make the stickers peel off more easily. -
Not Measuring Properly
Always measure before placing your stickers. You don’t want them to be crooked or uneven. -
Applying Stickers on Rough Surfaces
Wall stickers work best on smooth, flat surfaces. Applying them to textured or rough walls can make them difficult to stick. -
Not Pressing Down Firmly Enough
Make sure to press firmly along the edges to ensure the stickers stay in place.
Conclusion
Using wall stickers is a quick and fun way to decorate your space. With a few easy steps, you can transform your room and make it look stylish and unique. Whether you’re adding small accents or creating a large design, wall stickers are perfect for any room. Follow this guide to decorate your walls with confidence and enjoy your beautiful space!