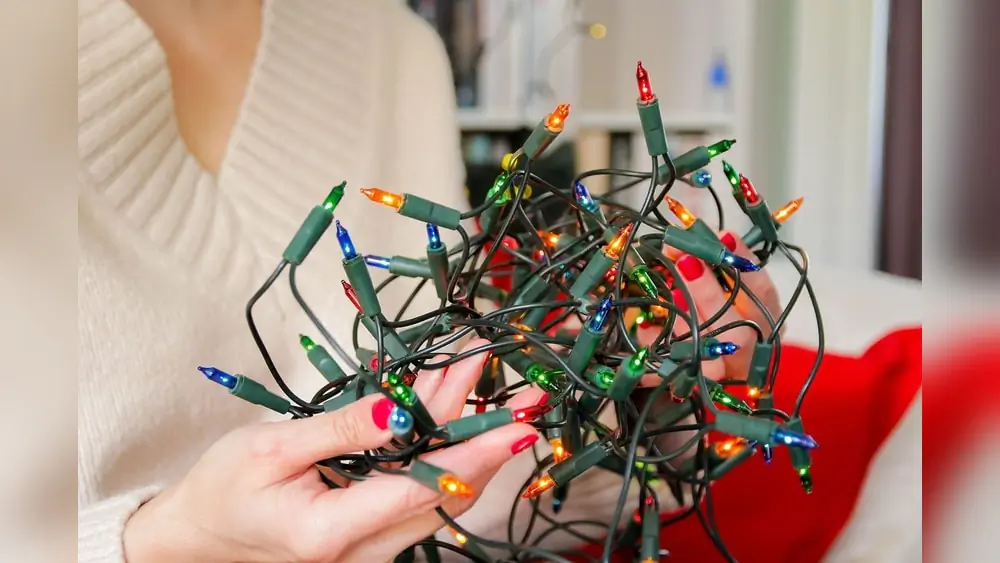
How Can I Fix Christmas Lights as they should? You’re not alone.
When a string of lights goes dark, it can be frustrating and disappointing—especially when you’re ready to deck the halls. But before you toss those lights in the trash, there’s good news: you can fix them yourself. With just a few simple tricks, you’ll be able to find the faulty bulbs or blown fuses and get your lights sparkling again.
Ready to bring the magic back to your holiday decorations? Keep reading, and you’ll learn easy, step-by-step methods that anyone can follow to fix Christmas lights quickly and confidently.
Credit: www.homedepot.com
Check And Replace Fuses
Checking and replacing fuses is a key step to fixing Christmas lights. Fuses protect your lights from electrical damage. A blown fuse stops the whole string from lighting up. Fixing this is simple and saves money. Follow these steps to find and replace fuses safely.
Locate Fuse Compartment
First, unplug the Christmas lights from the power source. Look for the fuse compartment on the plug. It is a small box or sliding cover. Sometimes it has a label saying “fuse.” Use a small flat tool to open the compartment gently. Keep the fuses inside safe for replacement.
Identify Blown Fuses
Take out the fuses carefully and check them. A good fuse looks clear with an intact wire inside. A blown fuse has a broken or melted wire. Sometimes the glass is blackened or cloudy. If you see any damage, the fuse is bad and must be replaced.
Insert New Fuses
Use the exact type and size of fuse recommended by the manufacturer. Insert the new fuse into the compartment carefully. Make sure it fits snugly and the cover closes securely. Plug the lights back in and test them. The lights should now work if the fuse was the issue.
Spot Burned Out Bulbs
Spotting burned-out bulbs is key to fixing Christmas lights quickly. A single bad bulb can cause the whole string to fail. Finding these bulbs saves time and restores your lights efficiently. Follow simple checks to identify bulbs that need replacement.
Look For Blackened Bulbs
Blackened bulbs often show clear signs of burnout. Check each bulb carefully for dark spots or discoloration. These marks usually mean the bulb’s filament has burned out. Replacing blackened bulbs can restore the light string’s function.
Check For Broken Filaments
Filaments inside bulbs are very thin wires that glow when lit. If a filament is broken, the bulb will not work. Hold the bulb up to the light and look closely for any gaps or breaks. Broken filaments mean the bulb needs to be replaced.
Inspect Smoky Or Damaged Glass
Smoky or cracked glass indicates a bulb is damaged. Damage can cause electrical problems and stop the light from working. Carefully examine bulbs for any smoke inside or cracks on the glass. Replace any bulb with glass damage to fix the string.
Swap Bulbs To Identify Faults
Swapping bulbs is a simple, hands-on way to find faults in Christmas lights. This method helps isolate the problem by using bulbs from sections that still work. It requires no special tools and helps you quickly pinpoint the broken bulb causing the issue.
Use Bulbs From Working Sections
Start by unplugging the string of lights. Take a bulb from a section that is lit and working well. Carefully remove a bulb from the dead section and replace it with the working bulb. This swap tests if the problem is the bulb or the socket.
Test Dead Bulb Sockets
After swapping bulbs, plug in the lights again. If the new bulb lights up, the old bulb was faulty. If it still does not light, the socket or wiring might be the cause. Check the socket for dirt, corrosion, or damage. Clean or adjust the contacts gently if needed.
Repeat Until Faulty Bulb Found
Continue swapping bulbs one by one from the working section to the dead section. Each swap narrows down the faulty bulb’s location. Keep testing until the dead section lights up fully. Replace the faulty bulb with a new one to restore the entire string.
Try The Half-test Method
The half-test method is a smart way to find the problem in your Christmas lights. It helps you check smaller sections instead of the whole string. This method saves time and effort. You can quickly spot the bad bulb causing the issue. Follow these simple steps to fix your lights fast.
Divide The Unlit Section
First, unplug your Christmas lights. Look at the part where the bulbs do not light up. Split this unlit section in half. Separate the bulbs into two smaller groups. This makes it easier to test each part separately.
Test Middle Bulbs
Plug in the string again. Check the bulb in the middle of one half. This bulb often controls that half’s power flow. If the middle bulb is bad, replace it. If the half still does not light, the problem lies nearby. If it lights up, test the other half the same way.
Narrow Down The Problem Area
Keep dividing the unlit half into smaller parts. Test the middle bulb of each smaller section. Repeat this until you find the exact bulb causing trouble. Replace the bad bulb with a new one. This method helps fix your lights without testing every bulb.
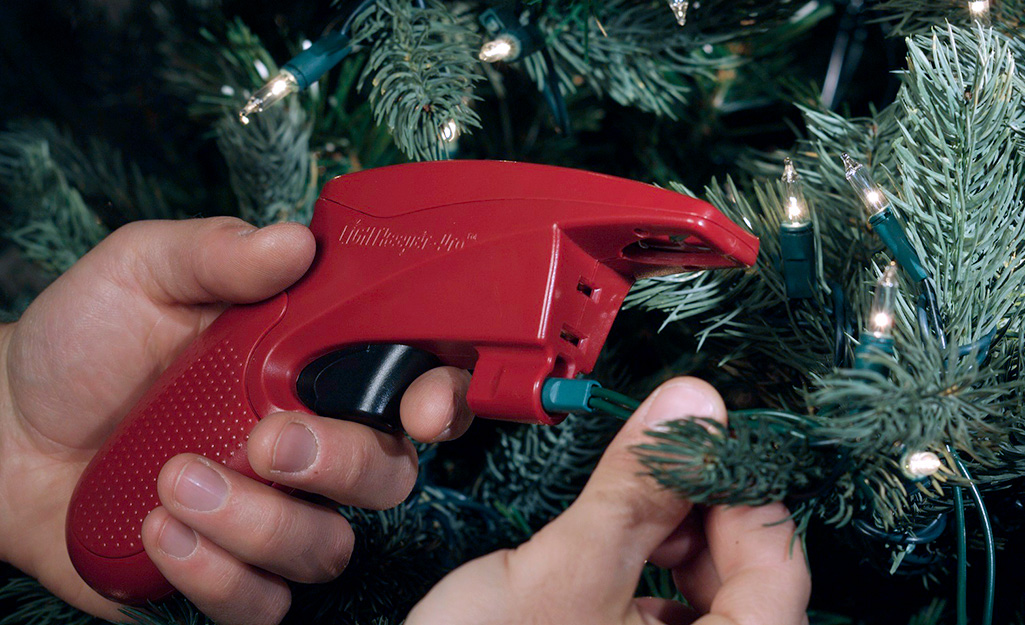
Use The Foil Trick
The foil trick is a simple way to fix Christmas lights that do not light up. It works by improving the connection inside the bulb socket. This method can save time and effort before buying new bulbs or strings.
Using aluminum foil is easy and can bring your lights back to life. The foil helps to close the gap in the socket where the bulb fits. This small fix often solves the problem of a dead socket.
Remove Bulb From Dead Socket
First, unplug the Christmas lights to stay safe. Gently pull out the bulb from the socket that is not working. Check the bulb to make sure it is not broken or burnt out. If the bulb looks fine, the socket might be the problem.
Insert Aluminum Foil
Take a small piece of aluminum foil, about one inch long. Fold it to fit inside the socket where the bulb goes. Insert the foil carefully into the socket. The foil should touch the socket’s metal contacts to help electricity flow.
Check If the Lights Brighten
Plug the lights back in and watch closely. The lights should start to glow if the foil fixes the connection. If the lights still do not work, try adjusting the foil or check other bulbs and sockets. Repeat the process if needed until the lights shine bright.

Credit: www.familyhandyman.com
Inspect For Shunt Failure
Inspecting for shunt failure is a key step in fixing Christmas lights. Shunts help current pass when a bulb burns out. A broken shunt causes the entire string to go dark. Finding and fixing a shunt failure can restore your lights quickly.
What Is A Shunt In Christmas Lights?
A shunt is a small wire inside each bulb. It allows electricity to bypass a burnt bulb. This keeps the rest of the string lit. Without a working shunt, the circuit breaks, and the lights go off.
Signs Of Shunt Failure
Look for bulbs that seem intact but cause the string to fail. The bulbs may look normal but do not light. Flickering lights or partial darkness suggest shunt issues. These bulbs need closer inspection.
How To Test For Shunt Failure
Unplug the lights before testing. Gently remove each bulb and check the filament. A broken filament may mean the shunt is active. If the bulb is dark and the string is off, suspect shunt failure. Try replacing the bulb or testing it in a working socket.
Fixing Shunt Failure
Replace bulbs with broken or faulty shunts. Use bulbs designed for your light string. Avoid forcing bulbs into sockets. Sometimes cleaning the socket helps improve contact. Ensure the replacement bulb matches the voltage and size.
Clean Socket Contacts
Cleaning the socket contacts is a key step in fixing Christmas lights. Dirt, dust, and corrosion often block electrical flow. This prevents bulbs from lighting up properly. Cleaning these contacts helps restore the connection. It improves light performance and safety.
Follow the simple steps to clean the contacts carefully. This ensures the lights work better and last longer.
Unplug Lights Before Cleaning
Always unplug the lights before starting. This stops any electric current from flowing. It keeps you safe from shocks. Never clean sockets with power on. Handle the lights gently to avoid damage.
Use A Soft Brush Or Cloth
Take a soft brush or clean cloth to remove dirt. Gently scrub inside the socket contacts. Avoid using sharp or metal tools that may scratch. A cotton swab dipped in rubbing alcohol can help remove grime. Let the contacts dry completely before testing.
Ensure Dry And Secure Connections
Check that the contacts are dry before plugging in. Wet contacts cause short circuits or failure. Make sure bulbs fit tightly into sockets. Loose bulbs create poor connections and flicker. Secure all parts firmly to keep the lights shining bright.
Replace Damaged Light Strings
Replacing damaged light strings is a key step in fixing your Christmas lights. Some sections of the string may be beyond repair. Swapping out these parts can save time and ensure safety. This process keeps your lights bright and festive throughout the season.
Identify Irreparable Sections
Start by inspecting the entire light string carefully. Look for broken wires, melted sockets, or missing bulbs. If a section shows heavy damage, it cannot be fixed by replacing bulbs alone. Cut out these parts to avoid electrical hazards. Mark areas that need full replacement to simplify the next steps.
Choose Compatible Replacements
Select new light strings that match the voltage and style of your original set. Using the same bulb type ensures even lighting and prevents electrical issues. Check package labels for compatibility with your current setup. Buying from trusted brands improves durability and safety.
Dispose Of Old Lights Properly
Do not throw damaged light strings in regular trash. Many contain materials that harm the environment. Take them to an electronic recycling center or a designated drop-off point. Proper disposal helps reduce waste and supports eco-friendly practices.
Safety Tips For Fixing Lights
Fixing Christmas lights can brighten your holiday spirit. Safety must come first to avoid accidents. Follow these simple safety tips before starting any repair work on your lights.
These guidelines protect you from electric shock and prevent damage to your lights.
Always Unplug Before Repairing
Unplug lights from the power source before any repair. This prevents electric shock and injury. Never handle bulbs or wires while the lights are plugged in. Make sure your hands are dry to avoid slipping or shocks.
Avoid Overloading Circuits
Do not connect too many light strings to one outlet. Overloading can cause overheating and fires. Check the wattage rating on your lights and compare it with your outlet’s capacity. Use power strips with built-in circuit breakers for added safety.
Use Outdoor-rated Lights For Outside
Only use lights marked as outdoor-rated for outside decorations. These lights are made to resist weather and moisture. Indoor lights can cause short circuits and fires if used outside. Secure outdoor lights properly to avoid damage from wind or rain.
:strip_icc()/BHG-How-to-Fix-Christmas-Lights-Primary-2iacu7LkqHF8WhZUNKSzN5-f44417d07385466ebc8554b975fd5e88.jpg)
Credit: www.bhg.com
Frequently Asked Questions
How Do I Make My Christmas Lights Work Again?
Unplug the lights and check the fuse for damage. Inspect bulbs for blackening or broken filaments. Replace any faulty bulbs by swapping them with working ones. Test sections by removing and replacing bulbs until the lights work. Repeat these steps patiently to restore your Christmas lights.
How To Find The Bad Bulb On Christmas Lights Without A Tester?
Unplug lights and check fuses first. Inspect bulbs for blackened glass or broken filaments. Swap bulbs from working sections into dead sockets. Use the half-test by testing bulbs in the unlit half to narrow down the faulty bulb. Replace the bad bulb to restore the string.
How To Figure Out Which Bulb Is Burnt Out On Christmas Lights?
Unplug the lights and check the fuse first. Inspect bulbs for blackened glass or broken filaments. Swap bulbs from a lit section into unlit sockets. Use the half-test method by testing bulbs in the middle of unlit sections. Replace any faulty bulbs found.
How To Fix Christmas Lights That Are Half Out?
Unplug the lights and check the fuse first. Inspect bulbs for blackened or broken filaments. Replace bad bulbs by swapping with working ones. Use the half-test method: test bulbs halfway through the unlit section until the faulty bulb is found and replaced.
Plug in and verify.
Conclusion
Fixing Christmas lights takes patience and simple steps. Start by checking fuses and bulbs carefully. Replace any burnt or broken bulbs you find. Use the swap method to identify bad bulbs faster. Testing half the string can narrow down the problem.
Keep trying if the first fix does not work. With care, your lights will shine bright again. Enjoy the festive glow you restored to yourself. Simple fixes save money and stress during holidays. Bright lights bring joy to every home this season.