Have you ever been annoyed when the How to Fix LED Light Strip went out or started flickering? A broken LED strip can ruin the mood of a cozy corner, your gaming setup, or even the lighting in a room.
But before you rush out and buy a new one, here’s some good news: you can often fix your LED strip yourself with just a few simple tools and steps. This guide will show you quick and easy ways to get your LED lights working again, which will save you time and money.
Are you ready to fix your lights and get that perfect glow back? Let’s talk about how to fix your LED light strip today.

Common Problems with Led Strips
People like LED light strips because they can be used in many ways and are very bright. Still, they can have problems that keep them from doing their jobs well. If you know what these problems are, you can fix your LED strip quickly and easily. Here are some common problems with LED strips and how to spot them.
Weak Links
Flickering or parts not lighting up are common problems with weak connections. Loose connectors or joints that aren’t soldered well are common problems. Make sure that all of the connectors and solder points are strong. If you find any loose parts, re-solder or reattach the connectors. A strong connection makes sure that the LEDs always get power.
Sections that are dead
Dead sections are parts of the strip that don’t light up at all. When some LEDs burn out or circuit paths break, this happens. Cut out the dead part at the copper pads that are marked. To connect the working parts, use solder or clip connectors. After the repair, testing shows that the strip shines evenly again.
Issues with the power supply
If the power supply is not enough or is broken, the lights will be dim or not at all. Make sure that the voltage and current of the power adapter match what the strip needs. Check the power output with a multimeter. If the power supply gives you the wrong power, get a new one. The LED strip stays bright and steady with the right amount of power.
Damage to the body
Cuts, bends, or being in water are all examples of physical damage. These can break circuits or cause them to short out. Check the strip for any obvious damage and use a multimeter to test it. If you can’t fix it, replace the whole strip or just the broken parts. To keep LED strips working for a long time, be careful with them.

Things and tools you need
To fix LED light strips, you only need a few simple tools and materials. Having the right tools makes the repair easier and more likely to work. These tools help you safely cut, connect, and protect the strip.
To get started, make sure you have these things ready in your workspace. Each tool has a specific job to do when fixing something. You have a better chance of success if you know how to use them.
Solder and a Soldering Iron
A soldering iron melts solder so that metal parts can be joined together. It makes a strong, long-lasting link between parts of LED strips. Use electronics-specific rosin-core solder. For delicate LED strips, a low-watt iron (15–30W) works best. Soldering makes sure that the connection is strong and lasts.
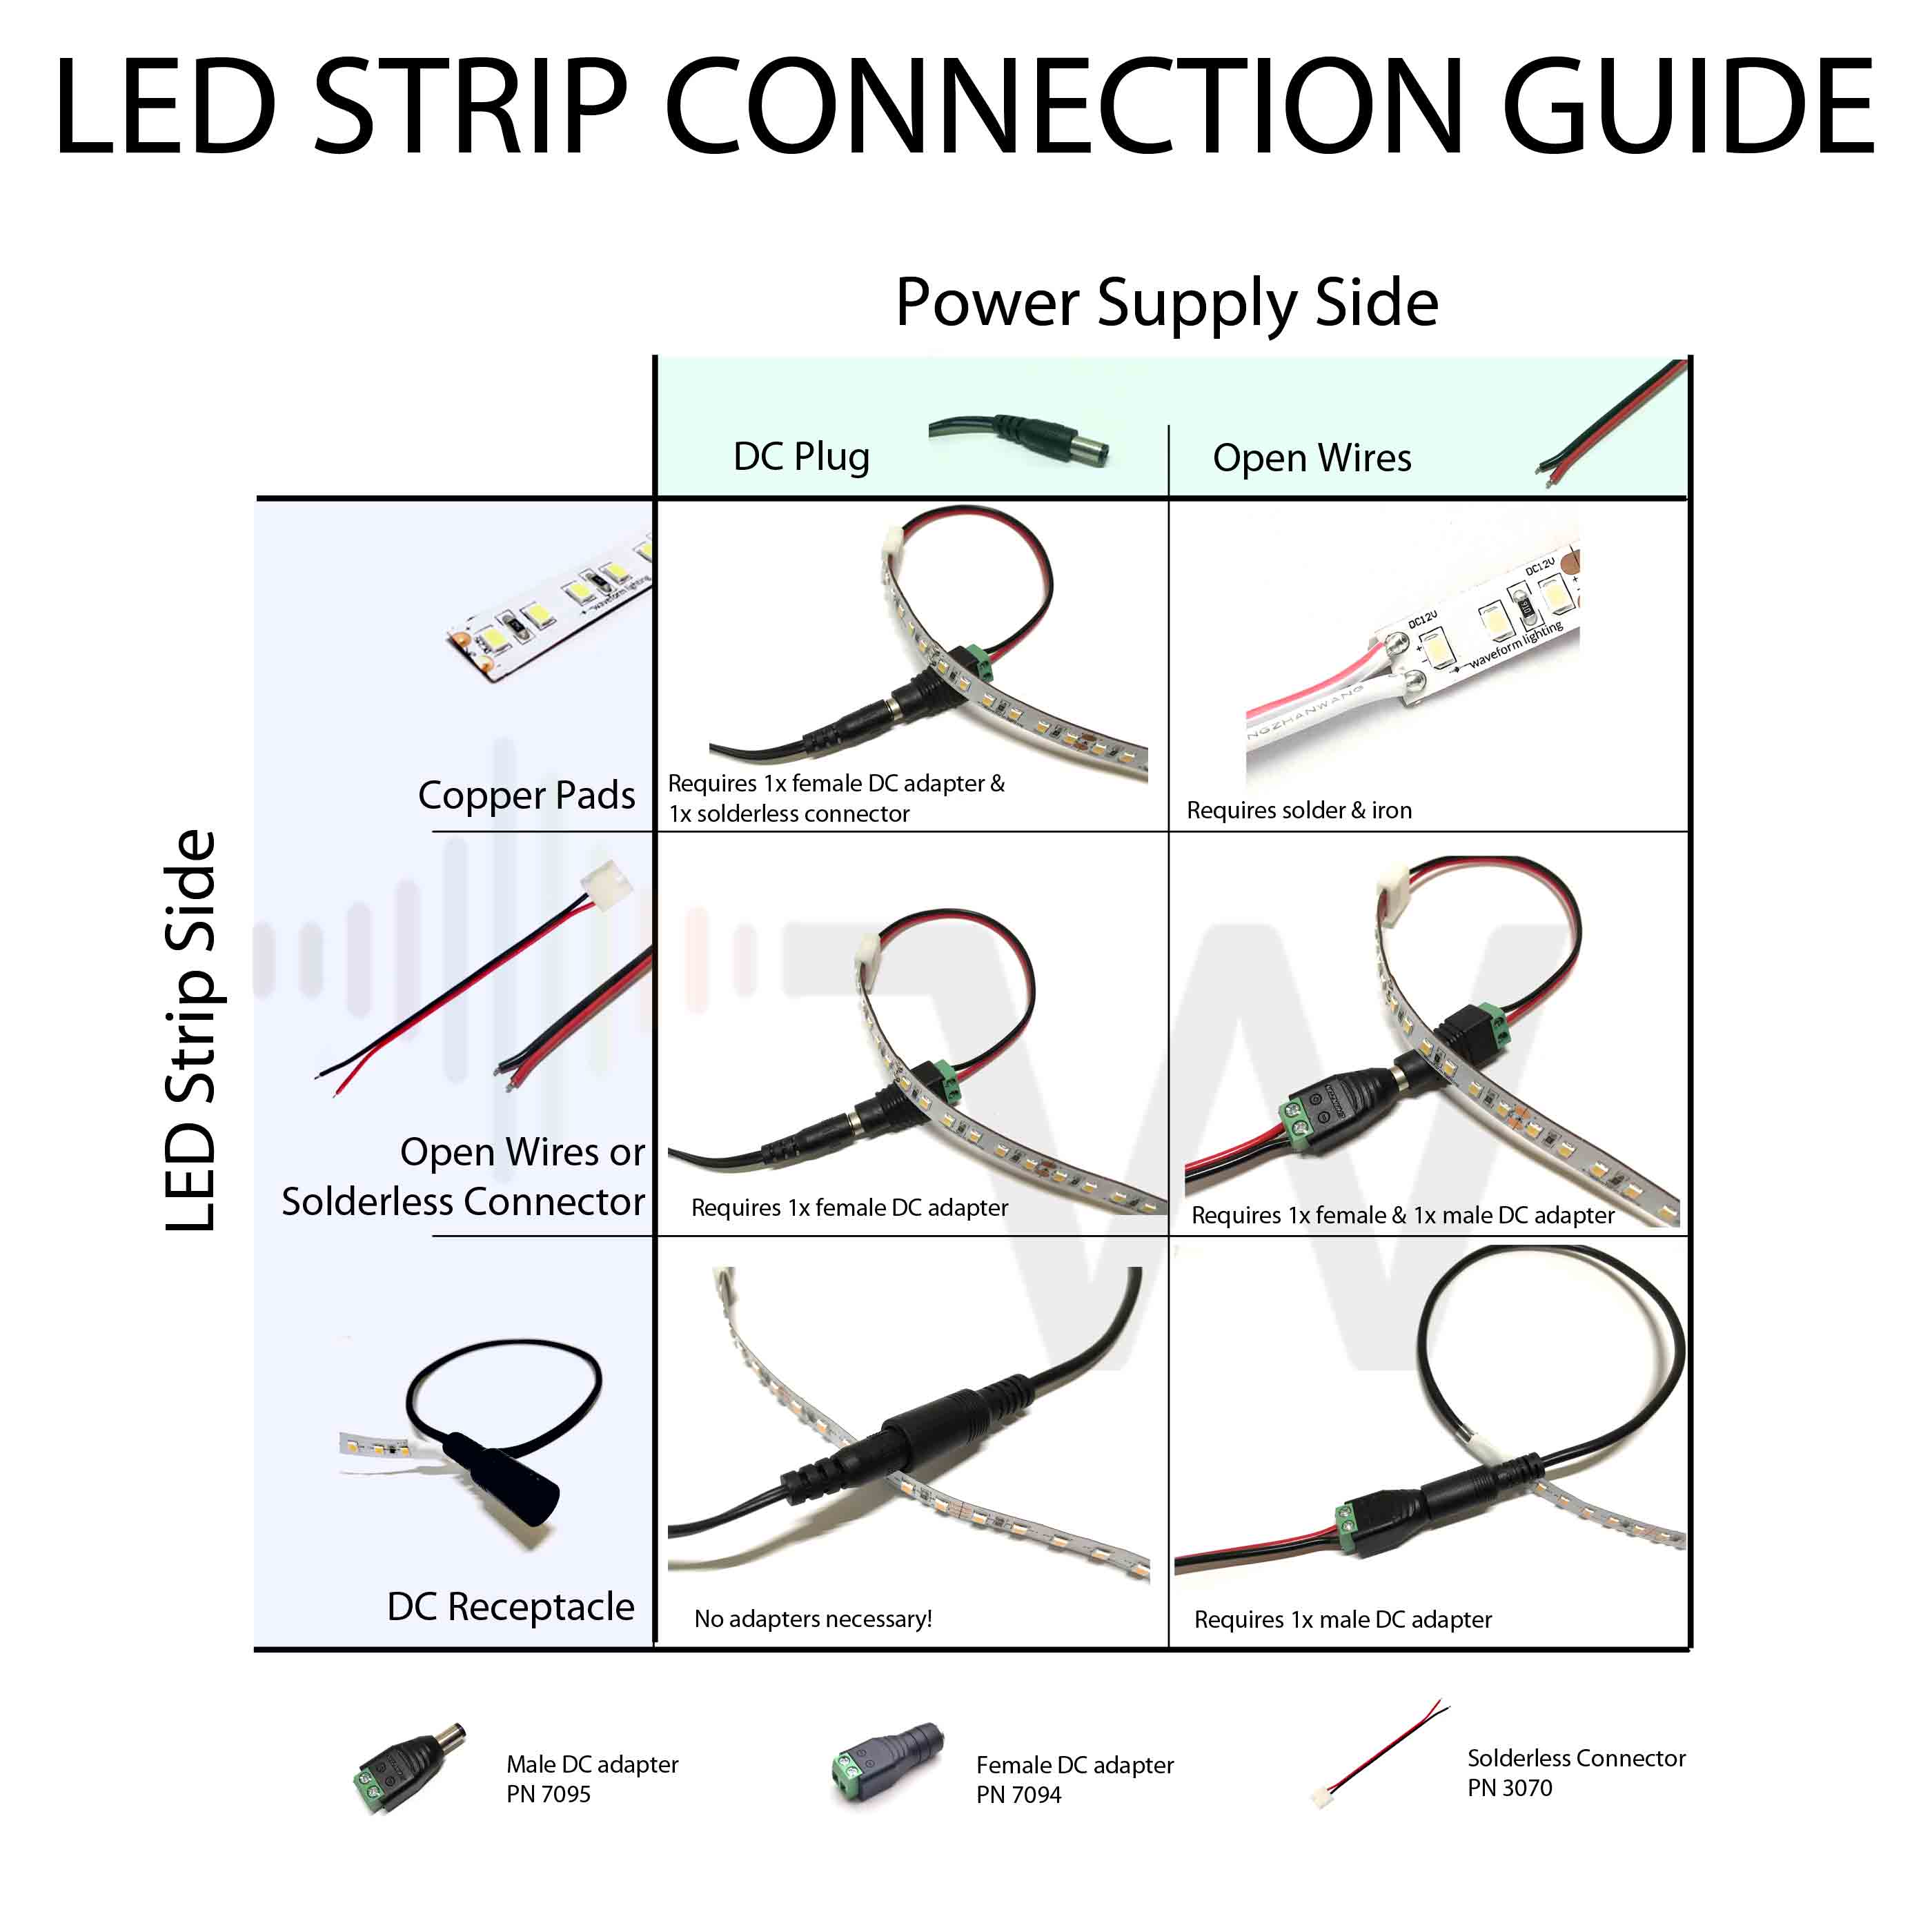
Connectors without solder
Without heat, solderless connectors clip onto the ends of the strip. They are easier for beginners and save time. There are different sizes and shapes of these connectors. Make sure the copper pads on the strip line up with the connector terminals. Press down hard to make sure the connection is secure. They are quick fixes, but they may not last as long as soldered joints.
Cutters and strippers for wire
Cutters for wire cut the LED strip or wires in a clean way. Use sharp cutters so you don’t hurt the strip’s circuits. Wire strippers take off the insulation without hurting the wire inside. Cutting and stripping the strip correctly gets it ready to connect. To make sure a neat and effective repair, cuts must be precise.
Tape and tubing that shrink when heated
Heat shrink tubing keeps soldered joints safe and insulated. Put the tubing over the connection and heat it up to make it fit tightly. It stops short circuits and damage from moisture. You can also use electrical tape to wrap connections for extra safety. Both materials make the repair strong and last longer.
Finding the Broken Part
The first step in fixing your LED strip is to find the broken part. Some of the lights on the strip might not turn on or might blink. This problem usually happens in one part of the strip.
Looking closely helps you figure out which part needs fixing. Knowing which part is broken saves time and work. It also keeps you from cutting the strip in the wrong spot.
Finding Dead Leds
While the strip is on, look closely at it. LEDs that are dead won’t light up or will only glow very dimly. The LED may sometimes blink or flicker in a strange way.
Put a mark on the places where the LEDs are dead. See if the problem is in one spot or all over the strip. This tells you whether just one part is broken or if the whole strip needs to be replaced.
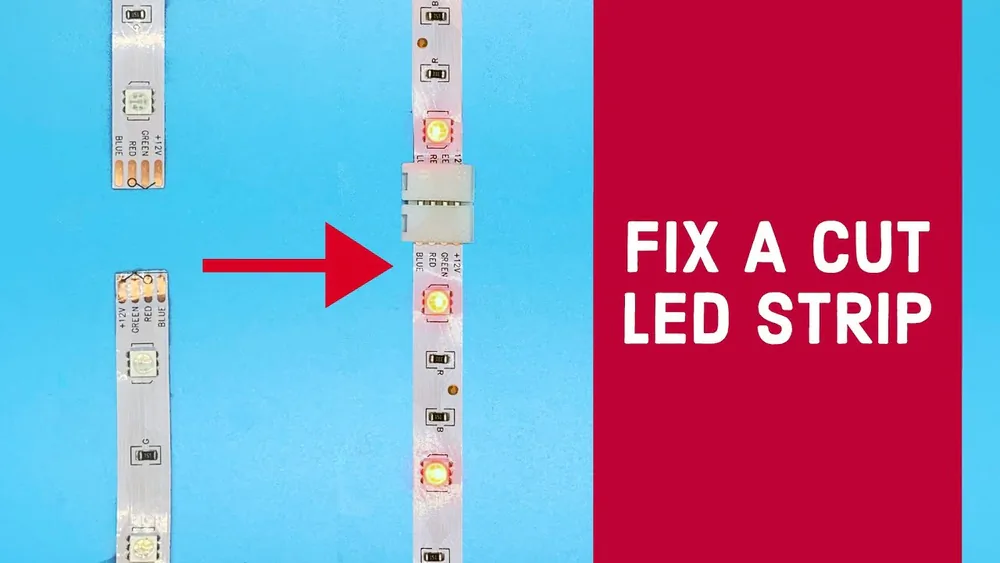
Finding cut points on copper pads
LED strips have copper pads that are safe to cut on. A small scissor icon usually marks these pads. Cutting here keeps the rest of the strip from getting hurt.
Find these copper pads close to the dead LEDs. Cut the strip straight at these points with sharp scissors. This makes it easier to take out the broken part and reconnect the strip.
Fixing with connectors that don’t need solder
Using solderless connectors to fix LED light strips is a quick and easy way to do it. It doesn’t require any soldering tools or skills. This method is good for beginners and anyone who wants a quick, clean fix. You only need to cut the strip at the right places and use special clips to connect the ends. These connectors keep the strip in place and keep the electrical connection. To get your LED strip working again, follow these simple steps.
Cutting at Certain Points
Find the cutting points on the LED strip that are marked. These points usually have a small scissor icon or copper pads on them. Cut straight and clean with sharp scissors. If you cut anywhere else, the strip could break and stop working. Before cutting, make sure the strip is off so you don’t get shocked.
Getting the Strip Ends Ready
Take off any silicone or plastic coating that protects the ends of the strip. This step makes the copper pads more visible so they can connect better. Be careful not to hurt the pads. Use a soft cloth to clean the pads and get rid of dirt and glue. This makes sure that the electrical connection is strong.
Aligning and locking connectors
Carefully open the clip for the solderless connector. Put the ends of the strip into the connector, making sure that the positive (+) and negative (-) pads are lined up. Before closing the clip, check the alignment twice. To keep the strip in place, press the clip down hard. The metal pins on the connector go through the pads to make the electrical connection. A secure fit keeps the connection from dropping or flickering.
Checking the Connection
To test the LED strip, turn on the power. Make sure that all the lights shine evenly and don’t flicker. If some parts don’t light up, open the connector and move the ends of the strip around. Cleaning the copper pads again can help sometimes. Once the strip is working, use clear tape or heat shrink tubing to protect the connector area even more.
Using solder to fix things
Soldering is a strong and long-lasting way to fix broken LED light strips. It reconnects the electrical path by securely joining wires or new strip parts. You need a soldering iron, solder, and some basic skills to do this. Taking care of things makes the repairs last longer and work better.
Removing Broken Parts
First, take the power out of the LED strip. Find the broken part. Carefully cut the strip along the marked copper pads. Use a utility knife or sharp scissors. Cut straight to keep from hurting nearby parts. Taking out the broken part makes sure the repair is clean.
Putting Tin on Copper Pads
Take off any covering to show the copper pads. Get the soldering iron hot enough. Put a little bit of solder on the copper pads. This is called “tinning.” Tinning makes the solder flow better and makes a strong connection. Don’t use too much solder.
Soldering New Segments or Wires
Get wires or a new LED strip segment ready to connect. Remove the insulation from the ends of the wires to show the copper. Make sure the wires or strip ends line up with the tinned pads. Use the soldering iron to heat the joint and then add solder. Stay still until the solder melts and sticks the parts together. Don’t move the joint until it has cooled down.
Keeping joints warm and safe
Once it has cooled down, cover the soldered joints. Use heat shrink tubing or electrical tape to cover the area. Heat shrink tubing makes a better seal and protects better. Insulation keeps the connection safe and stops shorts. To keep the joints from getting too much stress, make sure the LED strip is secure.
Fixing things without soldering tools
It is possible and useful to fix LED light strips without using soldering tools. It saves time and doesn’t need any special tools. This method works well for small breaks or connections that aren’t tight. The most important thing is to make a stable electrical path and lock it down properly. Here are some simple ways to fix LED strips without using solder.
Using wire bridges
Wire bridges make it easy to quickly reconnect broken LED strip sections. Cut a short piece of thin wire that is insulated. Take off a little insulation from each end of the wire. Put one end on the copper pads on one side of the break and the other end on the other side. Push down hard to make sure you have good contact. The wire acts like a bridge, bringing back the flow of power. This method works best for small gaps and copper pads that are easy to see.
Taking off the protective coating
Most LED strips have a clear layer of protection over the copper pads. This coating stops electrical contact. Gently take off the coating with a small knife or sandpaper. Show off the shiny copper surface underneath. Don’t hurt the copper pads. Taking off the coating makes it easier to connect with wires or tape. This step is very important for a successful repair without soldering.
Using tape to keep connections safe
It is very important to make sure the connection is secure after reconnecting wires or bridging gaps. To hold parts together, use electrical tape or strong adhesive tape. To keep the wires in place, tightly wrap tape around the joint. This stops movement that could break the connection again. Electrical tape works better than clear tape because it is more durable and insulates better. Taping correctly will make the fix last longer without using soldering tools.
Checks on the power supply
Many LED strip lights stop working because of problems with the power supply. Checking the power supply first saves time and work. When the voltage or current is wrong, a lot of problems happen. A proper check makes sure the strip gets the right amount of power.
Checking the voltage and current
Check the voltage output from the power supply with a multimeter. The voltage should be the same as the LED strip’s rating. The strip gets damaged if the voltage is too high or too low. Check the current to make sure the supply has enough power. Lights that flicker or are dim are caused by a low current supply. If the measurements are outside the strip’s requirements, change the power supply.
Testing with Other Power Sources
Try using a different power source to power the LED strip. Use one that has the same voltage and enough current rating. This step checks to see if the original power supply is broken. Replace the original power source with a new one if the strip works with a different one. Testing with a known good supply keeps the strip from needing repairs that aren’t necessary.
Tips for keeping LED strips safe
Taking care of LED light strips ahead of time makes them last longer. Taking a few simple steps can help you avoid common problems and cut down on the need for repairs. The most important things are how you handle it, how you connect it, and where you put it. These tips will help your LED strips stay bright and work well for longer.
Best Practices for Handling and Installing
Be careful with LED strips so they don’t break. Don’t bend strips too sharply; follow the manufacturer’s bend radius. For better adhesion, clean the surfaces before putting on the strips. Don’t touch LEDs or circuit boards with your bare hands. Only cut strips at marked points with the right tools.
Keeping connections safe
Make sure all the connectors fit tightly so that there is no flickering or loss of power. When connecting strips, make sure the positive and negative terminals are in the right place. To make things last longer, use good connectors or solder joints. Check connections often, especially in places where there is a lot of vibration. Use waterproof tape or heat shrink tubing to keep connections dry.
Keeping from hurting things
Keep LED strips away from sharp edges and places where a lot of people walk. If the strips aren’t waterproof, don’t let them get wet. To keep strips from melting, keep them away from very hot places. Secure strips well so they don’t peel or fall off. To keep the strips flexible and sticky, store them in a cool, dry place.
Questions That Are Often Asked
Can you fix LED strip lights?
You can fix LED strip lights by cutting out the broken parts at the copper pads and then reconnecting them with solder or clip connectors. Make sure the power is off, the polarity is correct, and the connections are secure for the device to work properly.
Why isn’t my LED strip working?
If your LED strip isn’t working, it could be because of loose connections, broken parts, or problems with the power supply. Check and secure all connections, look for physical damage, and make sure the power source meets the strip’s voltage and current needs. To get things working again, replace broken parts.
How to Reconnect a Cut LED Strip
Cut the strip at the copper pads, take off any coating, and then use solder or clip connectors to reconnect the ends. Make sure the positive and negative terminals are lined up correctly. Use tape or heat shrink tubing to make sure connections are safe. Turn the power back on and test the strip to make sure it works.
How to fix LED strip lights when half of them are out?
Take out the dead part at the copper pads. Reconnect with solder or connectors that don’t need solder. Make sure the polarity is right. Check the power supply and connections. If necessary, replace broken parts.
Final Thoughts
With the right steps, fixing LED light strips is easy. Find the damaged area and make a clean cut at the copper pads. For a strong connection, use solderless connectors or solder. Before you start working, make sure the power is off. Before you install the repair, test it.
Regular checks can help keep problems from happening in the future. Your LED strips will shine brightly again if you are patient. Don’t let a small mistake ruin your lighting setup. Use these fixes to save time and money. Enjoy your bright space again!